How to set up a custom HTML targeting condition
Please note that this is an advanced feature that requires some programming knowledge. Therefore, we are unable to provide support for creating or troubleshooting custom code.
You can use a custom HTML condition to show (or hide) widgets based on the presence of a given HTML element on a specific page of the website.
For example, you can use this feature to display (or not display) a widget when there is at least one item in the cart.
On your website, there likely is a unique HTML element that indicates the number of items the customer added to the cart.
Let’s assume the element’s HTML code looks like this.
When the cart is empty:
<div class="cart-item-count">0</div>When there’s one item in the cart:
<div class="cart-item-count">1</div>When there are two items in the cart, etc:
<div class="cart-item-count">2</div>With an HTML condition, you can identify the element using the CSS selector, and show the widget if this element’s value (innerText) is higher than 0.
Here's how to set it up.
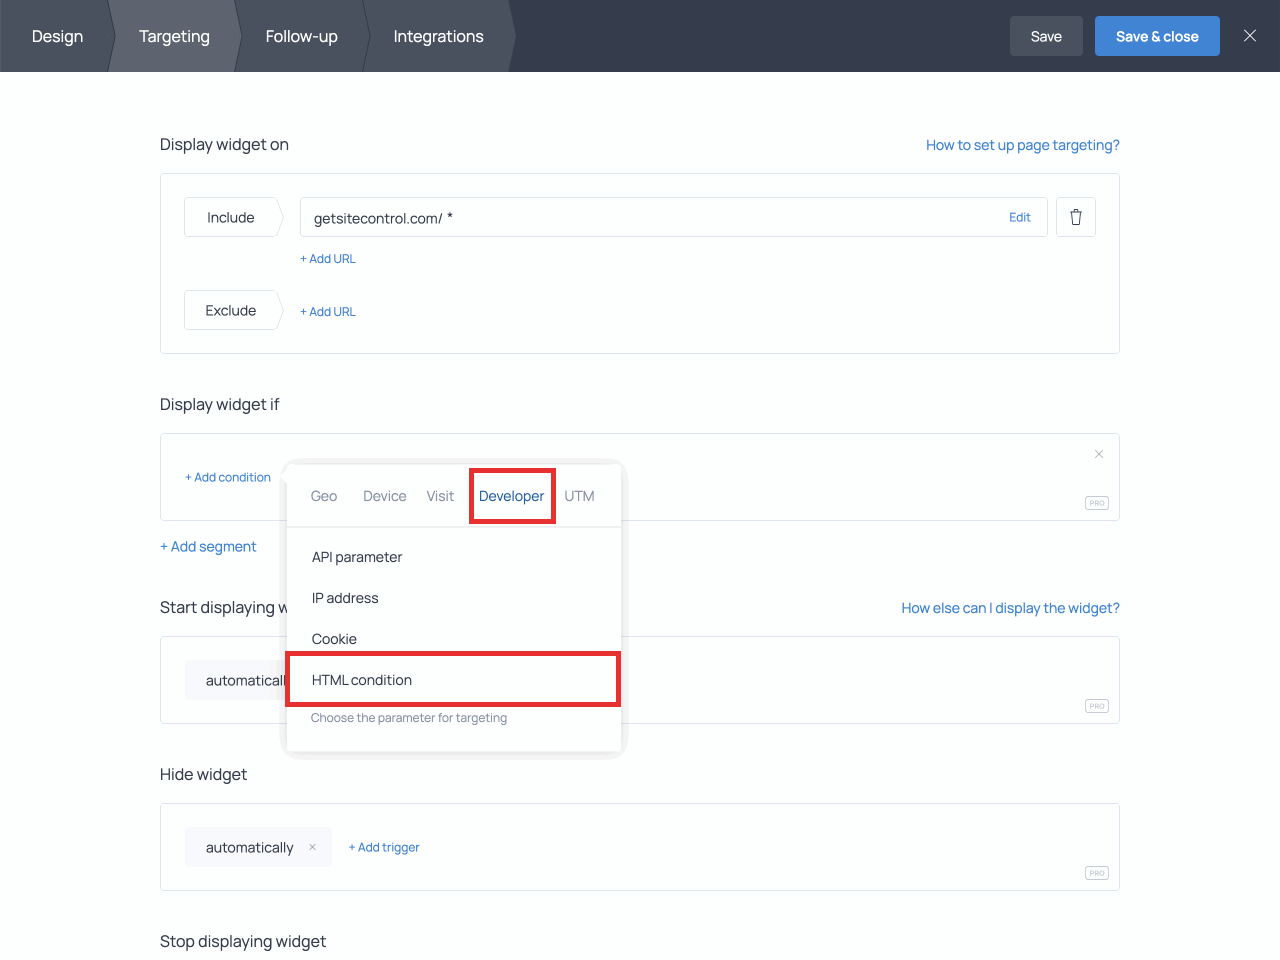
When setting up targeting for your widget, find the ‘Display widget if’ section. Switch to the ‘Developer’ tab and click HTML condition.
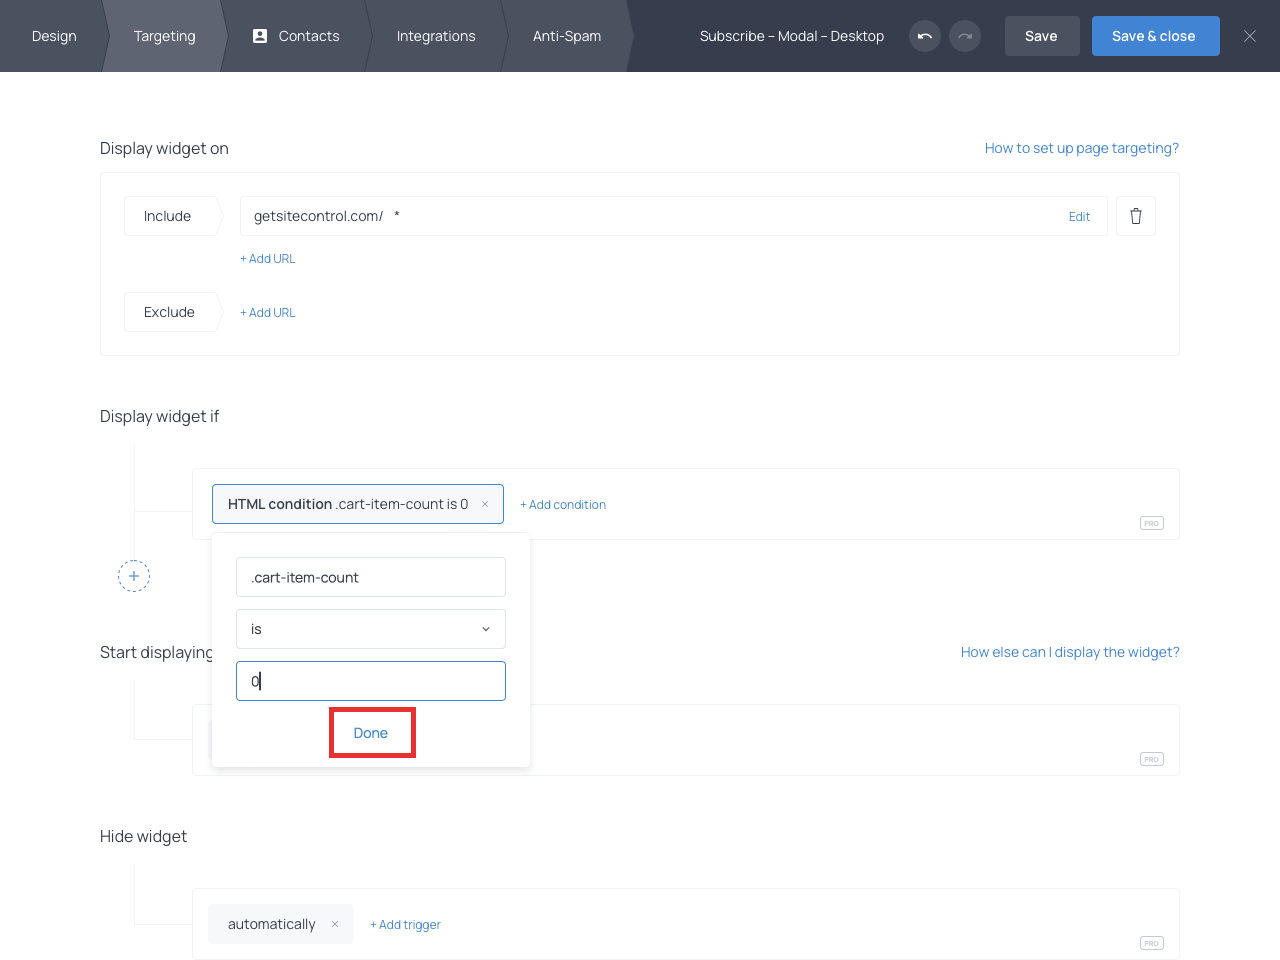
Then, add the HTML element’s CSS selector to the corresponding field.
For our example, we’ll use a class selector. Make sure to add a dot (.) before the class name.
It should look like this:
.cart-item-count
Feel free to use any of the other CSS selectors for different scenarios.
Next, proceed to choose an option from the dropdown list:
These are the options available:
- Is
- Is not
- Less than
- Greater than
- Starts with
- Ends with
- Contains
- Does not contain
- Matches
- Does not match
- Has any value
- Is unknown
Since we want to show a popup when there is at least one item in the cart, we’ll have to pick greater than and then add “0” to the second field:
And that’s it!
Getsitecontrol will look for the HTML element based on the CSS selector specified in the targeting rule. Then, if the value of that element matches the targeting settings, the popup will appear on the webpage.
The HTML condition allows you to set up a variety of scenarios. Feel free to experiment with different HTML conditions to create precise targeting settings for your purposes.


