How to integrate widgets with Google Analytics 4
Tracking widget interactions in Google Analytics 4 allows you to see how visitors engage with your widgets and understand what drives results. By connecting Getsitecontrol to GA4, you can track widget views, button clicks, and form submissions within your analytics reports. This helps you identify which widgets attract attention, which ones lead to conversions, and where users drop off, so you can improve targeting, messaging, and overall performance.
This guide provides step-by-step instructions on how to set up the integration, where to find the tracked events, and how to interpret the data in your GA4 dashboard.
Enable the GA4 integration
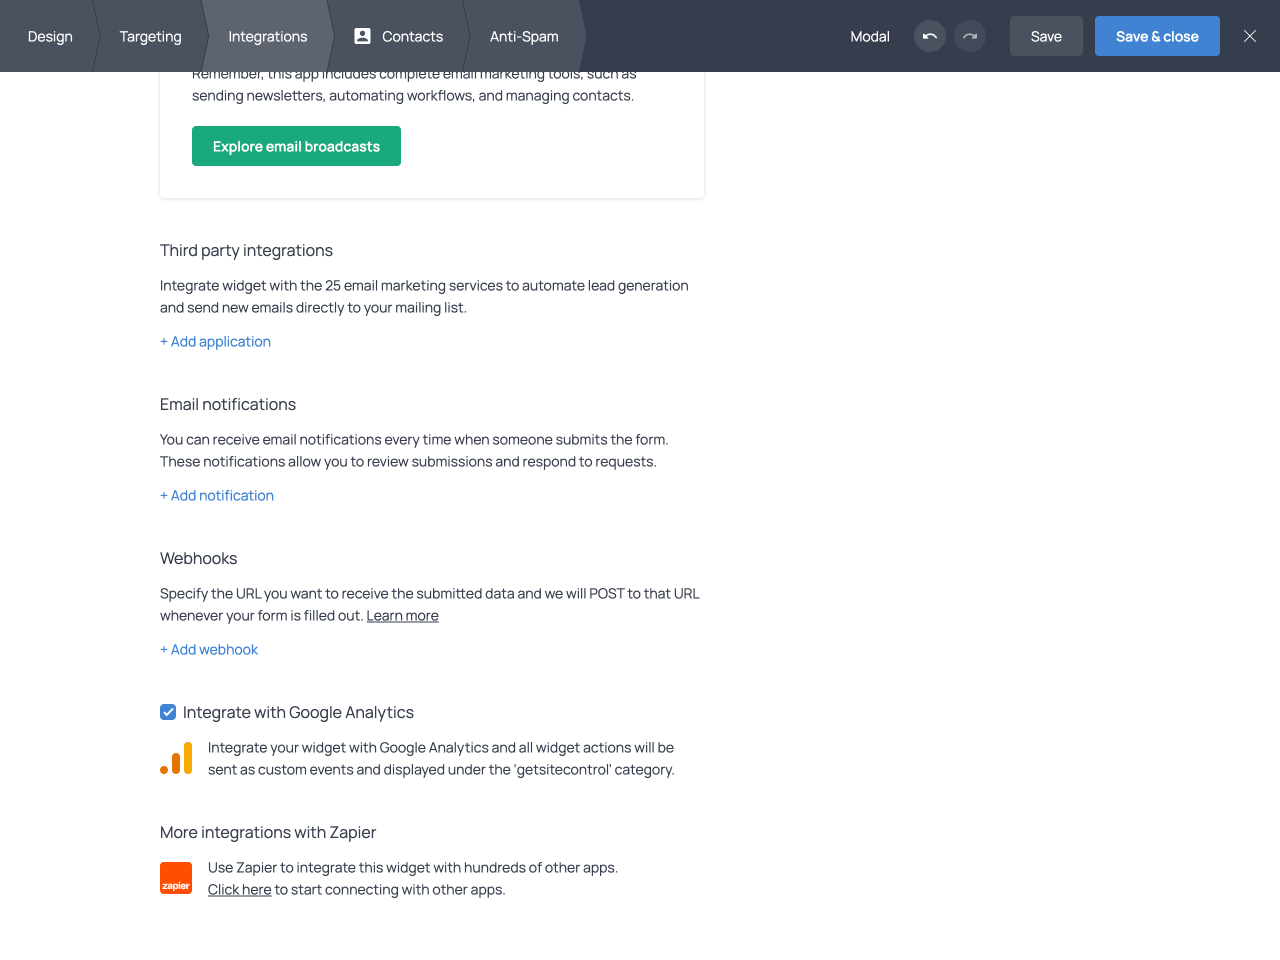
To connect a widget to GA4, open the widget editor and switch to the Integrations tab from the top bar. Check the Integrate with Google Analytics checkbox, and Save & close the widget.
View events in GA4
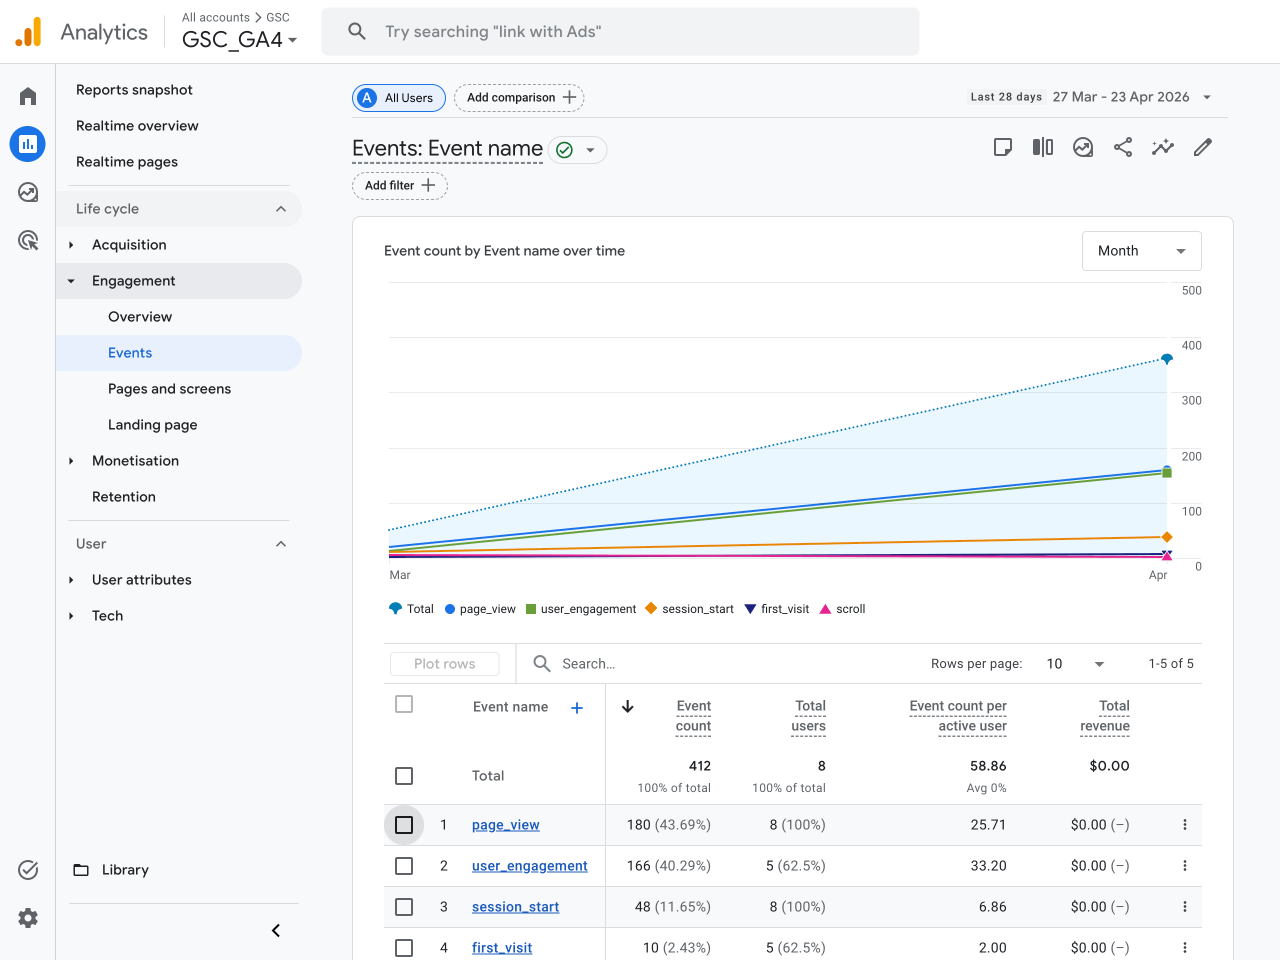
Getsitecontrol events will appear in the GA4 dashboard within one hour. To view the events, switch to Reports, expand Engagement, and click Events.
What events are tracked in GA4
| Event | Description |
|---|---|
| gsc_show | A visitor sees the widget |
| gsc_close | A visitor closes the widget by clicking the close button, clicking an action button that closes the widget, or clicking the widget background (if set to close the widget) |
| gsc_showWidget | A visitor clicks a button that triggers another widget |
| gsc_submit | A visitor clicks a button that submits the data |
| gsc_openUrl | A visitor clicks a button that opens a URL |
| gsc_copyToClipboard | A visitor clicks a button that copies text to the clipboard |
| gsc_addToCart | A visitor clicks a button that adds an item to the cart (Shopify only) |
| gsc_applyDiscount | A visitor clicks a button that applies an automatic discount to the cart (Shopify only) |
GA4 installed via GTM: additional setup
If Google Analytics 4 is installed on your website via Google Tag Manager, additional configuration is required. By default, Getsitecontrol sends widget events to GTM only. Perform the steps below to send these events to GA4 as well.
Create a custom event trigger
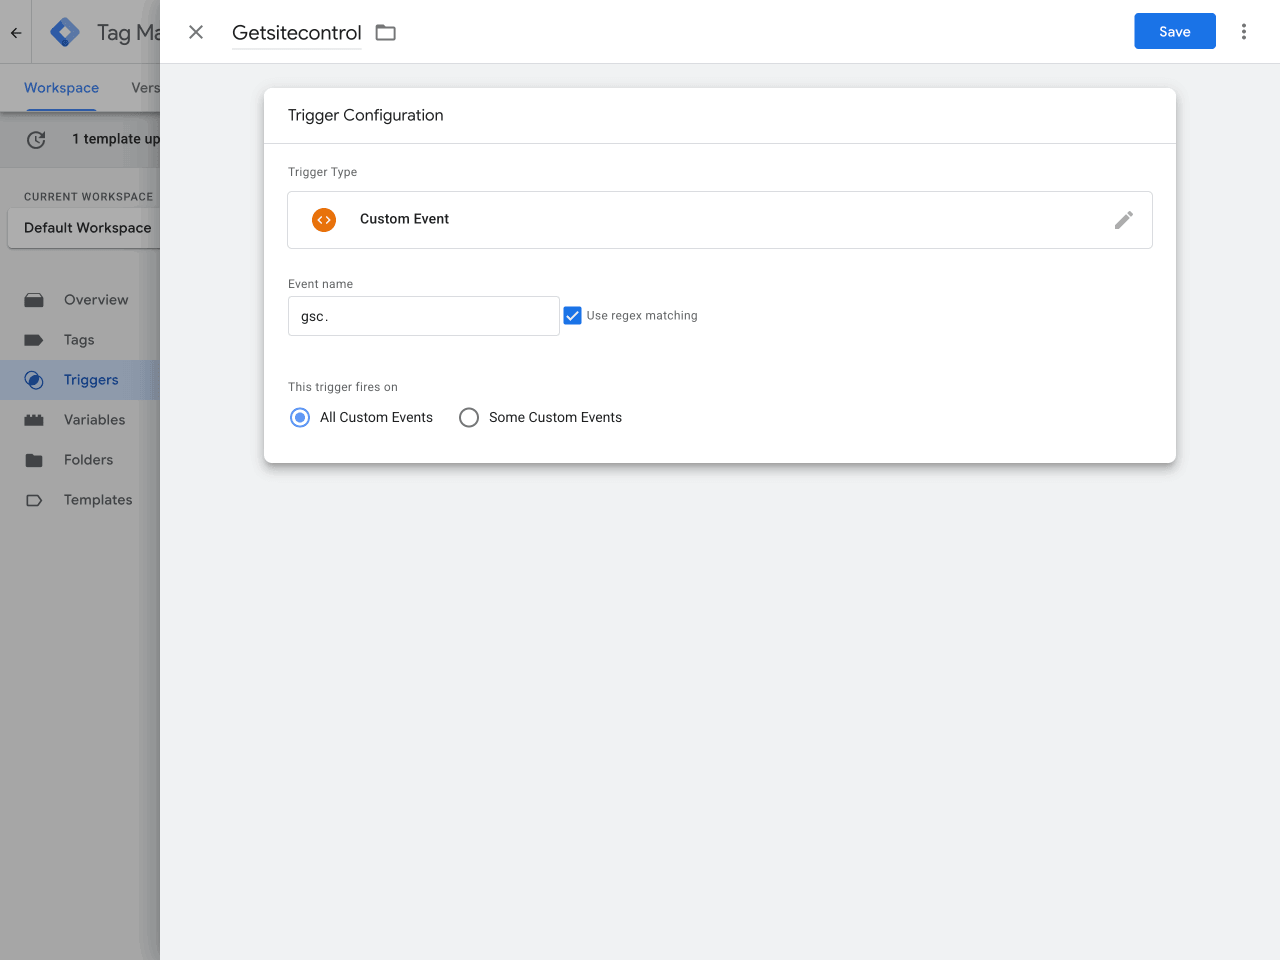
In Triggers, click New to create a new trigger. Name the trigger, for example, ‘Getsitecontrol Event’. In Trigger Configuration, select Custom event as the trigger type. Enter ‘gsc.’ as the event name, and check the Use regex matching box. Under This trigger fires on, select All custom events. Save the changes. This trigger will fire whenever Getsitecontrol sends a widget event to GTM.
Create a Google Analytics: GA4 Event tag
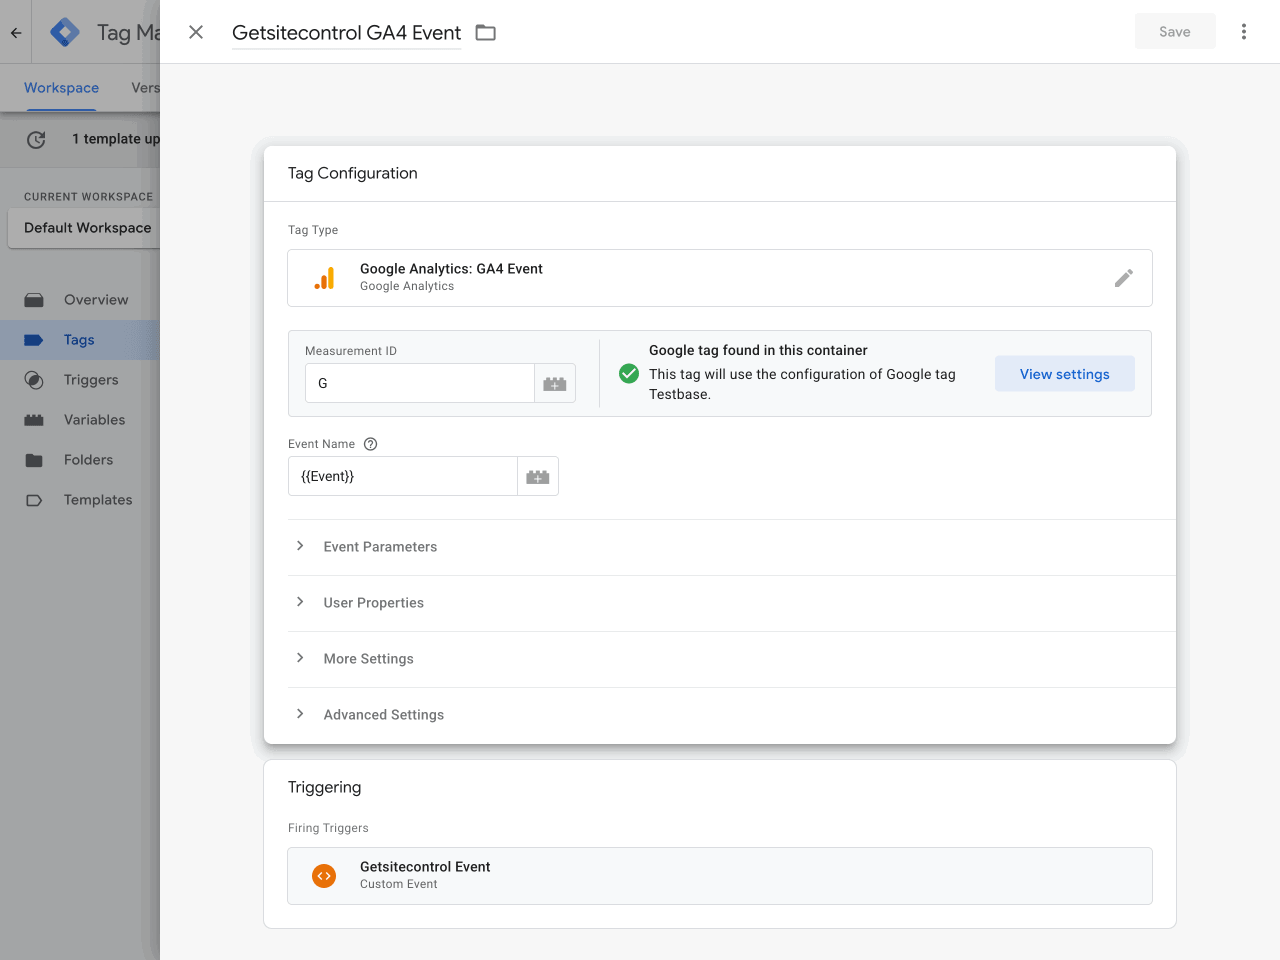
In Tags, click New to create a new tag. Name the tag, for example ‘Getsitecontrol GA4 Event’. Open the Tag Configuration and select Google Analytics. Choose Google Analytics: GA4 Event as your tag type. Find your Measurement ID and enter it in the corresponding field. Next, enter {{Event}} as the event name.
Move on to Triggering and click Choose a trigger. Select the custom event trigger you created earlier, in this example ‘Getsitecontrol Event’ (see the previous step of this guide). Save the tag. The tag will send an event to GA4 whenever the custom event trigger is fired.
Configure widget event parameters
Each Getsitecontrol event includes the following parameters: gsc.widgetId, gsc.widgetName, and gsc.eventData (an opened URL). To pass these parameters to GA4 along with an event, you’ll need to create corresponding data layer variables as follows.
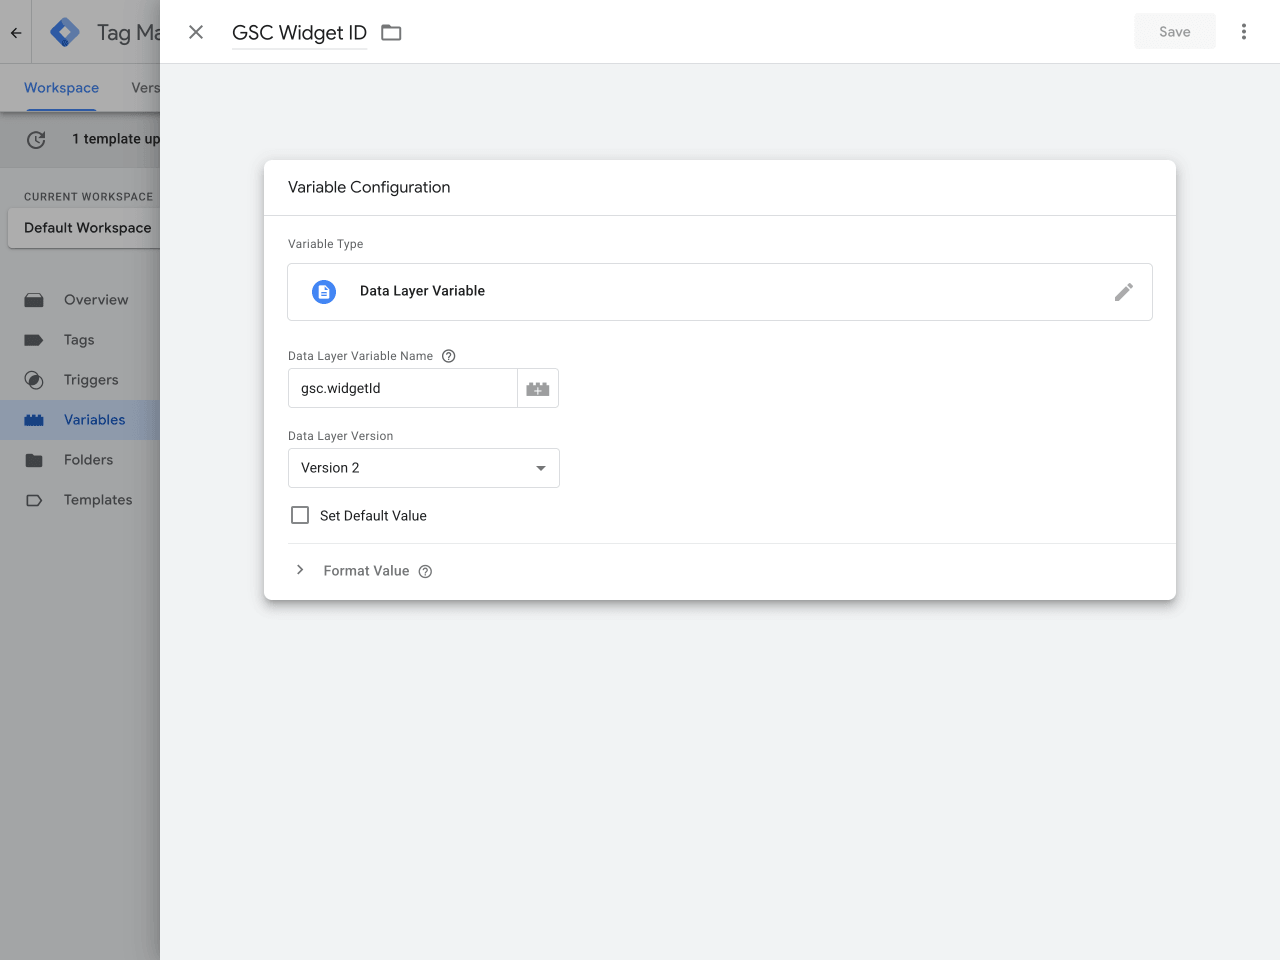
Create a Widget ID variable
In Variables, click New and name the variable, e.g. ‘GSC Widget ID’. Select Data Layer Variable as the variable type. Under Data Layer Variable Name, enter ‘gsc.widgetId’. Under Data Layer Variable Version, select Version 2. Save the variable.
Create a Widget Name variable
Create a second data layer variable the same way as the first one. Name it ‘GSC Widget Name’ (for example). Under Data Layer Variable Name, enter ‘gsc.widgetName’.
Create an Event Data variable
Create a third data layer variable and name it ‘GSC Button URL’ (for example). Under Data Layer Variable Name, enter ‘gsc.eventData’. With this variable, if the widget button features an Open URL action, Getsitecontrol will send the URL to GA4.
Map the parameters in the event tag
Lastly, map the event parameters in the Google Analytics: GA4 Event tag (see section above) with the created variables. Open the Google Analytics: GA4 Event tag. In the Tag configuration, expand the Event Parameters section and click Add parameter.
In the Event Parameter field, enter the event parameter name that will appear in GA4, for example ‘widget_id’. Names can only include letters, numbers, and underscores.
In the Value field, select the relevant data layer variable. Click the icon next to the field and find the variable on the list. Repeat the process for the remaining data layer variables. Save the tag configuration. Then, submit and publish the changes.

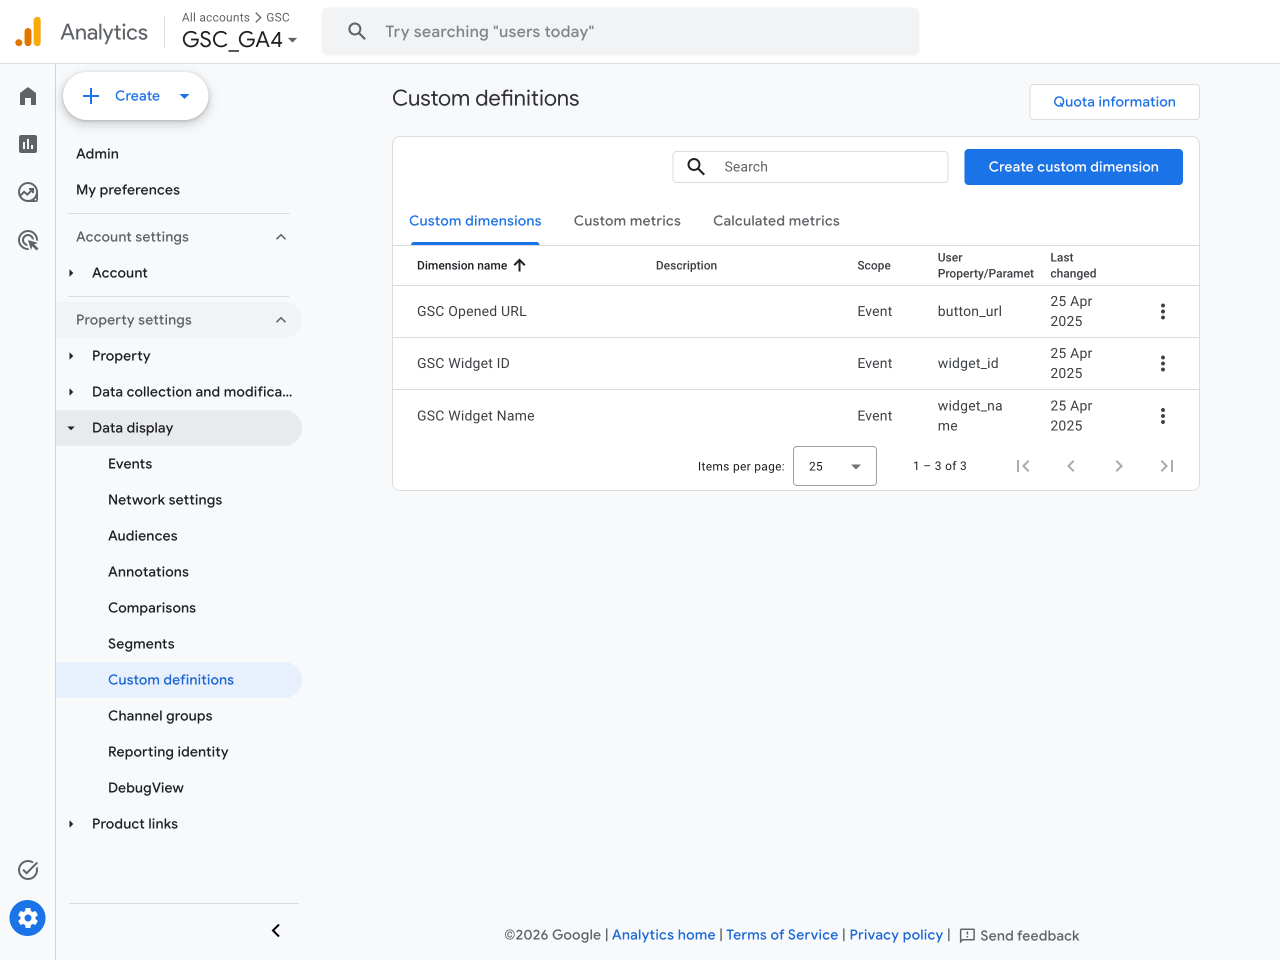
Register event parameters in Custom dimensions
Go to GA4. Open the Admin section (gear icon), expand Data display, and click Custom definitions. Proceed to Create custom dimension. In the Dimension name field, enter a descriptive name for the parameter, e.g. GSC widget ID. Leave the Description field blank.
In the Event parameter field, enter the event parameter name you’ve entered in the Google Analytics: GA4 Event tag in GTM, for example, ‘widget_id’. Repeat the steps for the remaining event parameters.
Once the configuration is complete, you’ll be able to view the events in GA4. New custom events will appear in the dashboard within one hour. Event parameters in custom dimensions may appear later, within 24 hours.
Troubleshooting
| Issue | Solutions |
|---|---|
| Events are not appearing in GA4 | Confirm that GA4 is installed on your site Make sure the GA4 integration is enabled in your widget Verify that your Measurement ID is correct |
| You see the events, but widget details are missing | Make sure you created and mapped the event parameters Confirm that custom dimensions were created in GA4 Wait up to 24 hours for custom dimensions to populate |
| You see events in your GTM account, but not in GA4 | Confirm that the GA4 Event tag is correctly configured Make sure changes were published Double-check the Measurement ID |