How to use Webhooks
❗ This is an advanced feature that requires some programming knowledge. Please note that we are unable to provide support for writing or troubleshooting custom code.
Webhooks are an easy way to instantly receive data from your forms as soon as respondents submit them.
Here is how it works: once you specify the URL where you want to receive the data, Getsitecontrol will start POSTing it to that URL whenever someone fills out a form on your website.
The way the collected data is processed on your side fully depends on your webhooks handler.
Follow the steps below to set up webhooks for your Getsitecontrol forms.
Enter submission URL
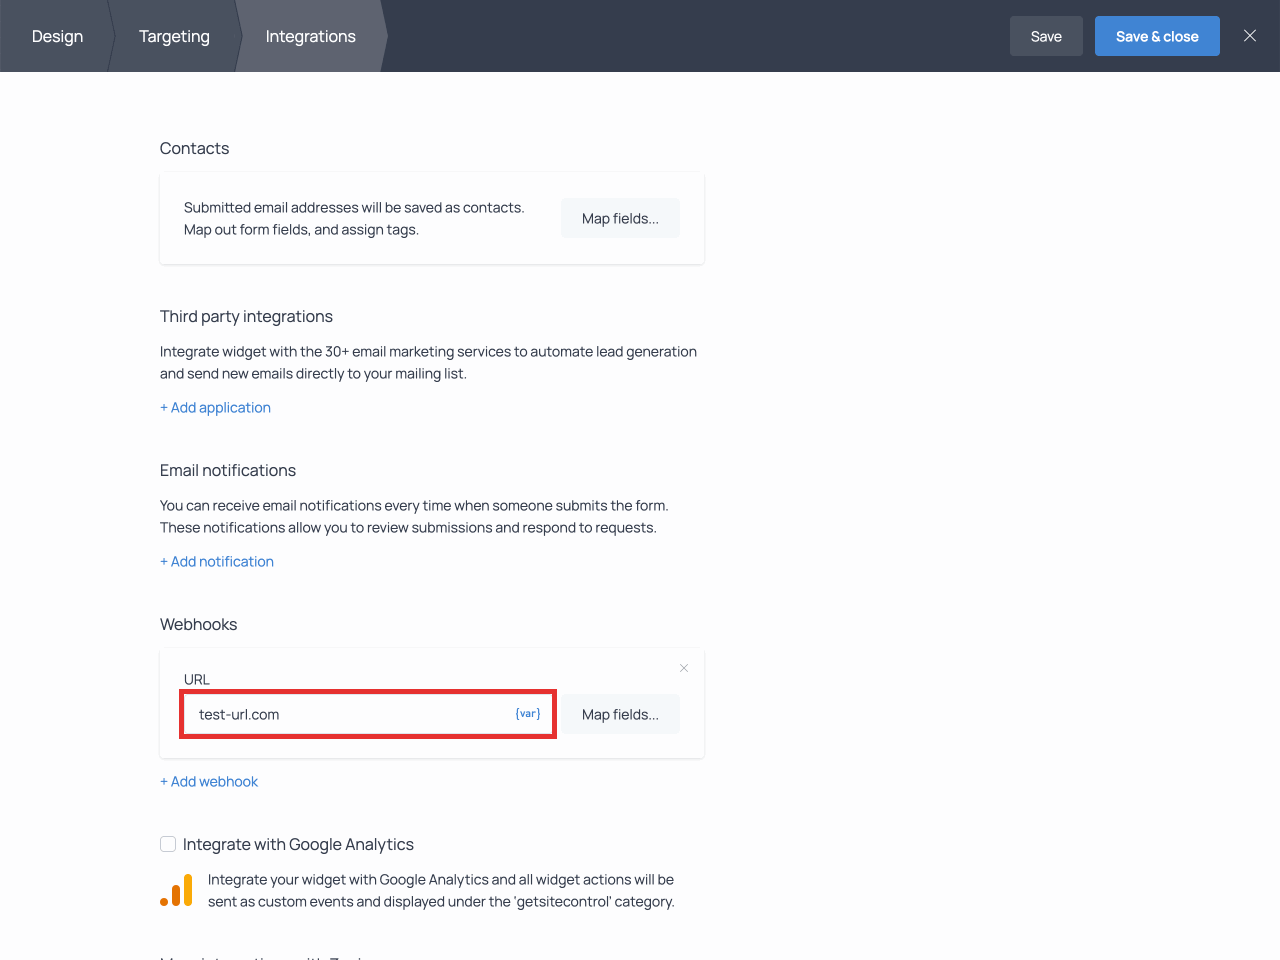
First, specify the URL where you want to submit the data from the form.
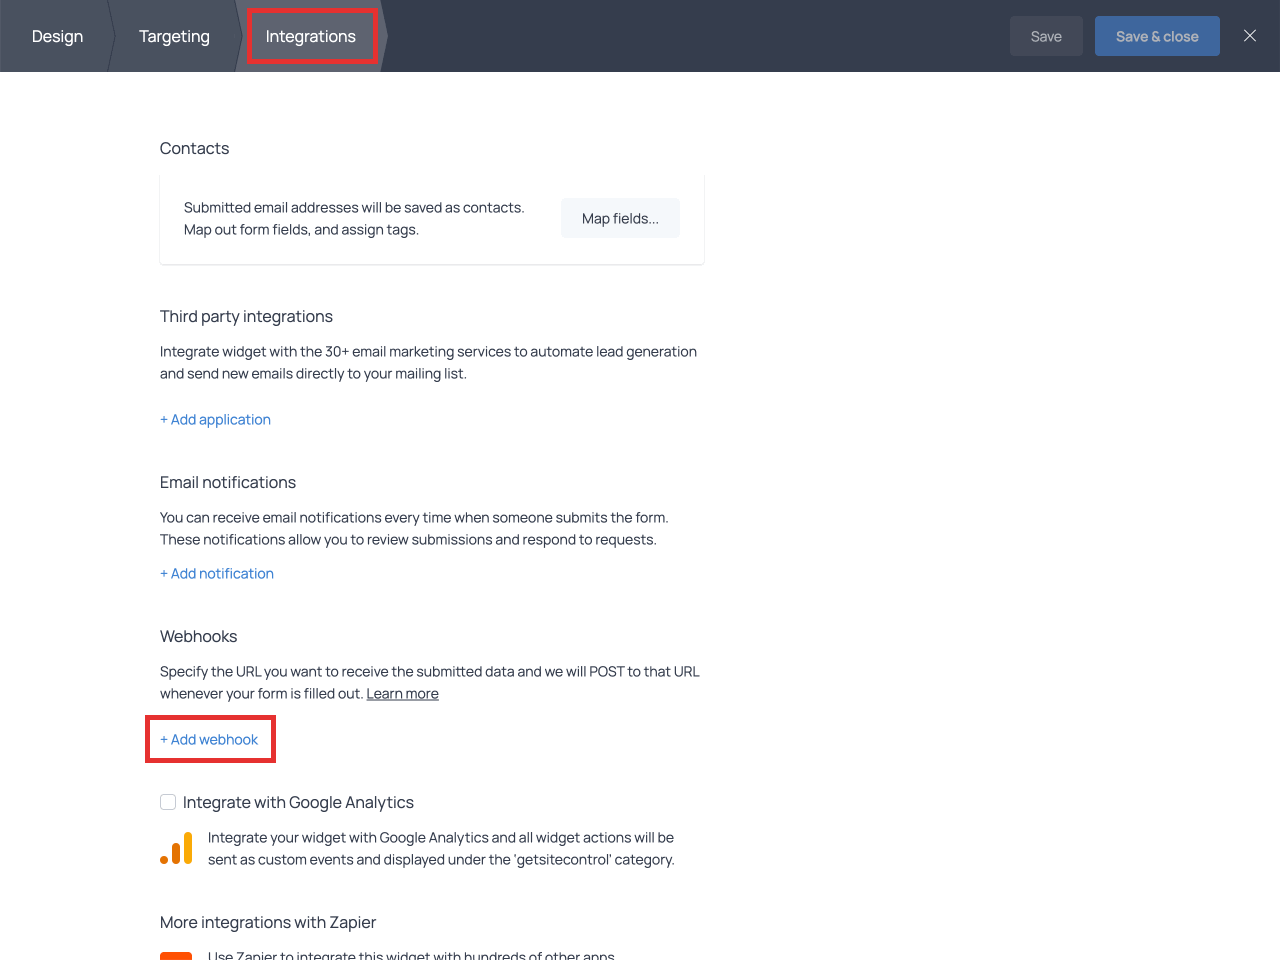
Open the desired form by clicking on the Edit button. Switch to the Integrations tab and click the +Add webhook link.
Enter the URL in the corresponding field:
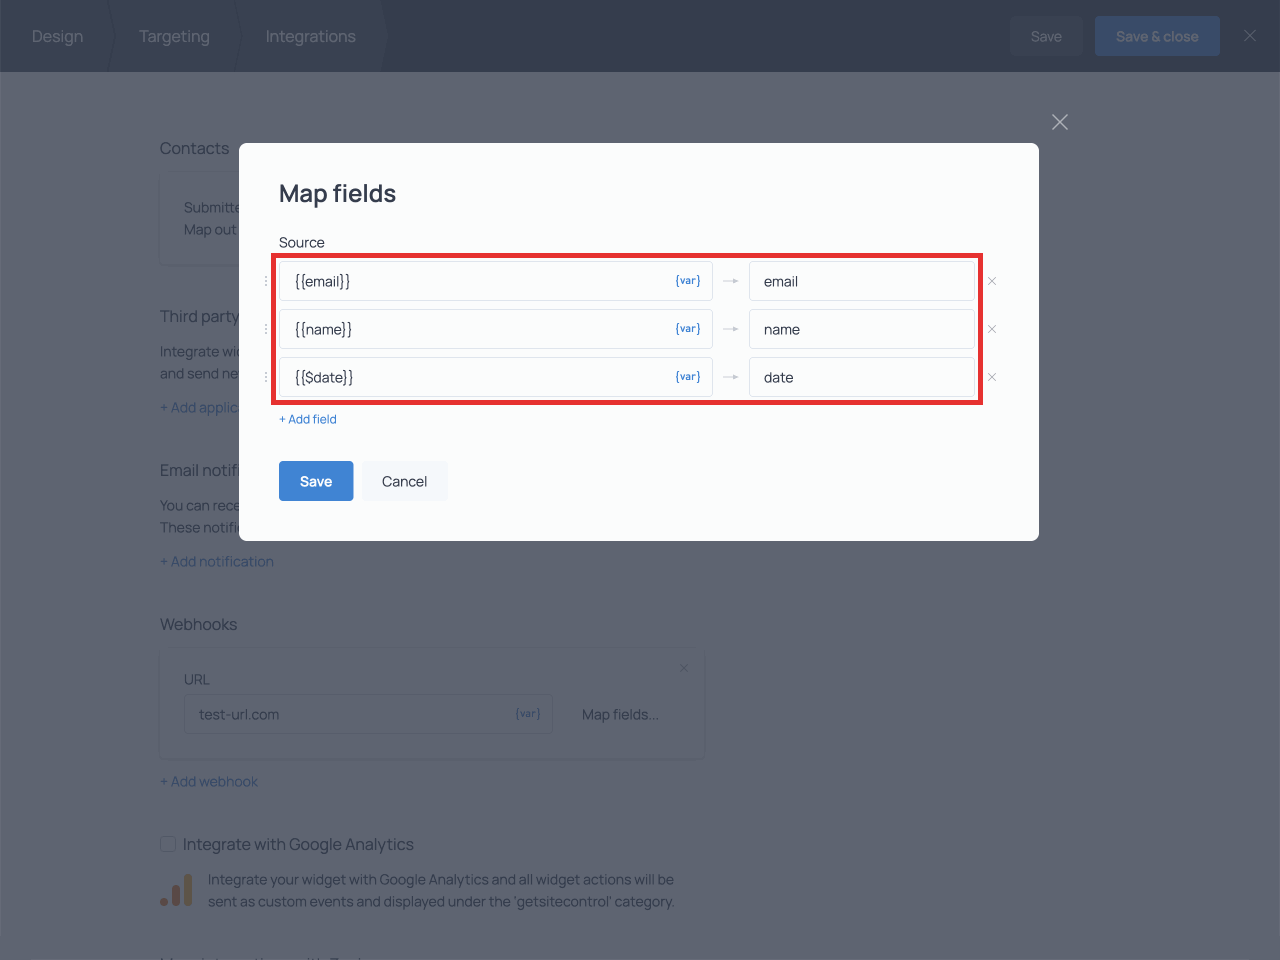
Set up field mapping
Next, you’ll need to choose what data will be sent with your webhook notifications.
Click the Map fields… button to set up field mapping.

Click the +Add field button to add as many fields as the form fields and system fields you want to send data from:

On the left, you’ll select the variables corresponding to your form and system fields from the variable menu ( {var} ).
On the right, you’ll enter the key values that will appear in the POST requests.
To learn more about field mapping, read this guide.
When you are done setting up field mapping, click Save.
Now all new submissions will be automatically POSTed to the specified URL.
Notification format
Webhook notifications are sent via HTTP POST request, where the request body contains the data from the fields in your form.
The request data is sent in the application/x-www-form-urlencoded format.
For example, if you have two fields in your form, ‘email’ and ‘name’, this is what a request will look like:
email=user@example.com&first_name=AlexThat is all you need to know about using webhooks in Getsitecontrol.
If you need help setting up webhooks, write us a message, our Tech Support team will be happy to help you.