How to set up field mapping for third-party integrations
Field mapping is the process of matching the fields of your Getsitecontrol form to the corresponding fields in the connected third-party service.
When new data is collected through the widget, Getsitecontrol will automatically send it to the mapped fields in your integration. The most common integration examples are email marketing apps, Google Sheets, CRMs, invoice apps, and other cloud business services.
Apart from the data collected directly by the form fields, you can also send the data collected by Getsitecontrol from the user’s browser — for example, the user’s location, or the language from their browser settings.
Use the shortcut menu to navigate the content of this article.
- 1. Setting up field mapping
- 2. Required fields
- 3. Variables
- 4. Text values
- 5. Shopify
- 6. Mailchimp
- 7. Google sheets
- 8. Webhooks
Setting up field mapping
Let’s take email marketing software integration as an example.
In the widget editor, open the Integrations tab and select the third-party app you want to connect.
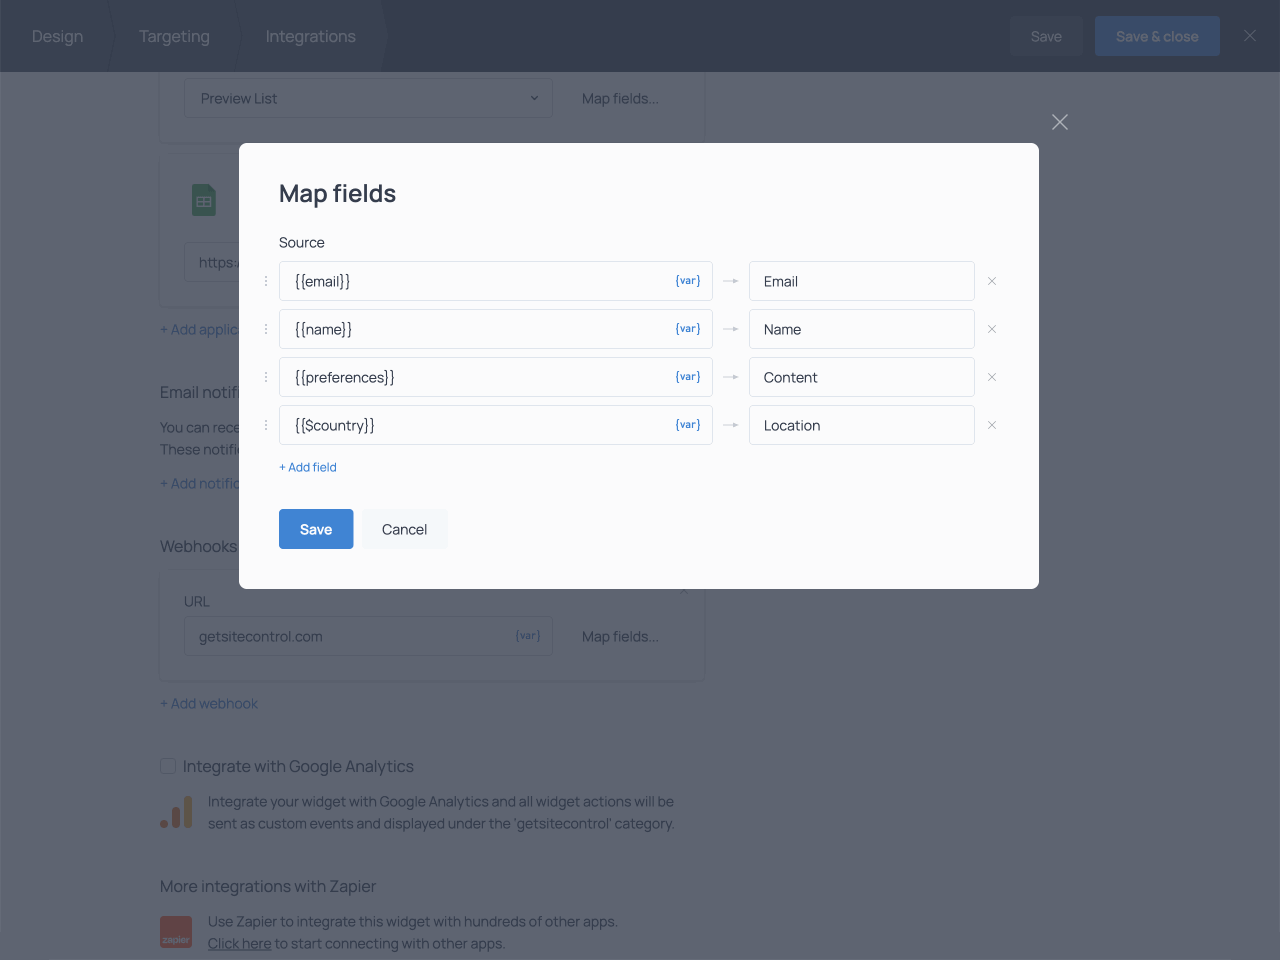
Next, select the necessary mailing list from the drop-down menu and click Map fields to start mapping fields.

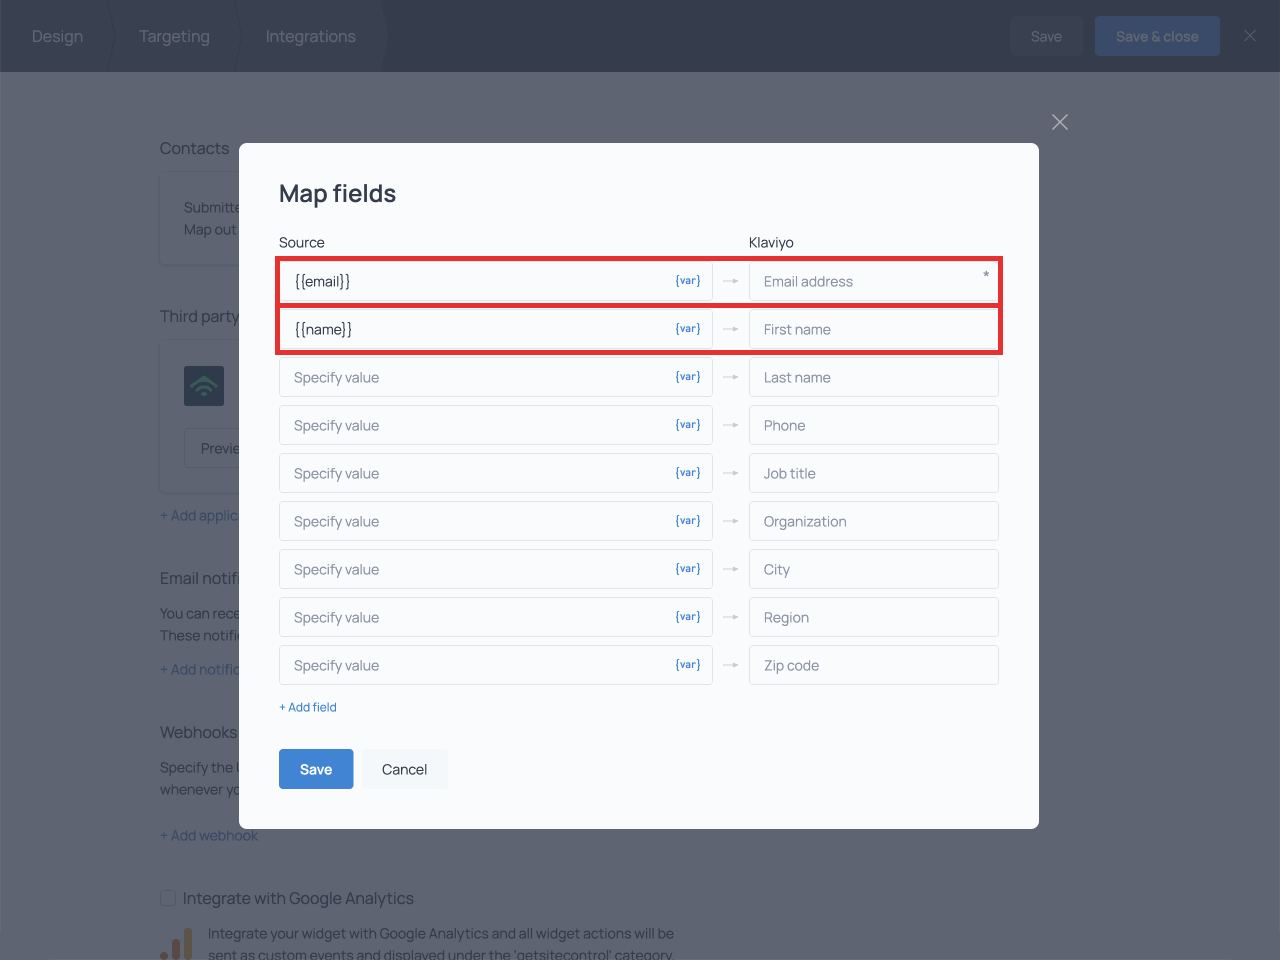
On the left, you’ll see source fields that need setting up. On the right, you’ll find the list of fields supported by your integrated service.
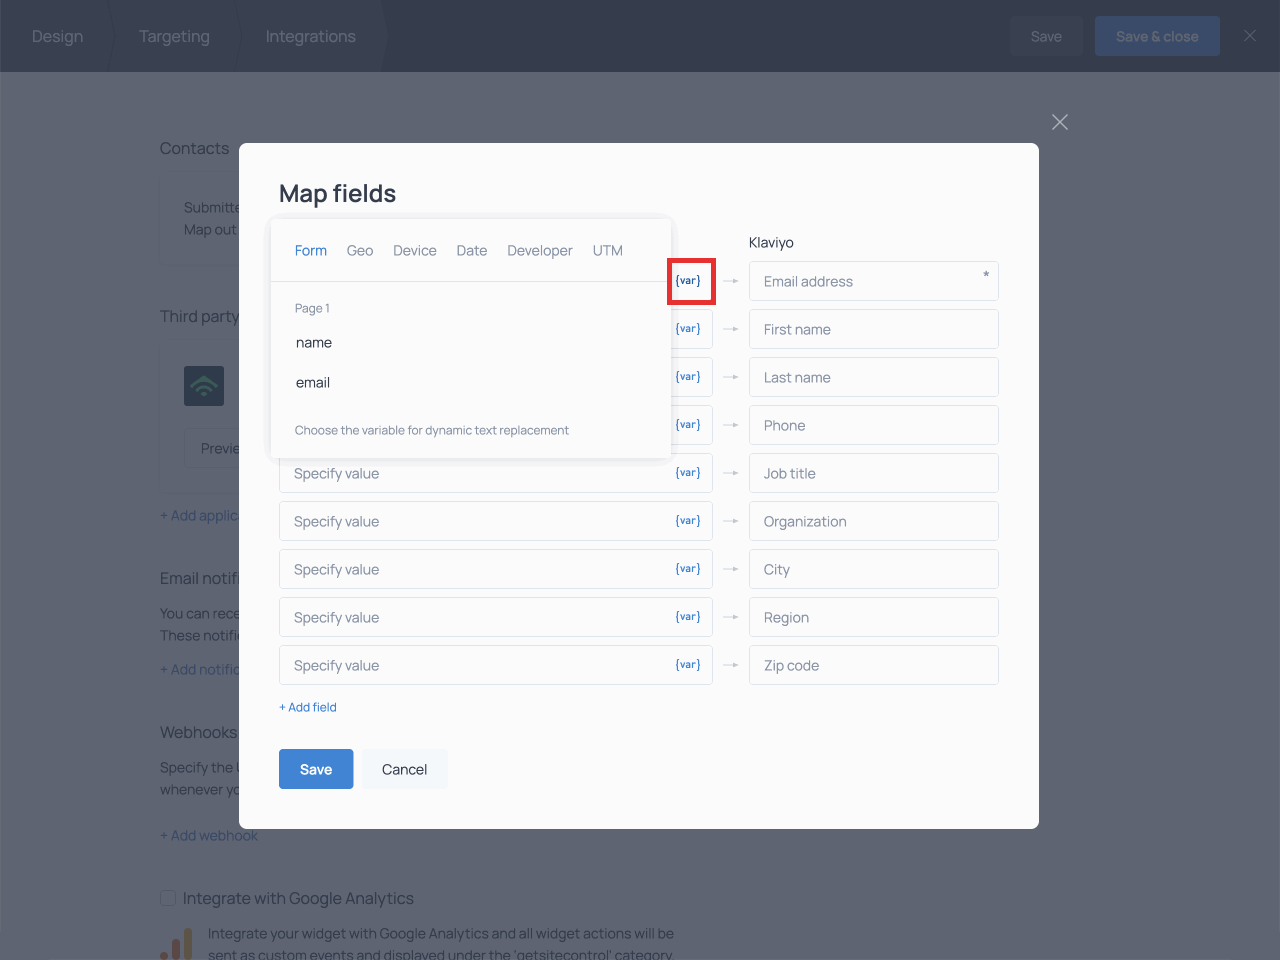
To map a field, click the {var} icon next to it and select a variable from the menu:
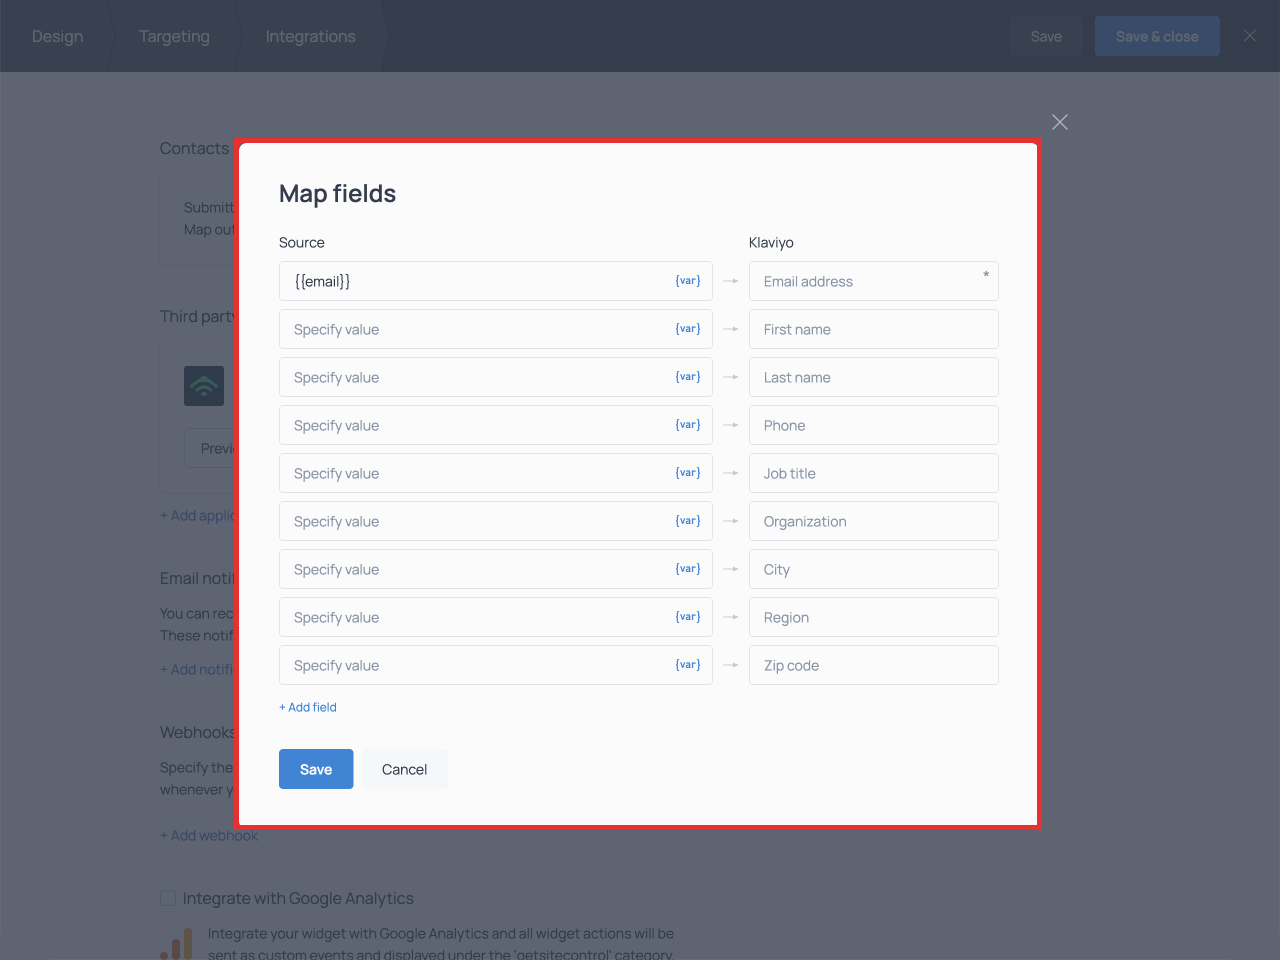
The email field — if there is one — will be already mapped by default:
You’ll find more information about variables and how to use them for field mapping in the dedicated paragraph.
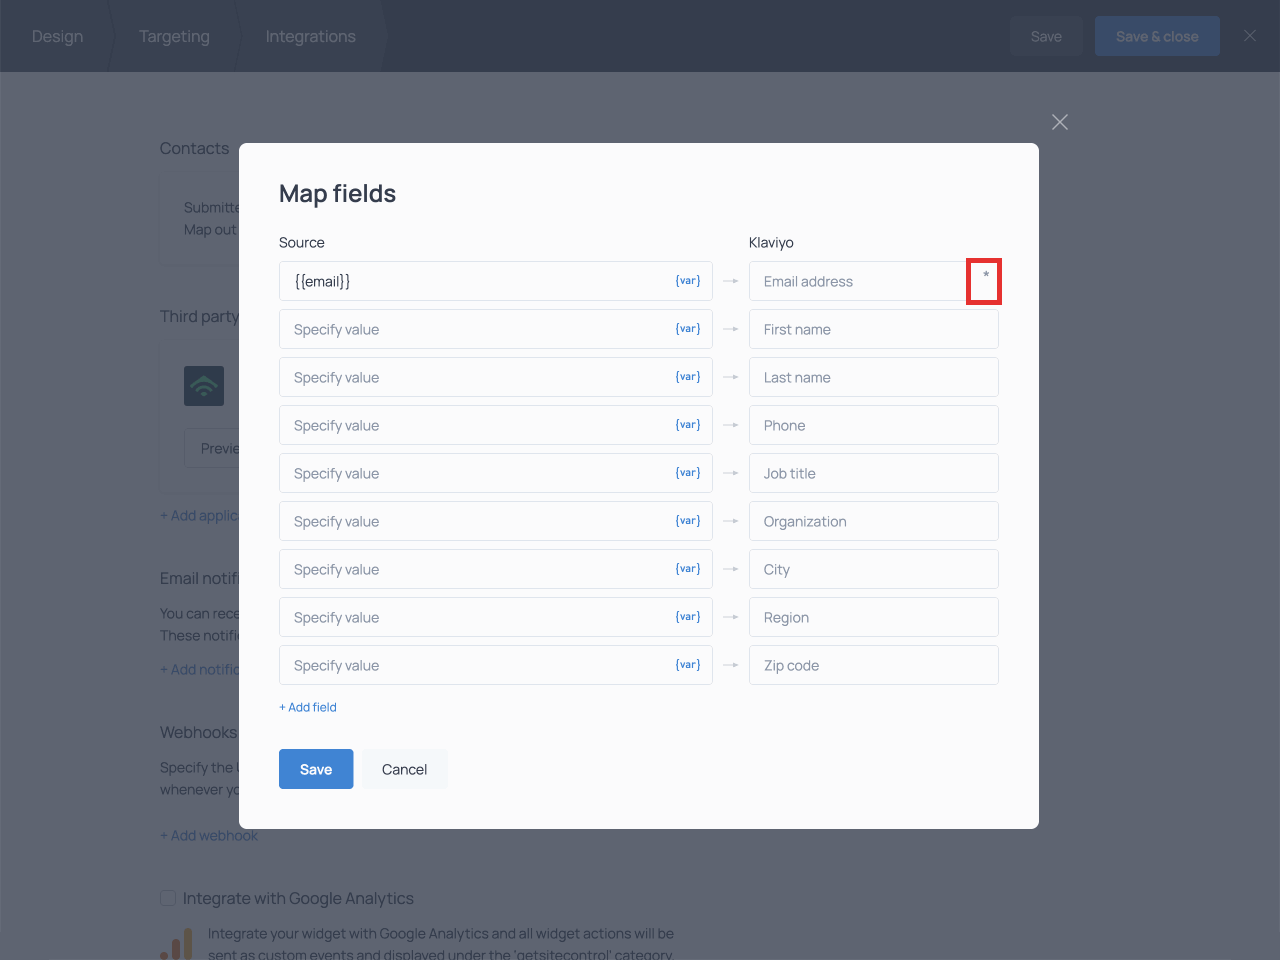
Required fields
An asterisk marks all required fields in the integrated service. You need to map them with corresponding fields in your widget. Otherwise, your subscribers’ data won’t be sent to your app.
💡 If you don’t want to send data collected by Getsitecontrol to these fields, you can set them as optional instead of required in your third-party service settings.
Variables
The data in the source fields are expressed in the form of variables. To open the variable menu, click the {var} button:
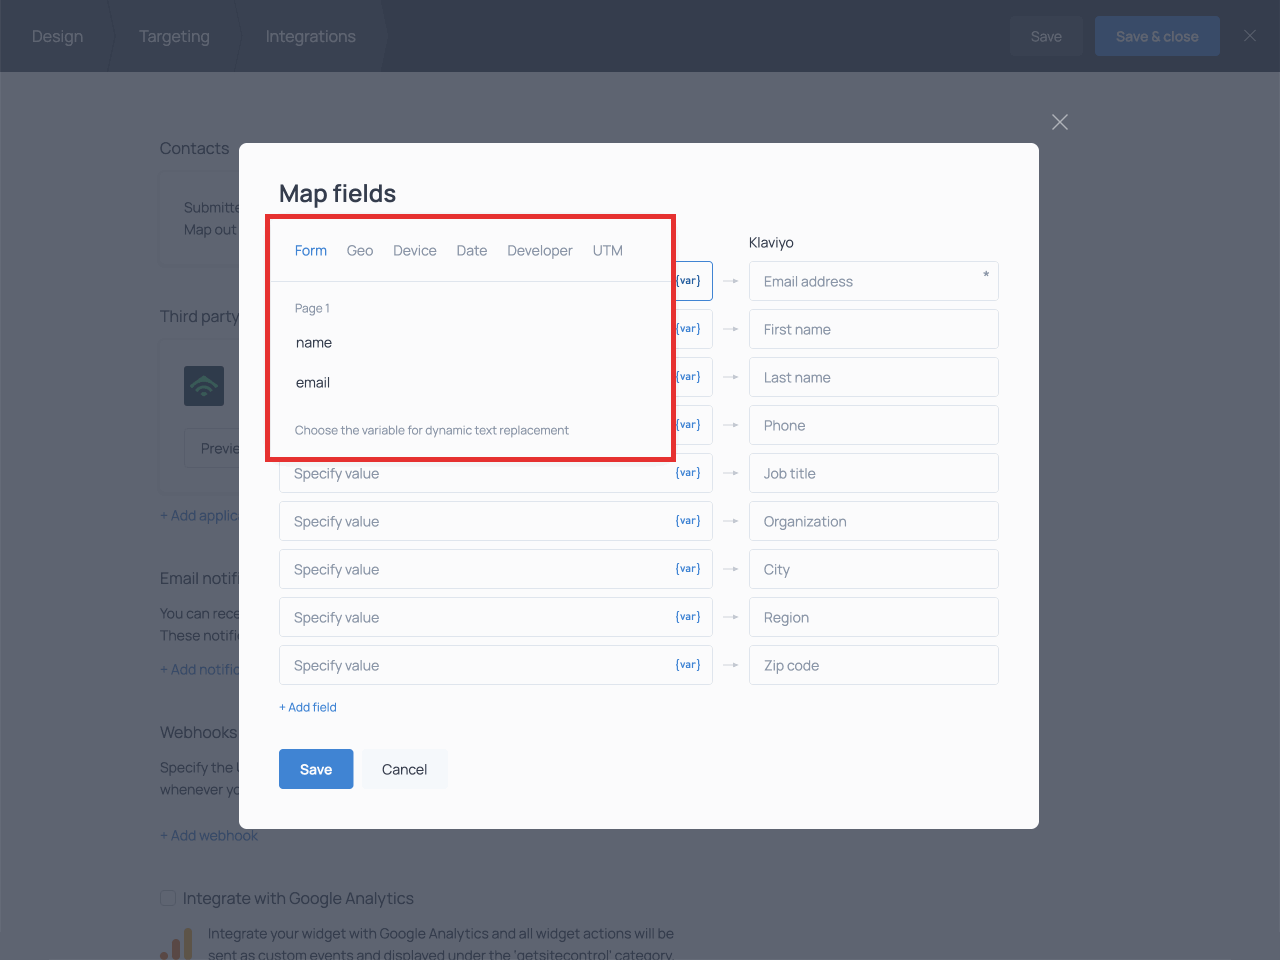
There are 6 variable subsets in Getsitecontrol:
- Form
- Geo
- Device
- Date
- Developer
- UTM
Let’s take a closer look at each one of them.
Form
The variables in the Form subset include the fields in your widget, e.g. “Email”, “Name”, etc.
Pair the variable for each form field with the corresponding field in your third-party integration.
For many of the apps available for direct integration, it’s possible to add and map new fields that will be automatically created in the third-party service.
To add a new field, click the +Add field button. Proceed to enter a label for the field and set up the mapping:
Let’s now move on to the variable subsets that collect data from the visitor’s browser.
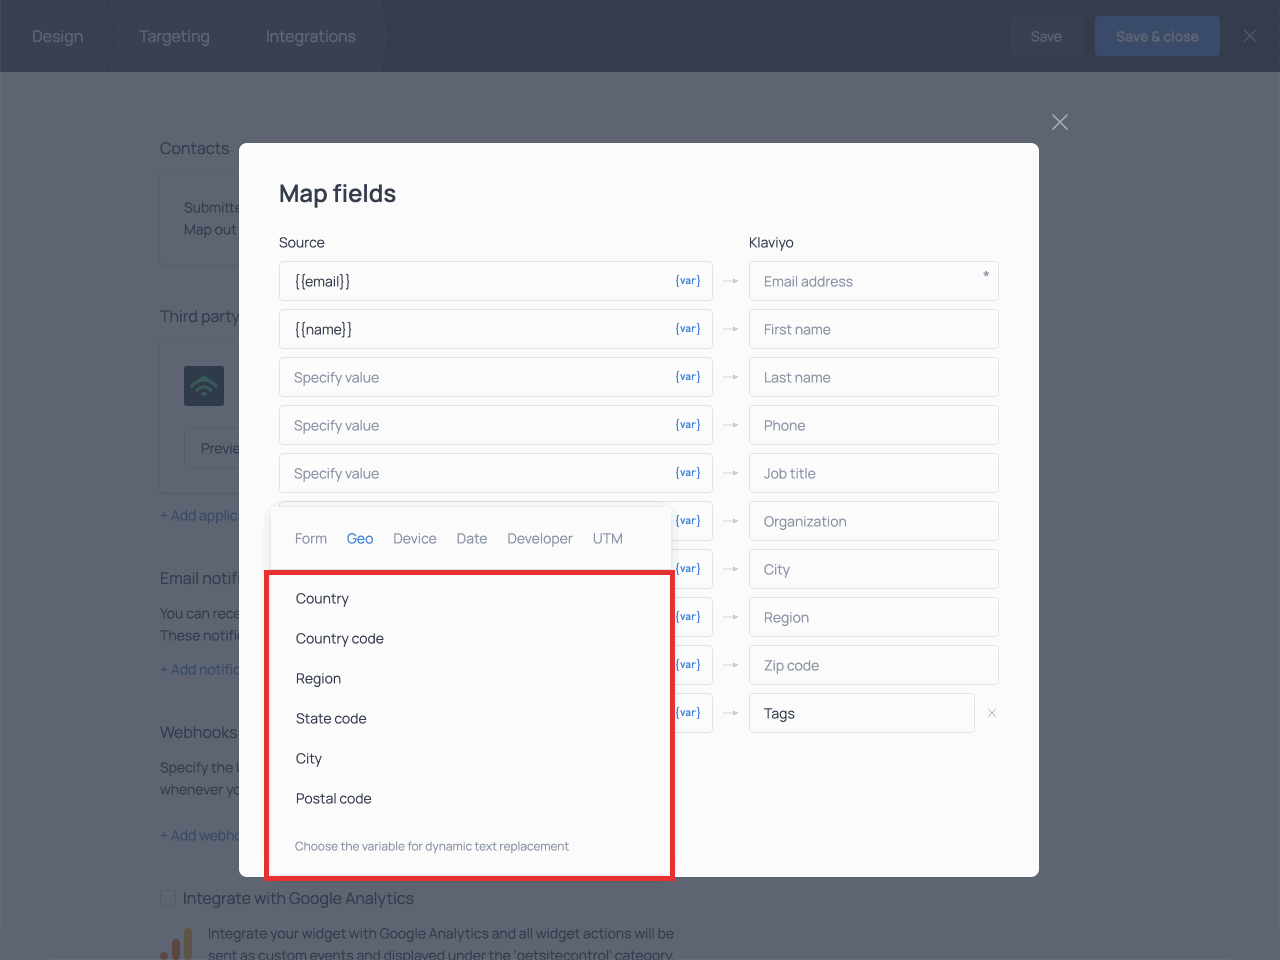
Geo
This variable subset allows you to pass along data about the visitor’s location, namely:
- Country
- Country code
- Region
- State code
- City
- Postal code
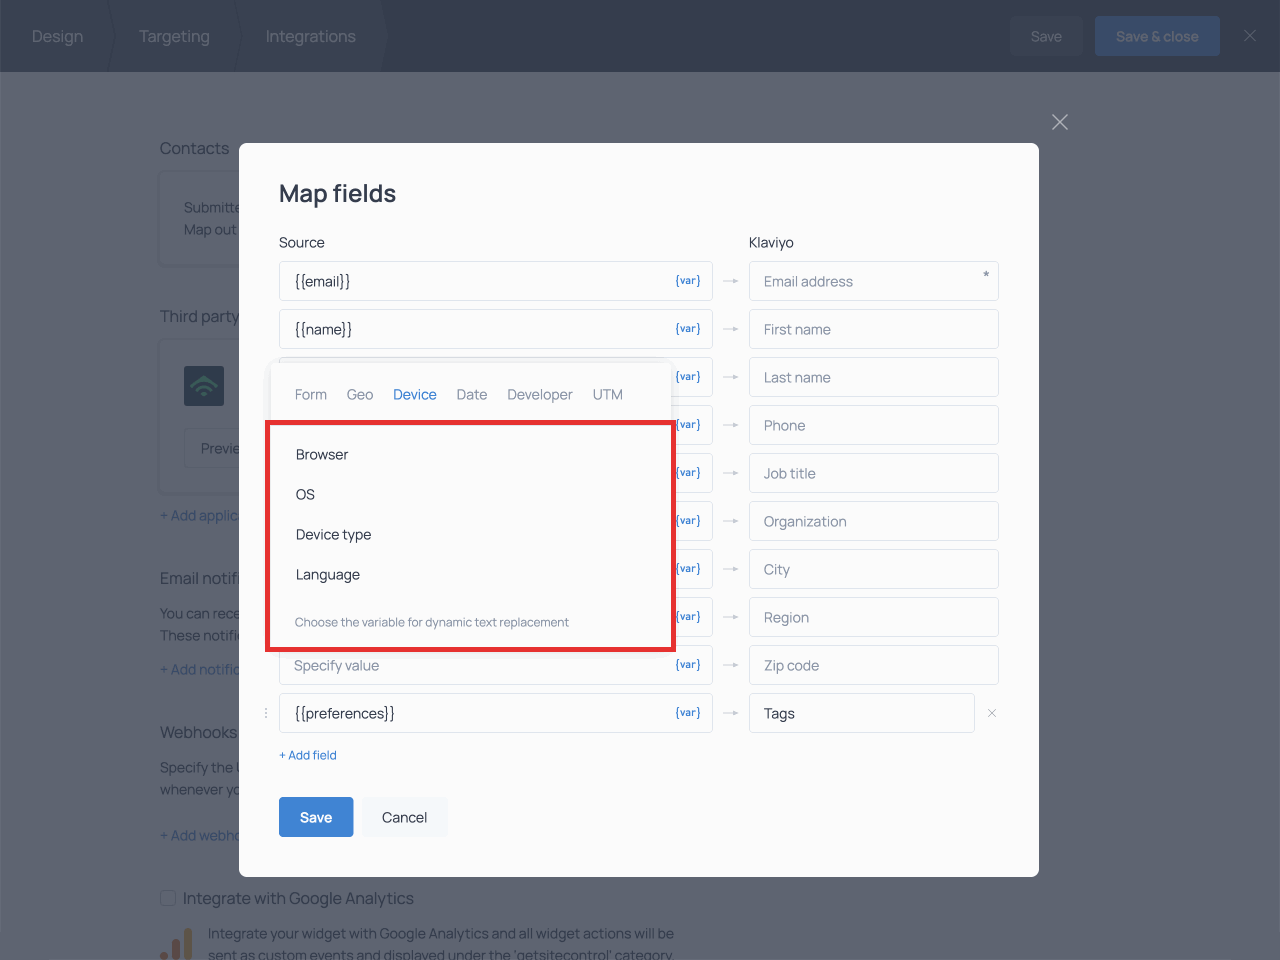
Device
The Device subset of variables allows you to collect data about the type of device the visitor is using and its characteristics:
- Browser
- OS
- Device type (Desktop, Mobile, Tablet, Other)
- Language from the browser settings
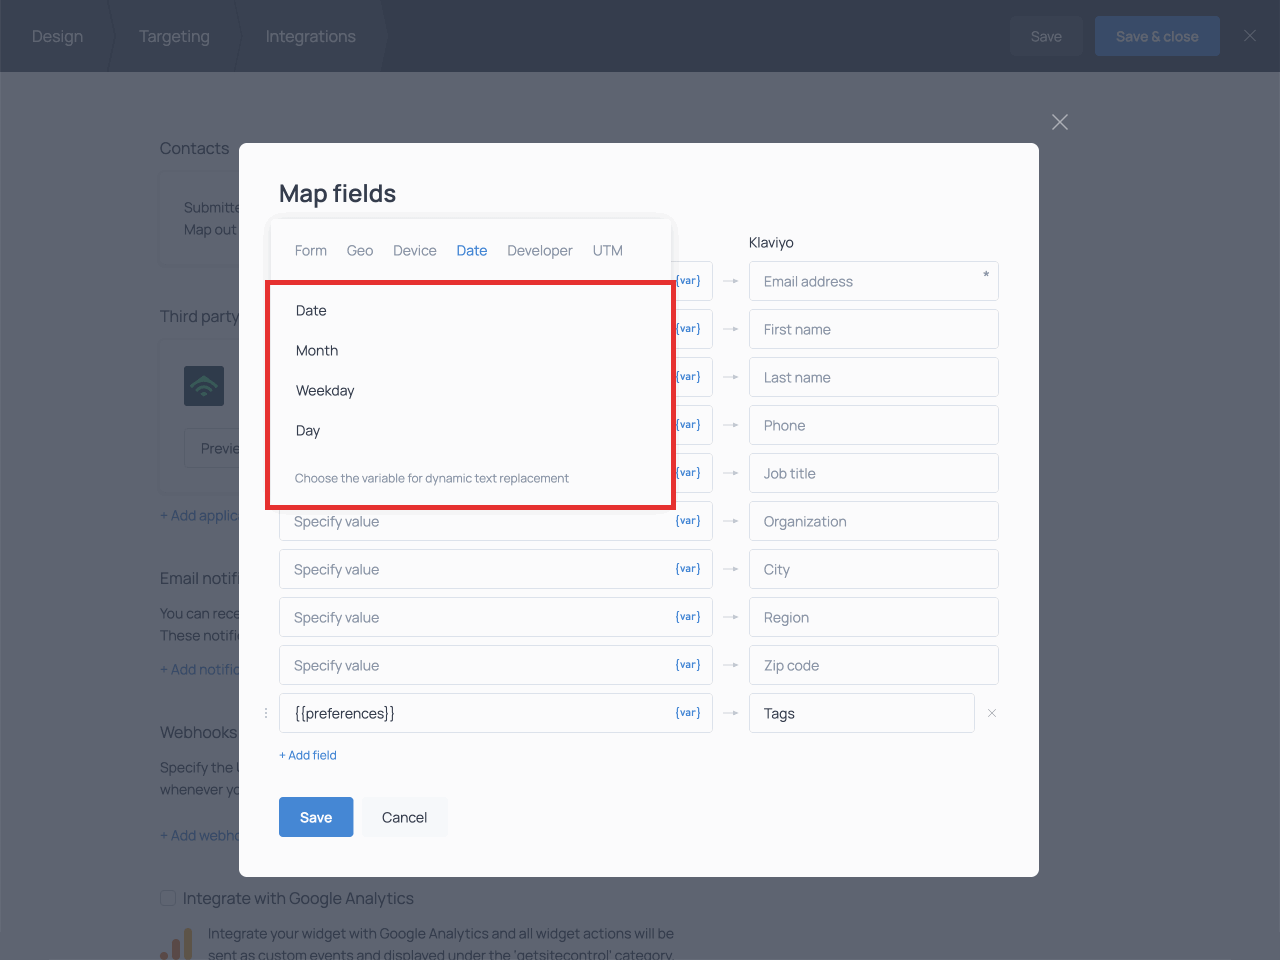
Date
The Date subset allows you to send data about the visitor’s current date to your third-party app.
- Date sends the current date in full, e.g. 5/20/2023.
- Month sends the current month, e.g. May.
- Weekday sends the current day of the week, e.g. Saturday.
- Day sends the day of the month, e.g. 20.
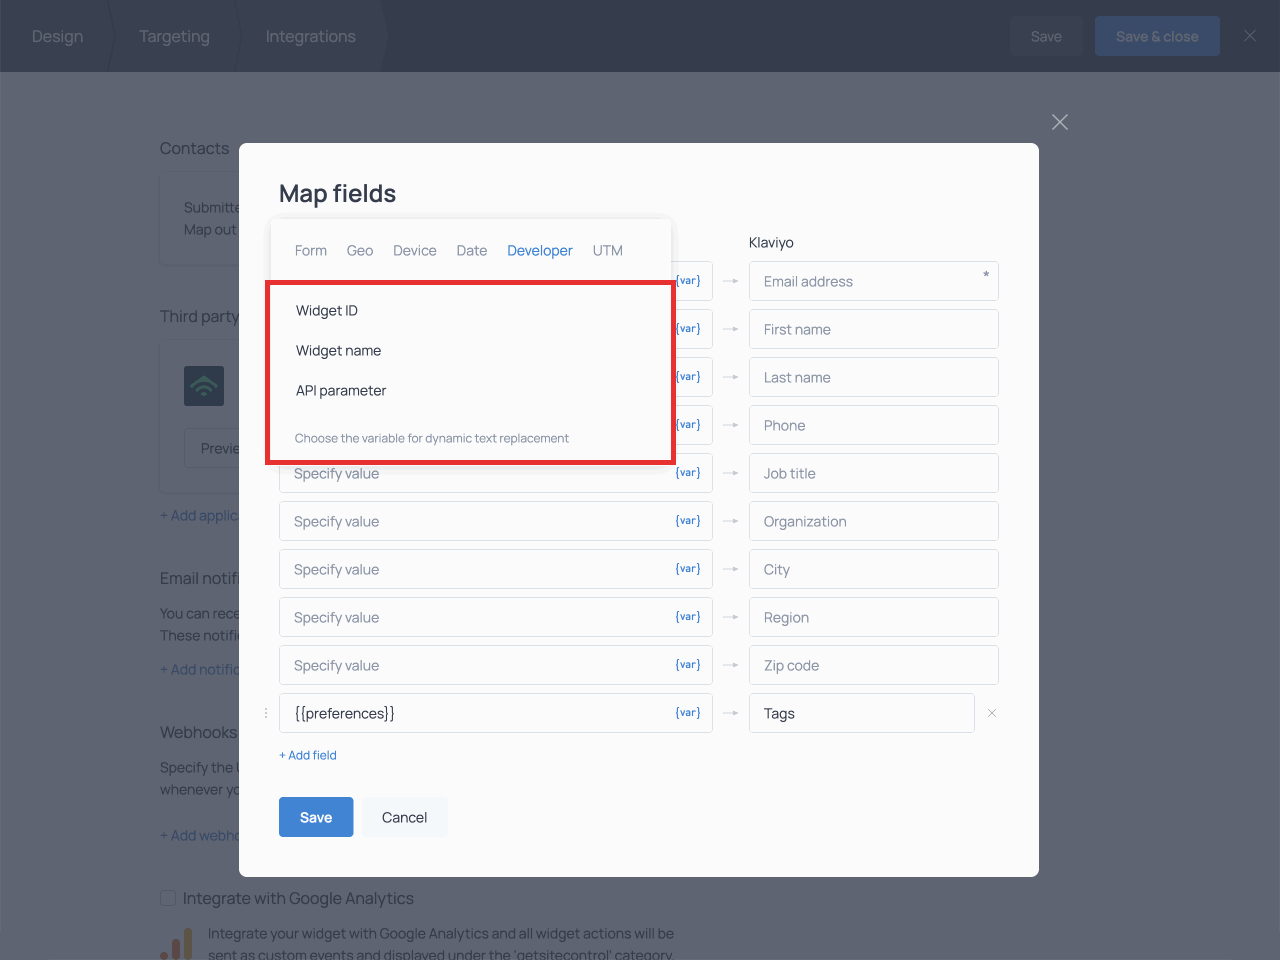
Developer
The Developer subset allows you to send specifics about the widget and custom API parameters to your integrated app. This subset features the following variables:
- Widget ID
- Widget name
- API parameter
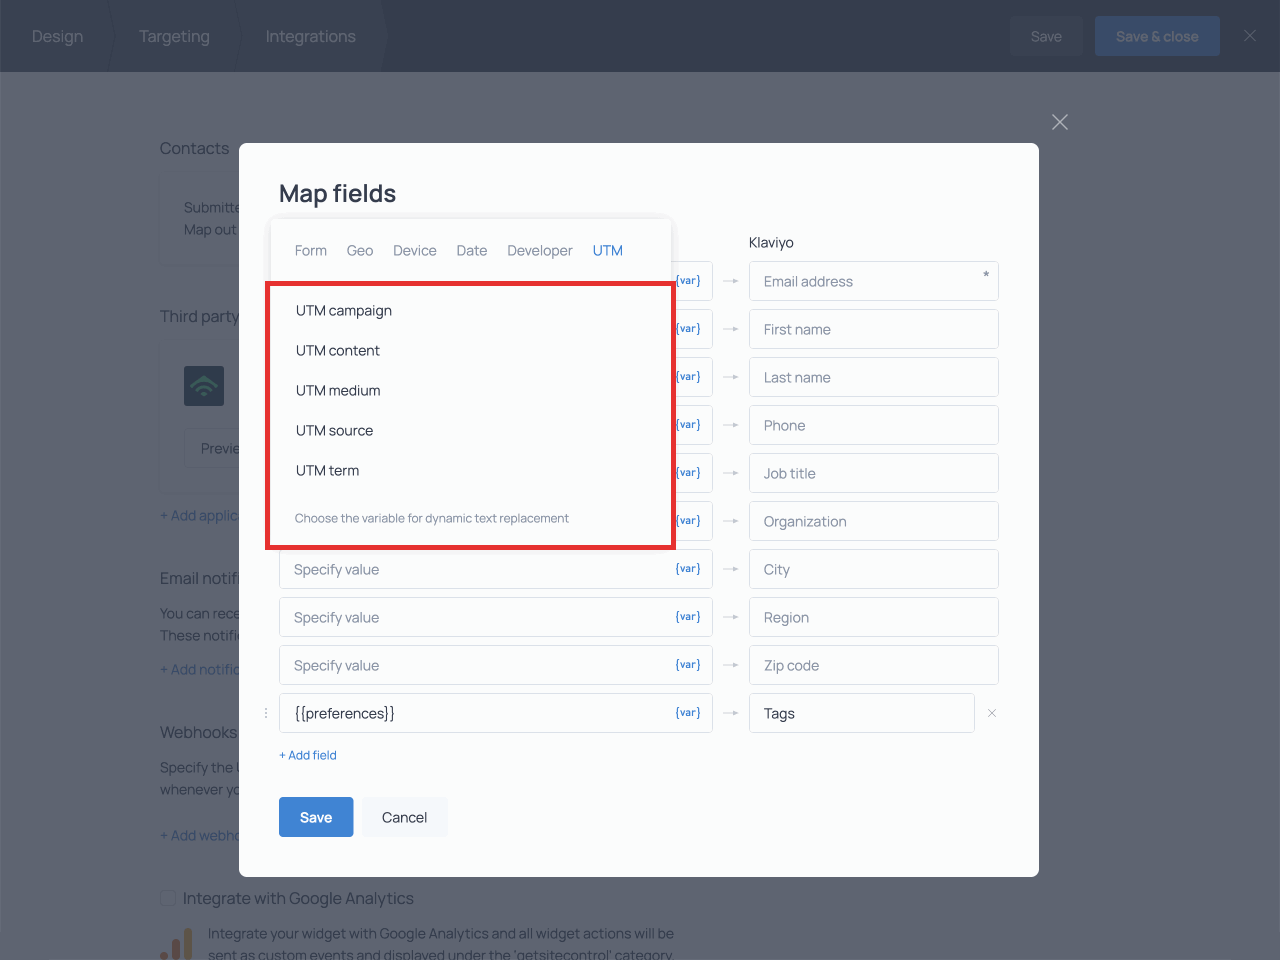
UTM
The UTM variable subset allows you to send UTM tags you use for campaigns on your website. There is a variable for each UTM tag:
- UTM campaign
- UTM content
- UTM medium
- UTM source
- UTM term
That concludes the overview of the variable subsets.
💡 It’s also possible to use variables in JavaScript expressions to send processed data to your third-party integration. To learn more about JS expressions, read our guide on Dynamic Text Replacement.
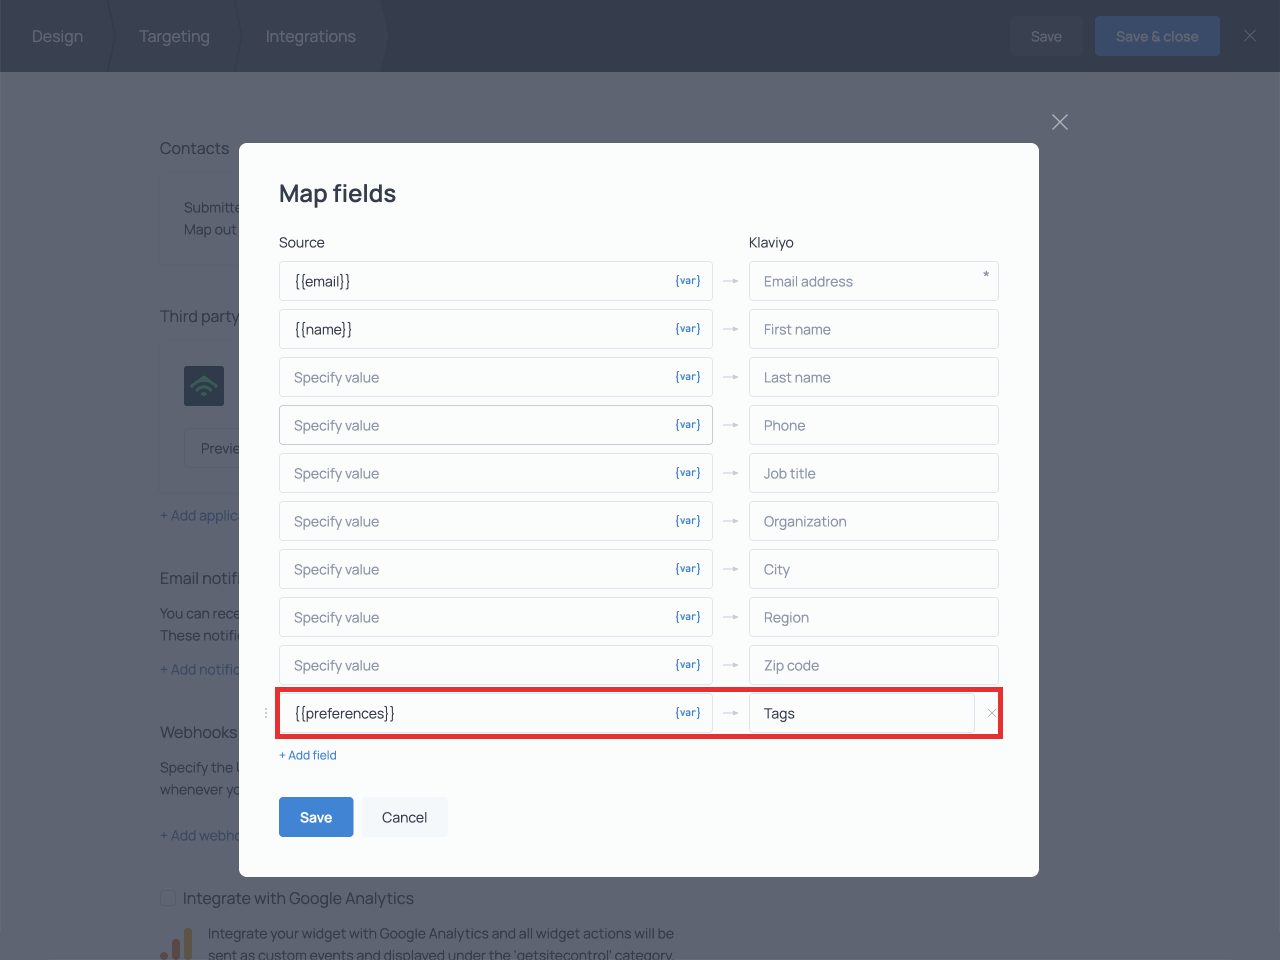
Text values
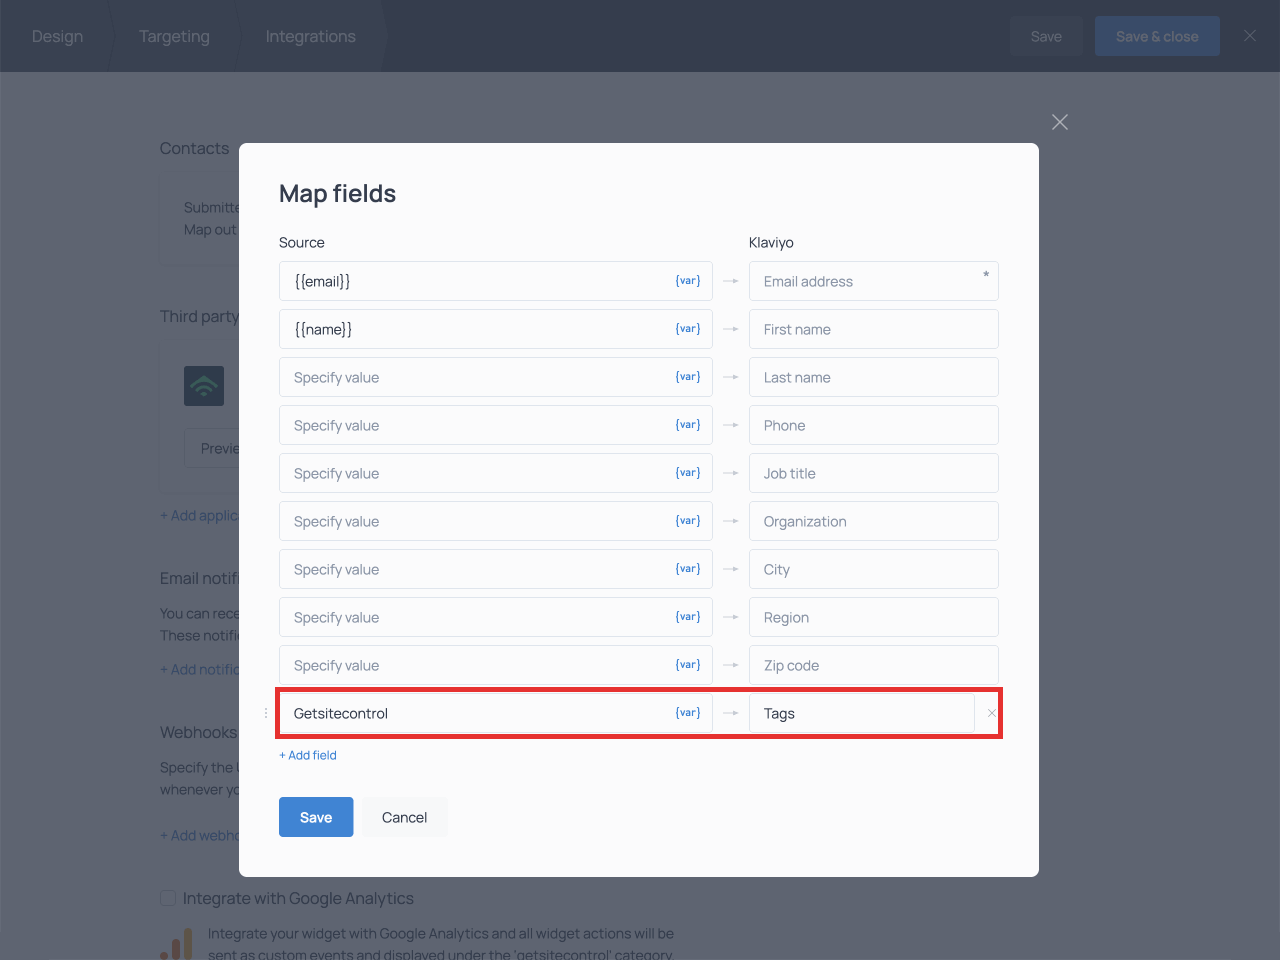
In addition to variables, you can send any text value to your integrated app. This value will be passed along with all submissions made via this particular widget.
For example, you can use text values to tag the contacts collected via Getsitecontrol:
In the upcoming paragraphs, we’ll discuss specifics for some of the services available for integration.
Shopify
Getsitecontrol accounts connected to Shopify are integrated with the Shopify Customers list.
The following two fields are mapped by default in the field mapping settings:
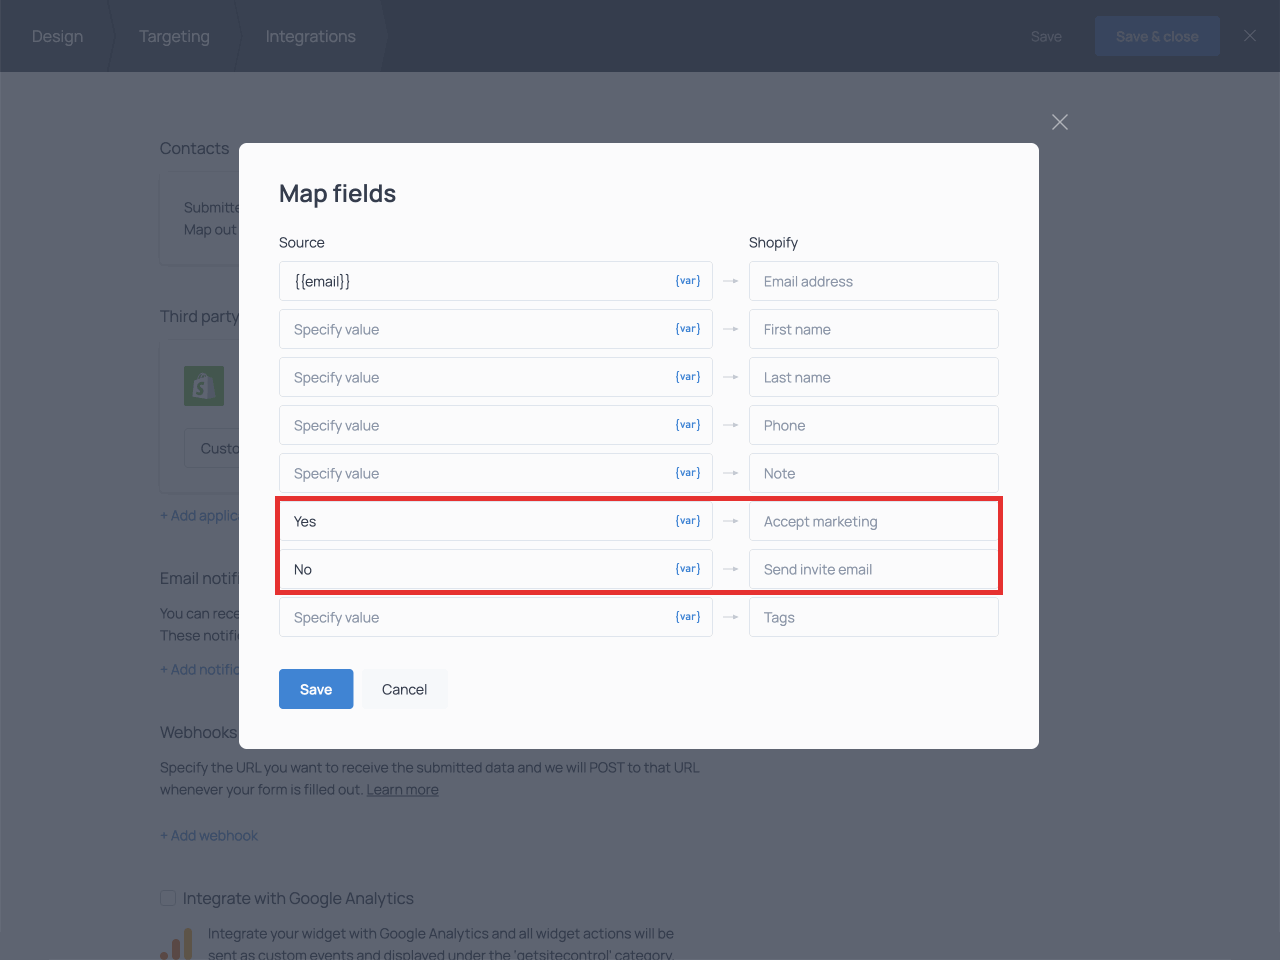
The Accept marketing field will be marked with ‘Yes’ so that the contacts collected by the widget are considered subscribed to your marketing emails.
The Send invite email field will be marked with ‘No’; otherwise, the contacts will automatically get an email asking them to activate their account.
Mailchimp
❗ Please note that this option is only available for the Mailchimp integration.
If you have set up custom groups in Mailchimp, you will see them listed in the field mapping settings of your integrated form.
To add contacts to a specific group, you need to enter a variable in the Source column of the field mapping, next to the relevant group option in Mailchimp:
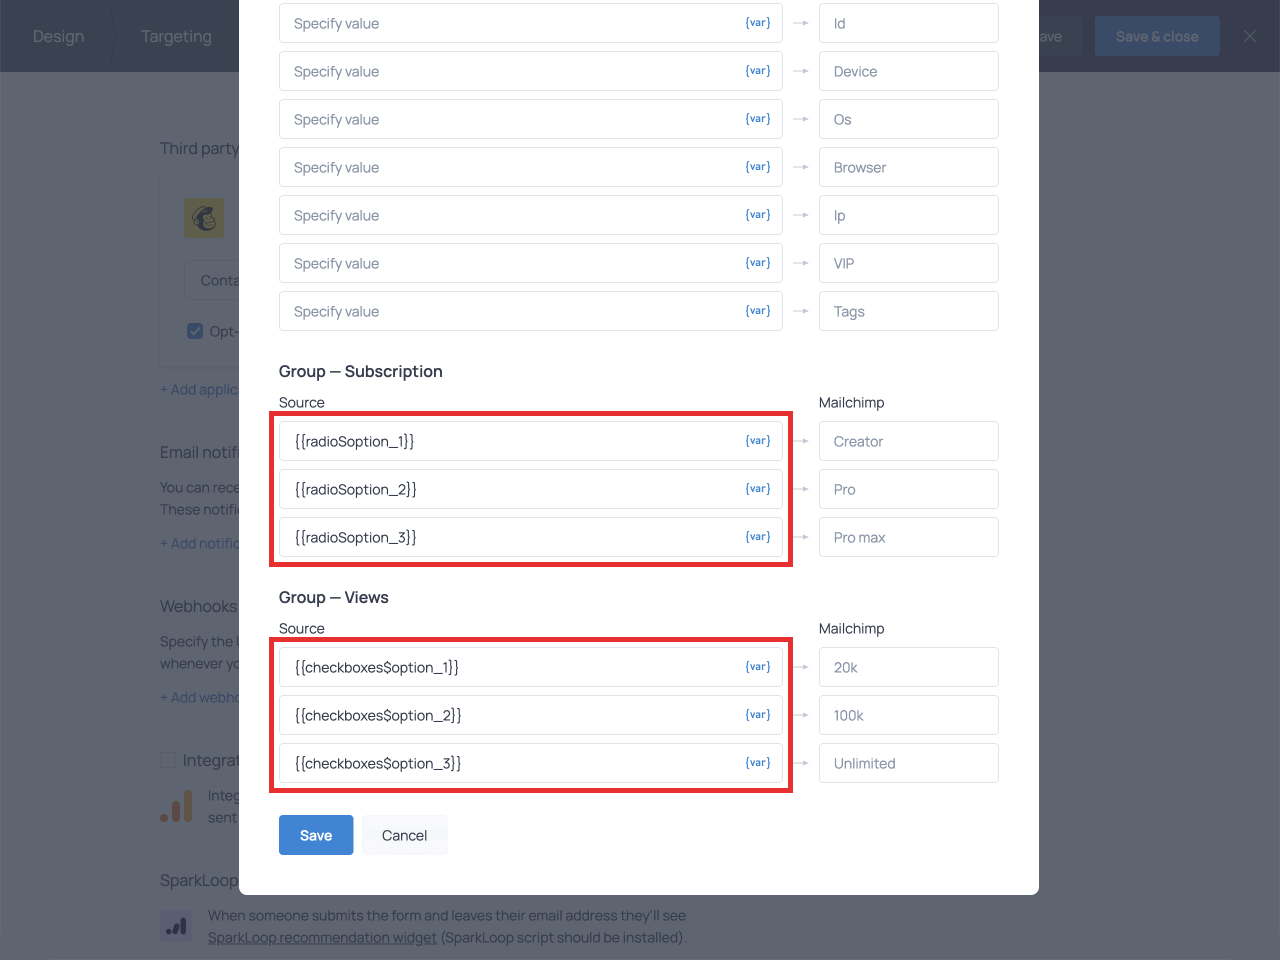
Here’s an example of correct format for the variable:
{{radio$option_1}}
where radio is the field ID and option_1 is the option ID
Another example:
{{checkboxes$option_1}}
where checkboxes is the field ID and option_1 is the option ID
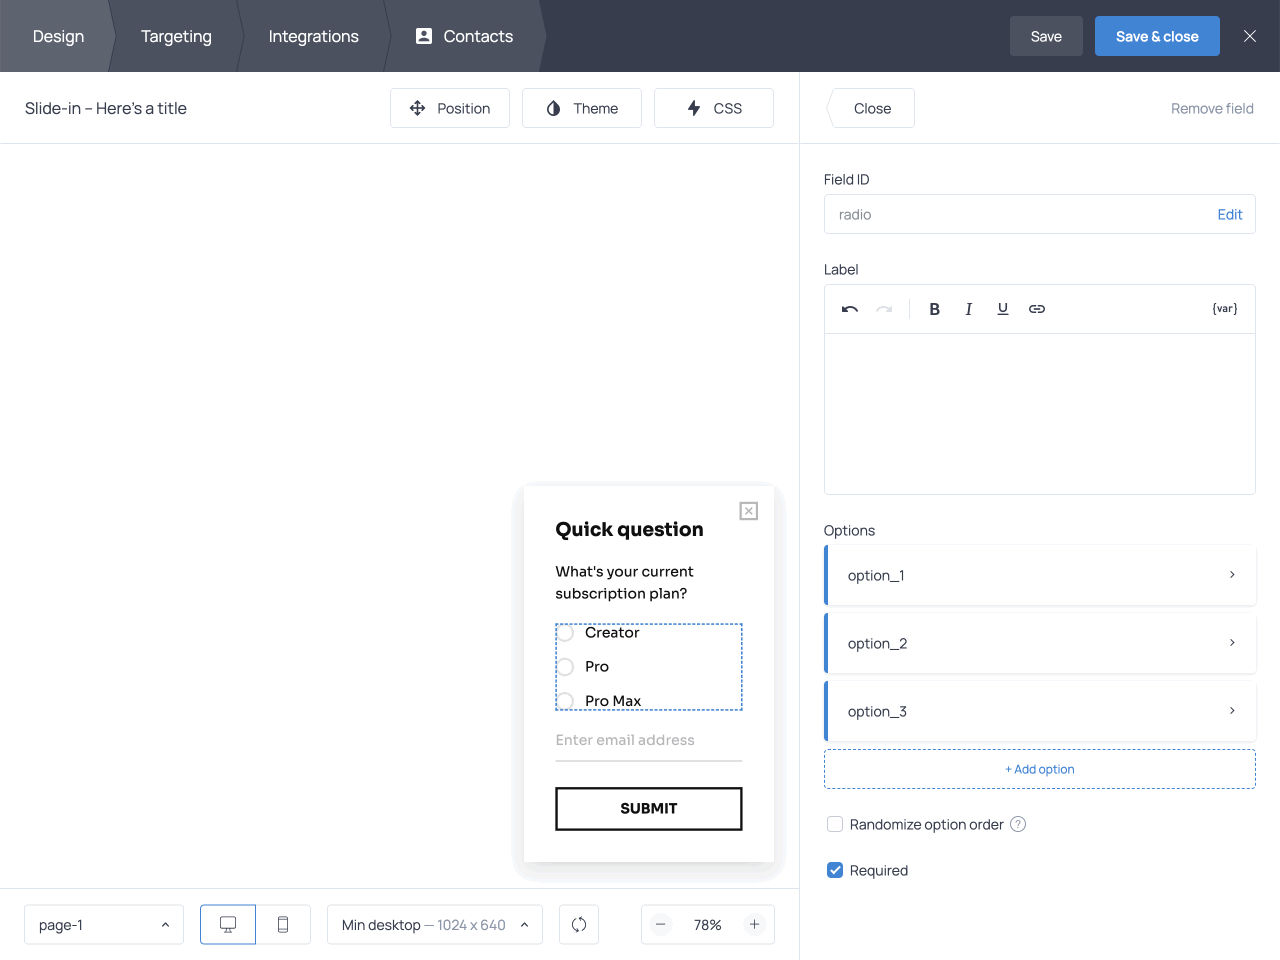
To find the field ID, click on the field in the widget preview; the field ID will be at the top of the side menu:
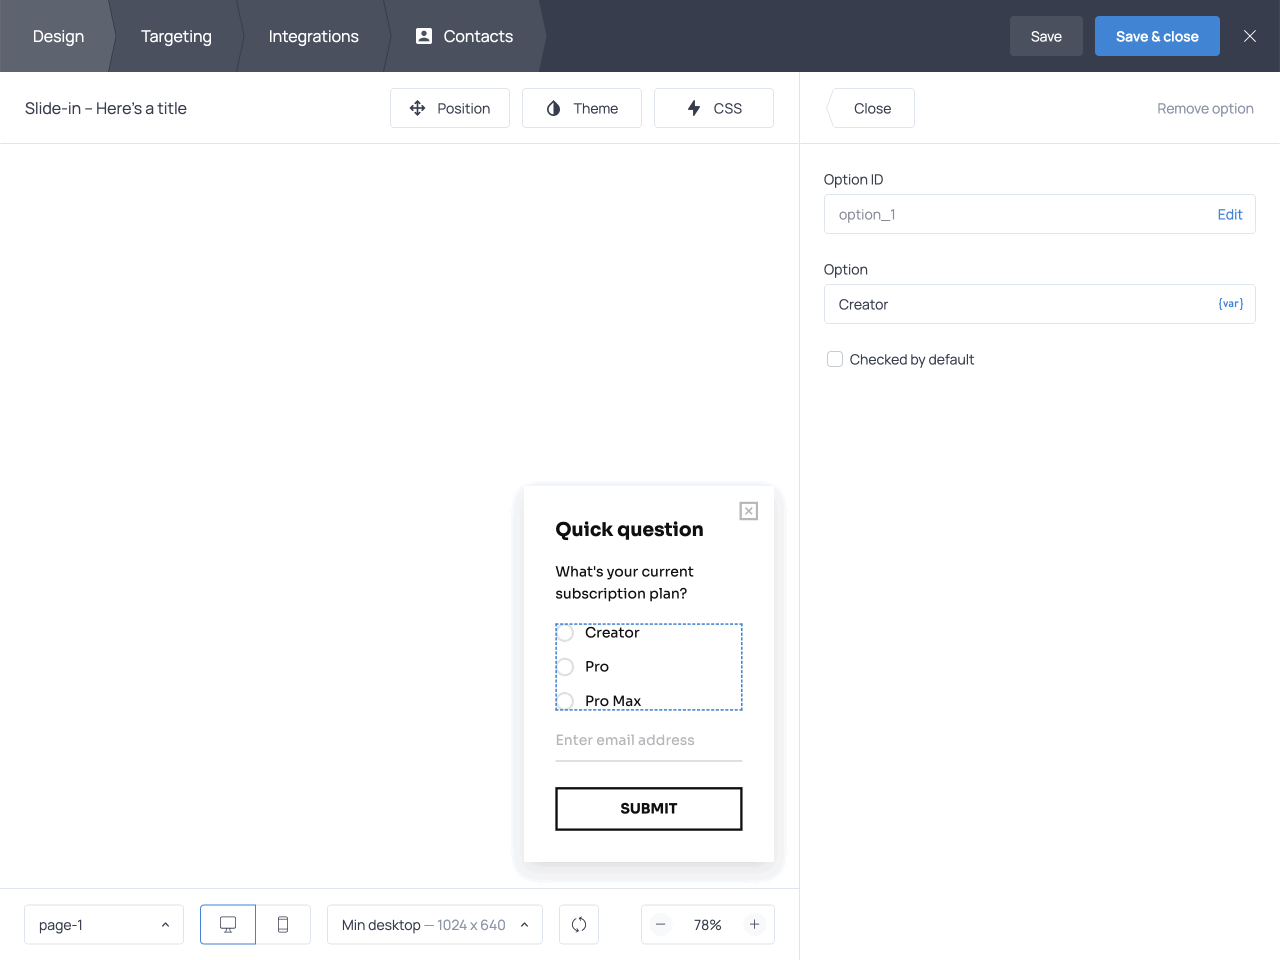
To find the Option ID, click on one of the options from the side menu; the option ID of that specific option will be at the top of the next screen:
❗ You can customize field IDs and option IDs to easily recognize them. If you do, make sure to adjust your variables accordingly.
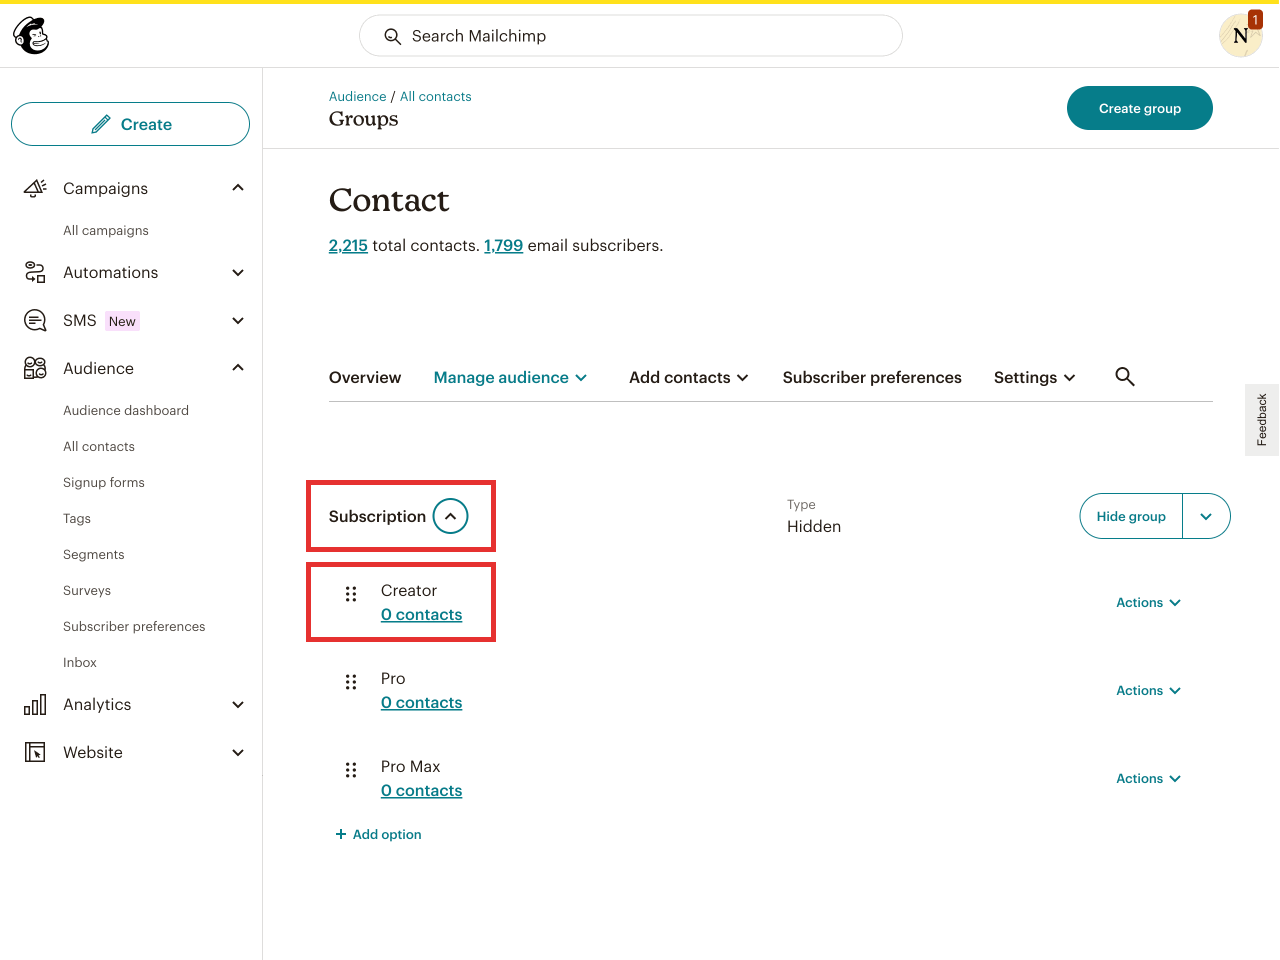
With the setup illustrated above, when a respondent selects the first option in the radio buttons (“Creator”), that information will be sent to Mailchimp, and the contact will be listed under the “Creator” option of the “Subscription” Group:
Google Sheets
Field mapping works differently for the integration with Google Sheets.
Instead of having a list of preset target fields to match with source data, you’ll have to create the fields yourself.
To create a new field, click the +Add field button:
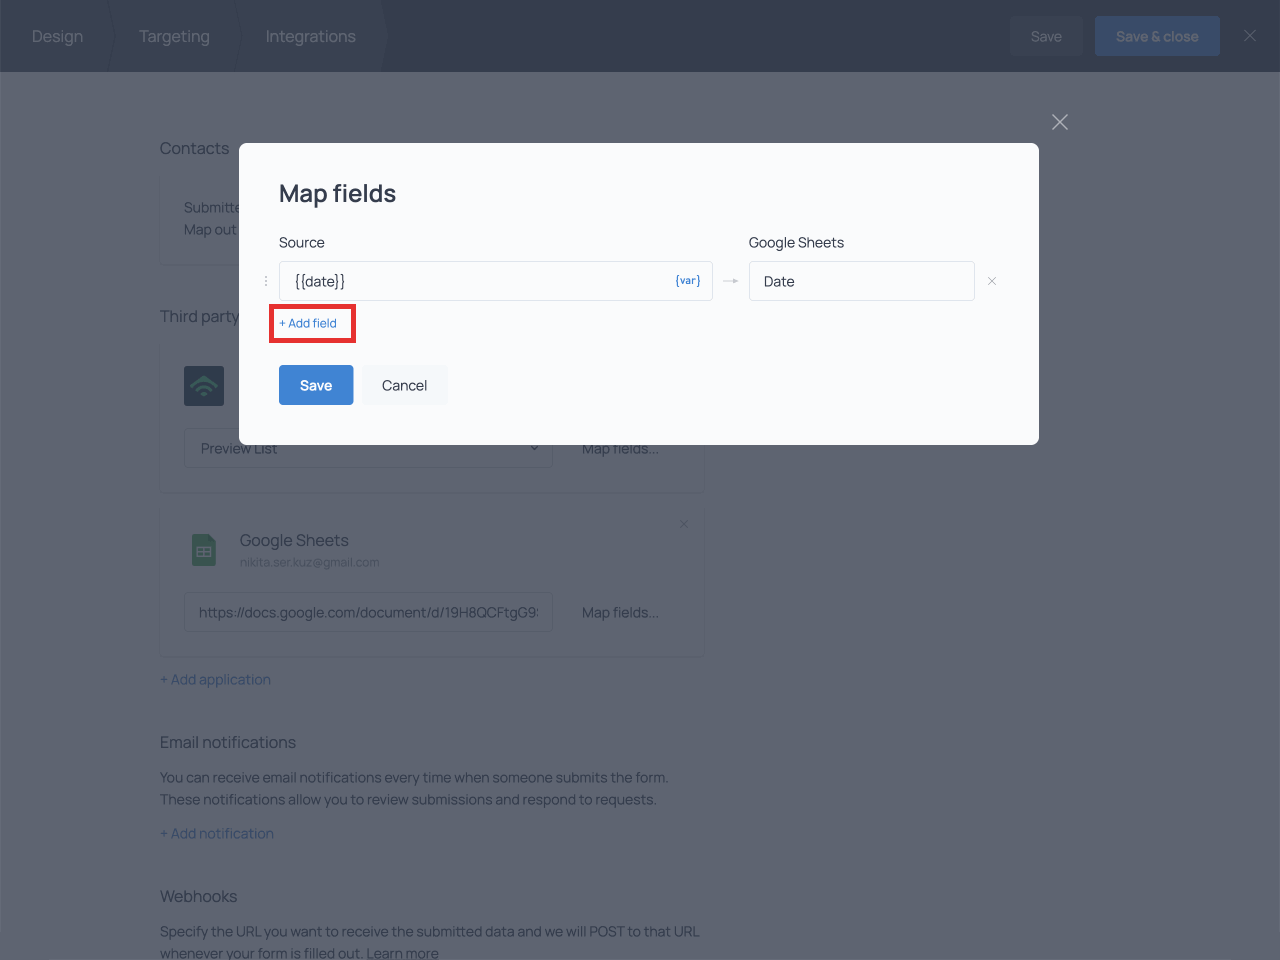
Proceed to select a variable from the menu and enter a label for the spreadsheet column. Repeat this process for all the fields you want to map:
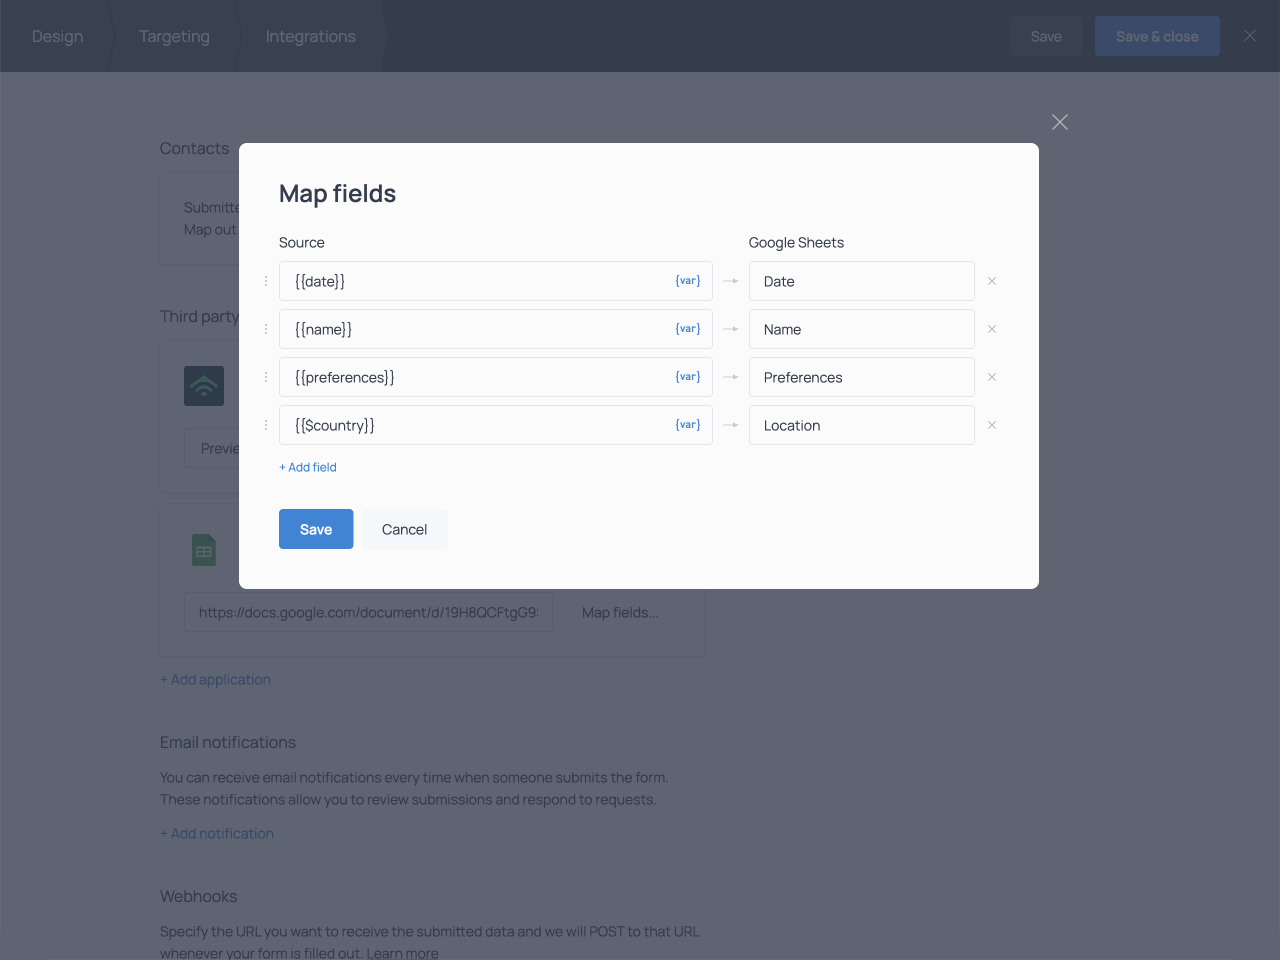
When data is sent to the spreadsheet from the widget, it’ll automatically create the columns you have set up in the mapping.
If you change the field names in the mapping, the spreadsheet won’t be updated automatically. To update the column names in the spreadsheet, you’ll need to manually edit them.
Webhooks
Webhooks also require field mapping. By default, you won’t find any fields in the field mapping settings:
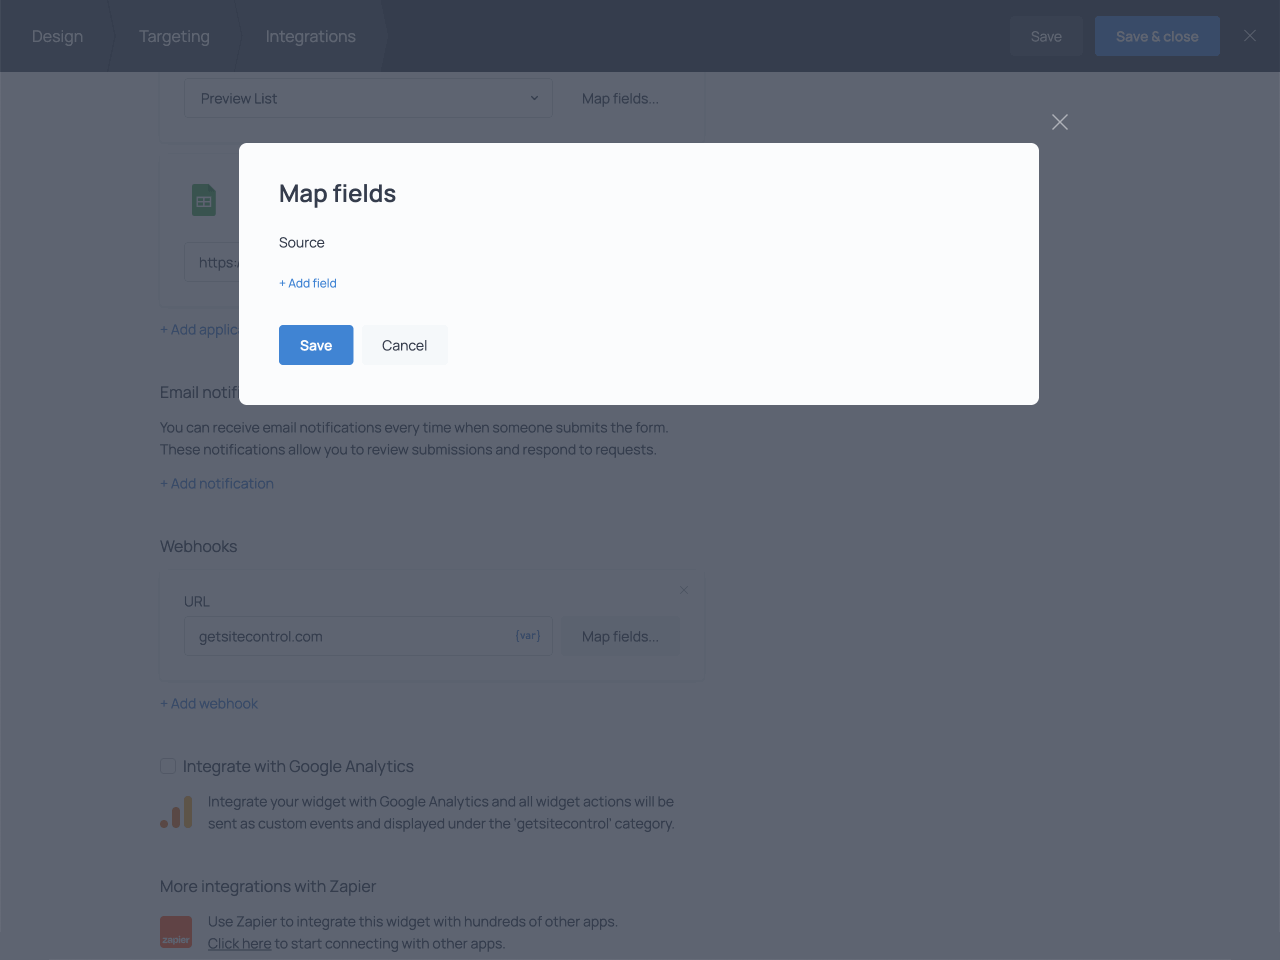
Add the fields that you’d like to send data from by selecting the corresponding variables from the menu. Then, proceed to map them with the key values in the POST requests (on the right):
This concludes the tutorial on field mapping for third-party integrations. If you have any questions or need help with field mapping, feel free to reach out to our tech Support team.