How to integrate widgets with Mailchimp
If you use Mailchimp for email marketing and Getsitecontrol forms to collect email addresses of your website visitors, you can easily connect the two apps to avoid manually exporting and importing data.
It’ll be enough to log in to your Mailchimp account and choose the necessary mailing list, and Getsitecontrol will add every new email subscriber to this list automatically.
Follow the easy steps below to set up your integration with Mailchimp.
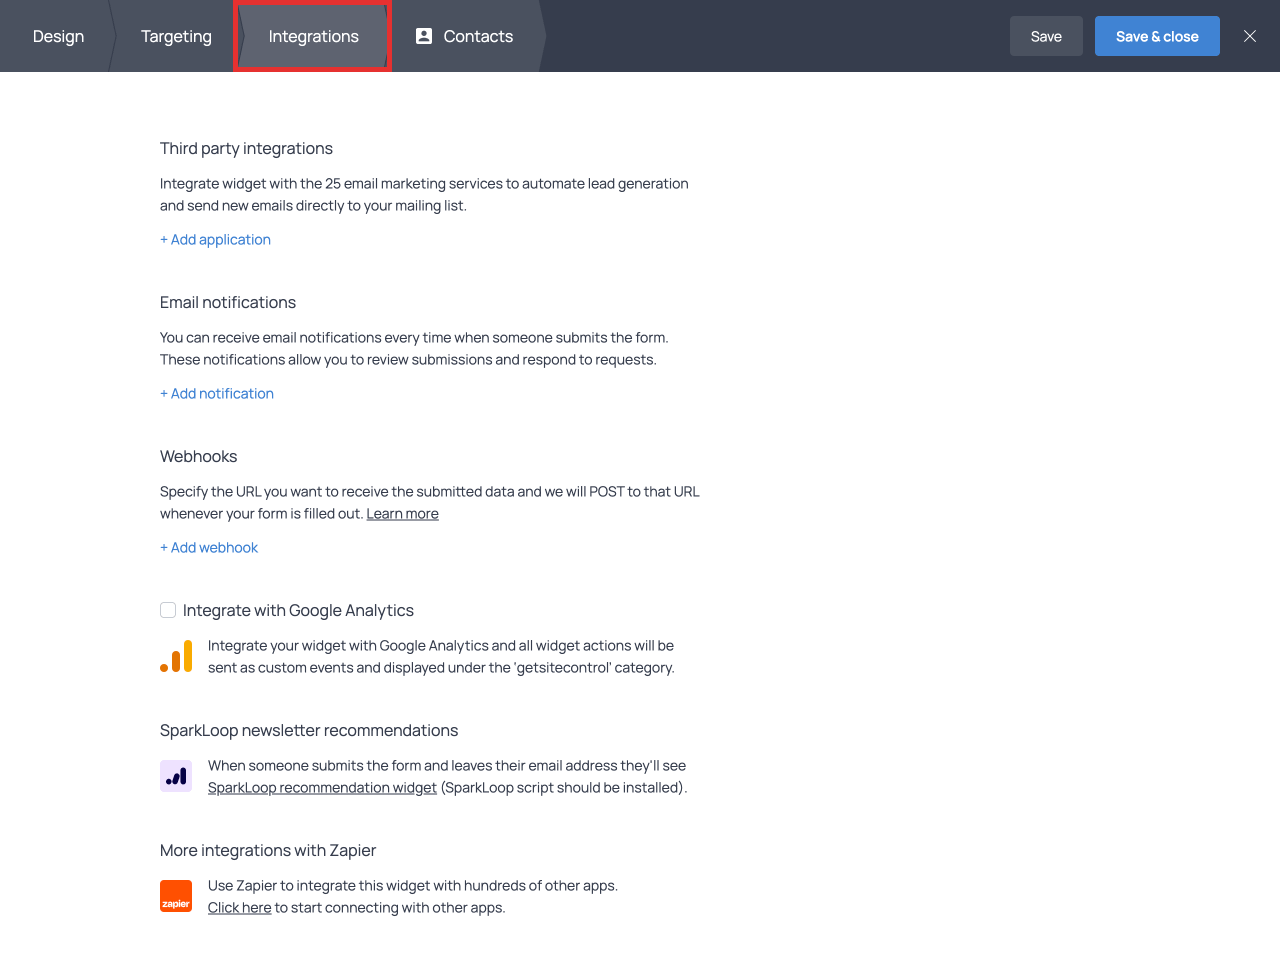
1. Find the Integrations tab
For starters, open the form you want to integrate with Mailchimp and find the Integrations tab in the top bar:
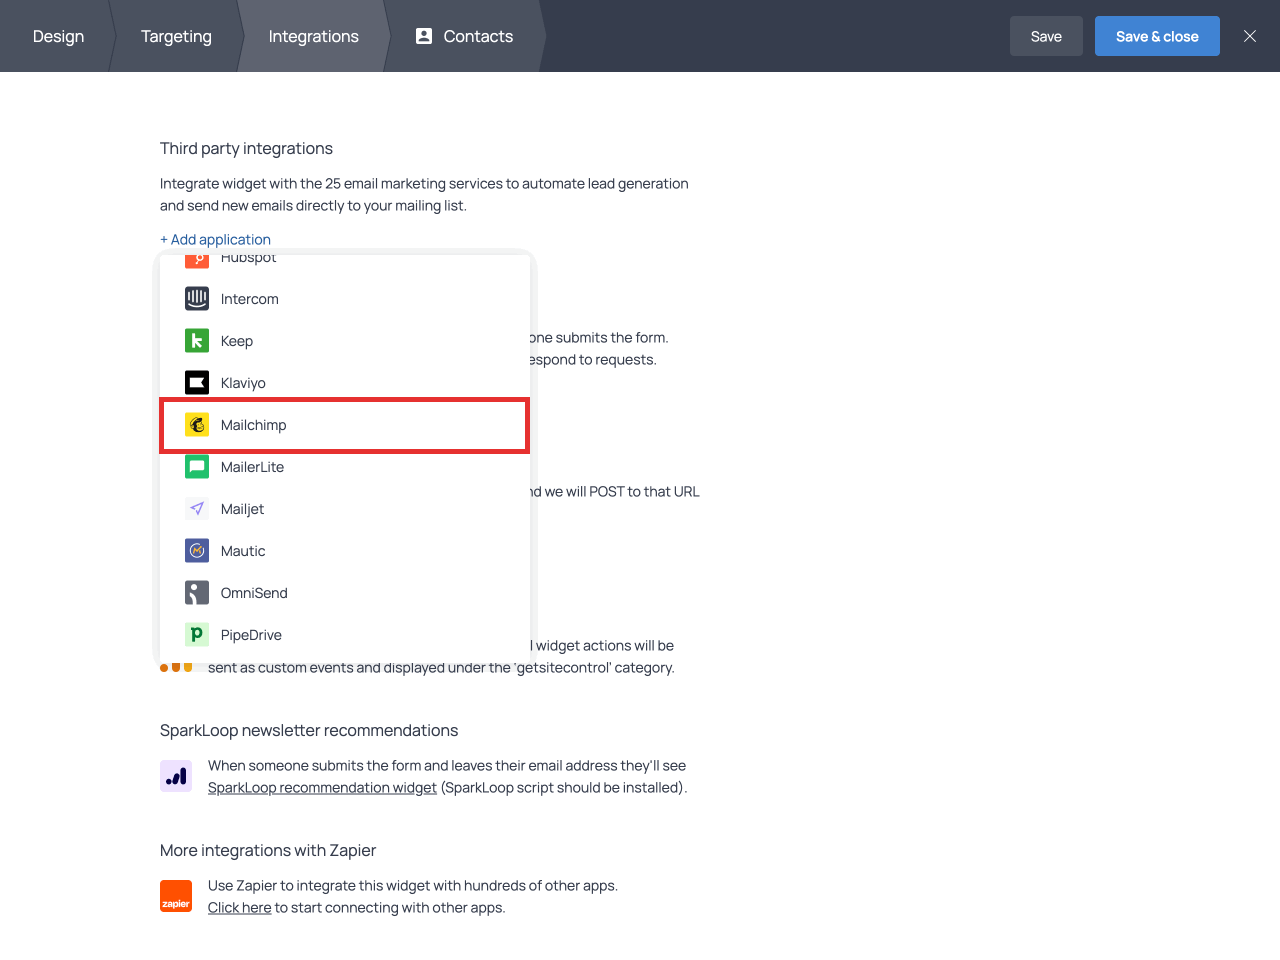
2. Connect your Getsitecontrol account to Mailchimp
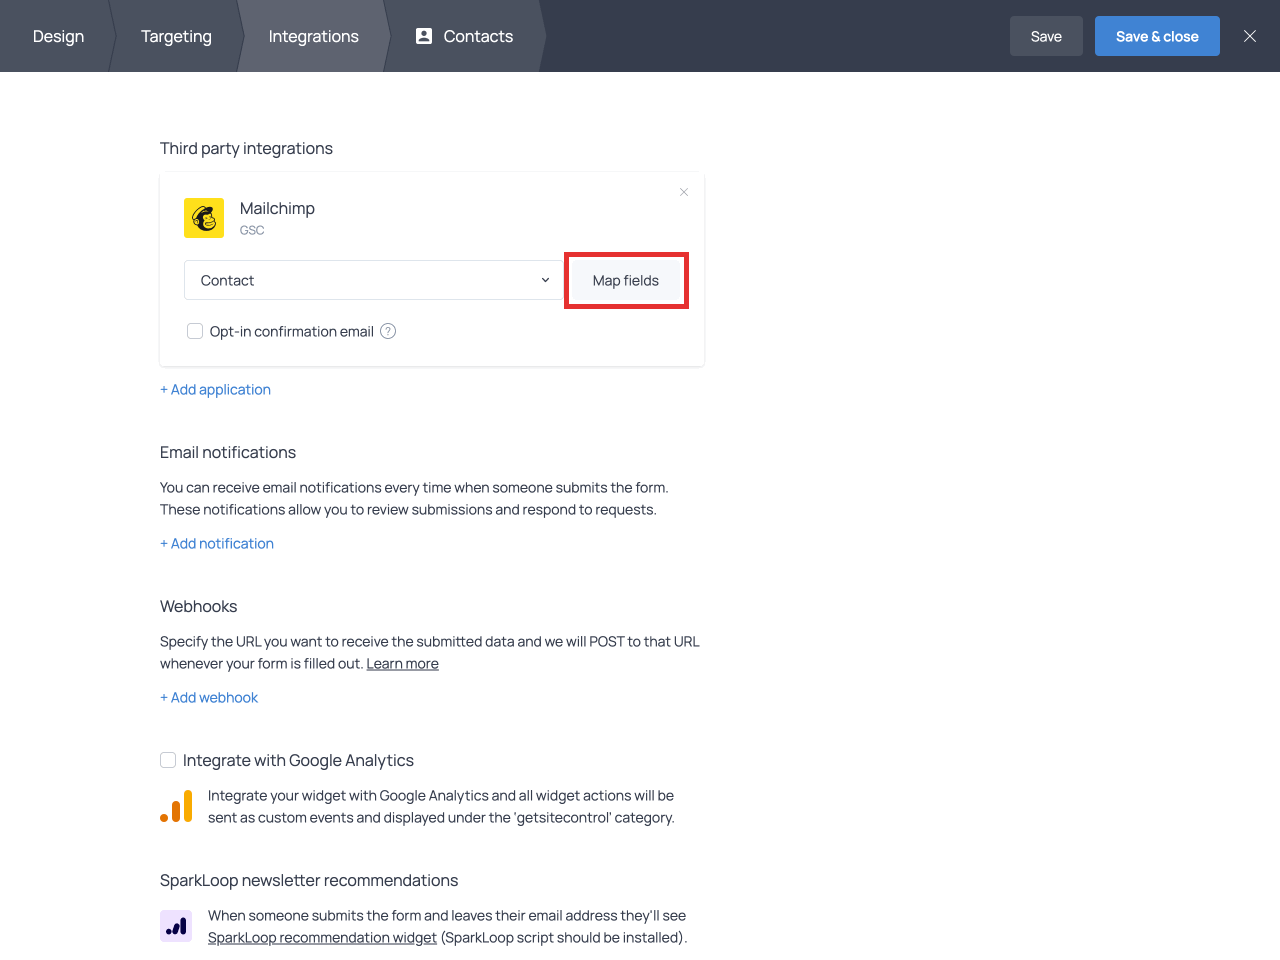
In the ‘Third party integrations’ section, click the + Add application link and choose Mailchimp from the drop-down list.
Log in to your Mailchimp account:
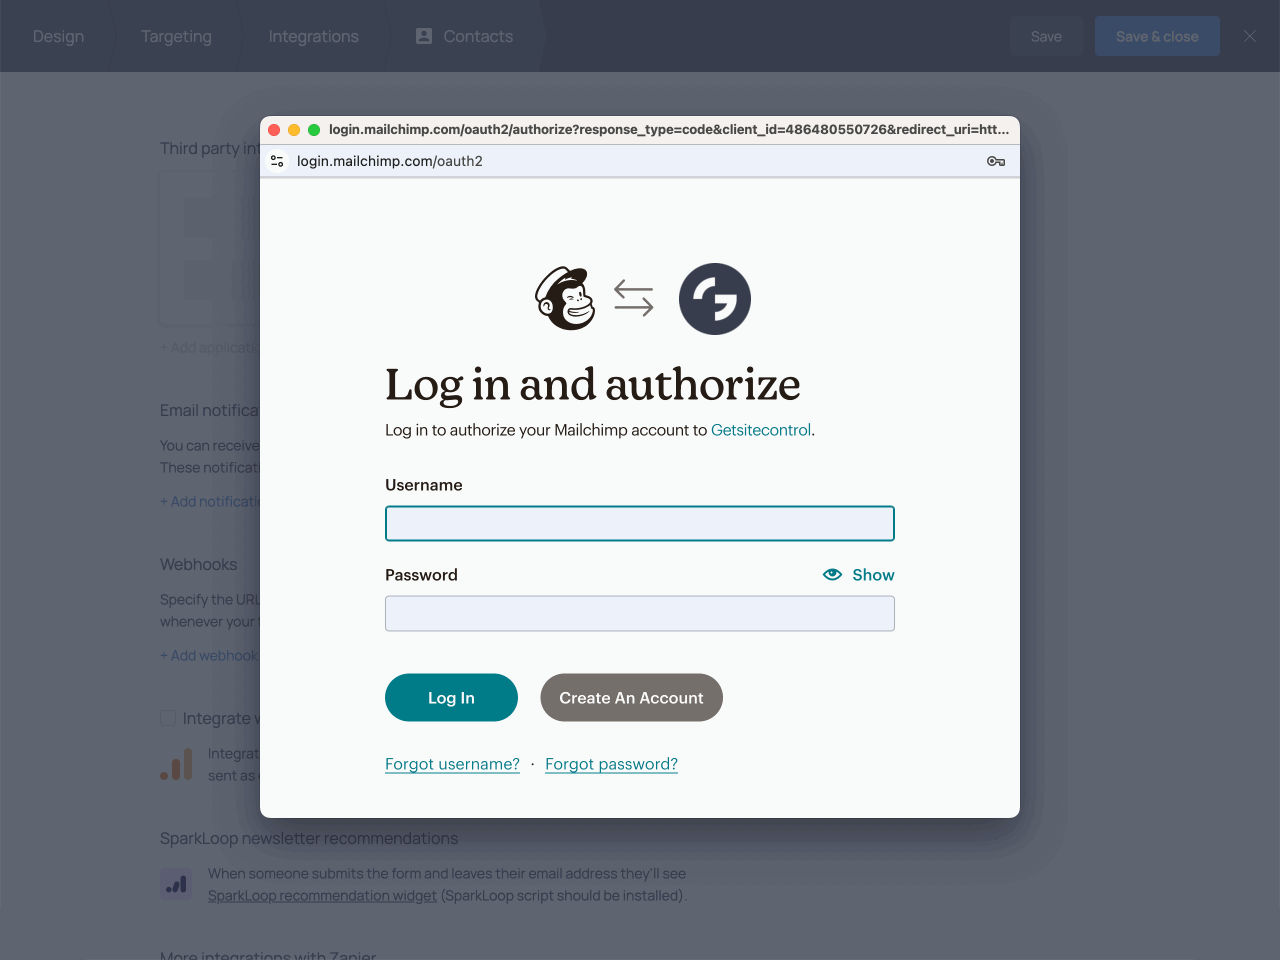
Proceed to authorize Getsitecontrol to access your Mailchimp account.

Now your accounts are connected.
3. Choose the list
Choose the Mailchimp list where you want the collected emails to be exported.
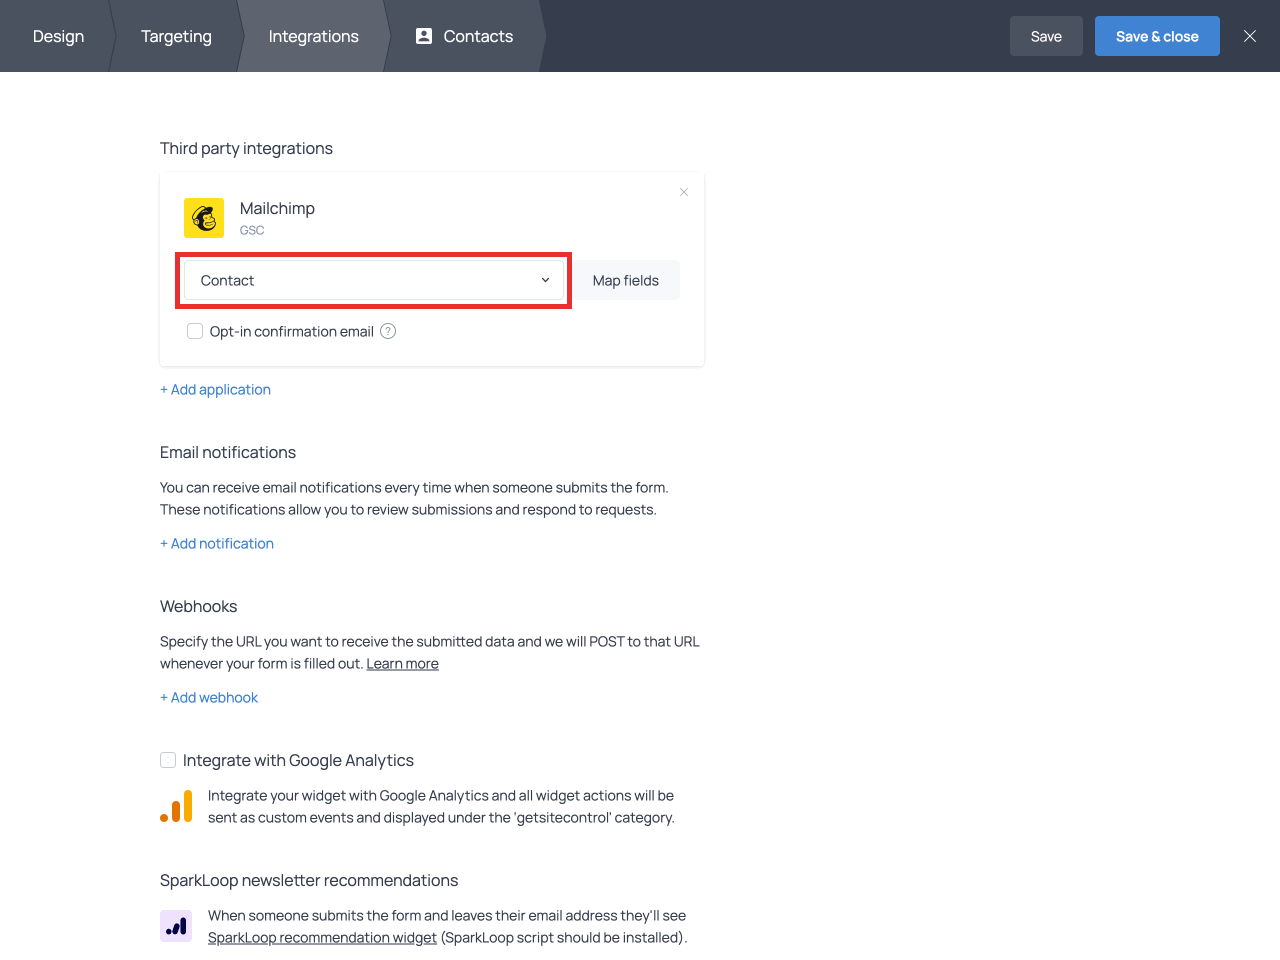
❗ You can also enable opt-in confirmation emails. In this case, all new subscribers will receive an email to confirm the subscription. If they don’t click the link in the email, they won’t be added to your list.
4. Map your form fields
Make sure your form fields are matched to the fields in the Mailchimp list. Click the Map fields button to open the field mapping settings:
Next, click the {var} icon next to a Mailchimp field and select the corresponding variable from the menu:
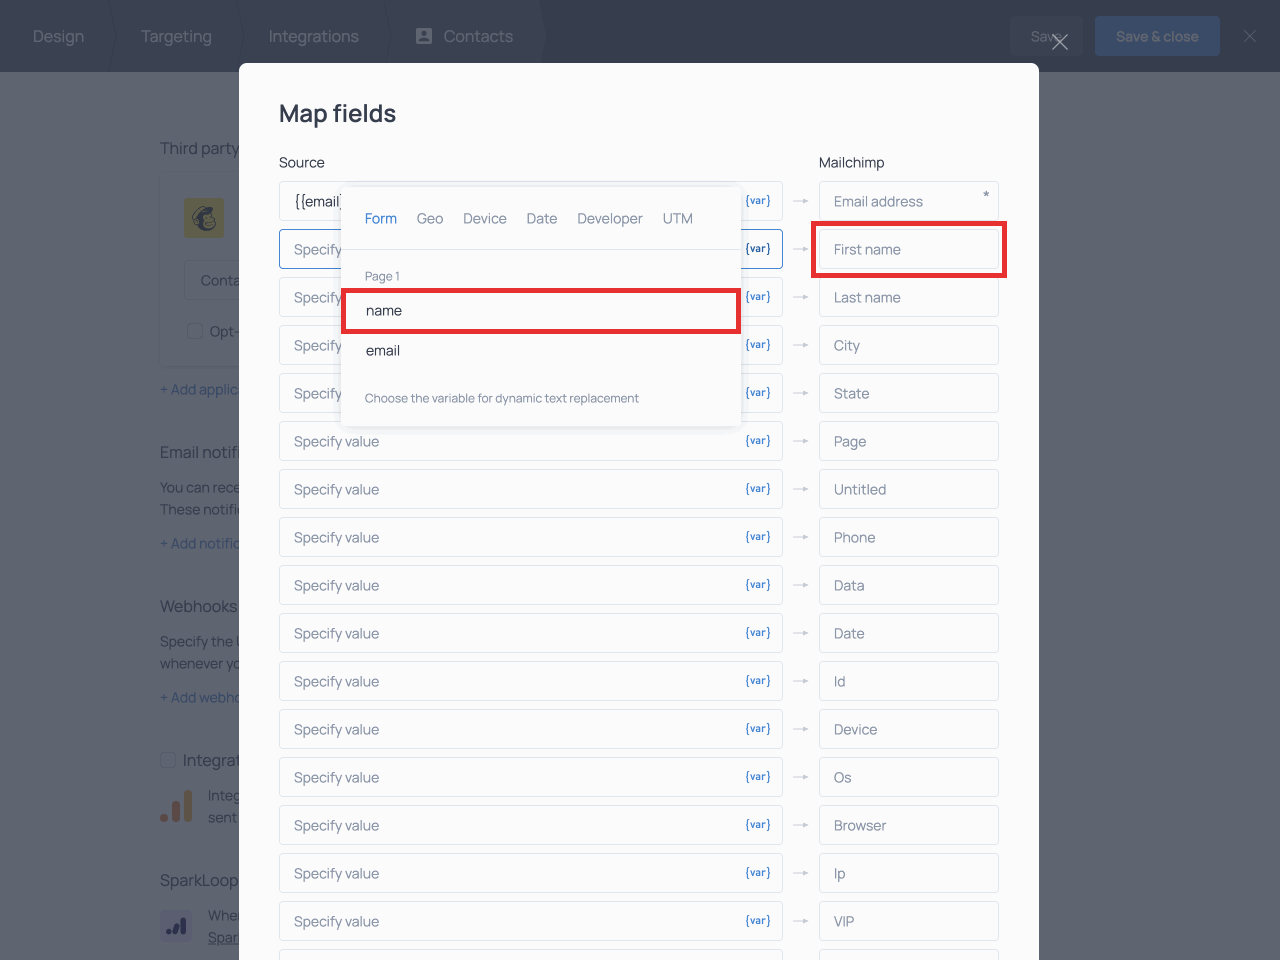
Your form fields will be listed under Form. The other tabs of the menu feature various system fields, including location, device type, current date, etc.
Repeat this process for all the fields you want to map.
📌 To learn more about field mapping for third-party integrations read this guide.
When you are done mapping the fields, click Save and then proceed to Save & close the form.
Your Mailchimp integration setup is now complete. Now all new contacts will be automatically sent to the list you have specified.
You can connect your form to more than one third-party application. Click the + Add application link to add another integration for the current form.
If you have issues setting up your Mailchimp integration, or performing any other task, feel free to message us. Our Tech Support team will be happy to help you!