How to use Dynamic Text Replacement
Dynamic Text Replacement (DTR) is a powerful feature to add personalization to your popups.
It allows you to create messages featuring the data you’ve collected from the visitor. That includes information they’ve submitted through the form, their location, products in their cart, current date, and so on.
In this guide, we’ll show you how to add dynamic text to widgets, cover the platform’s built-in variable options, and share some advanced DTR use cases. To navigate the sections of this article, use the shortcut menu below.
- 1. Adding a variable
- 2. Form
- 3. Geo
- 4. Device
- 5. Date
- 6. Developer
- 7. UTM
- 8. Shopify
- 9. Advanced options
Adding a variable to a widget
To display dynamic text on widgets, you need to add so-called “variables” to the text of the widget. Variables should appear in the text of widgets in the following format:
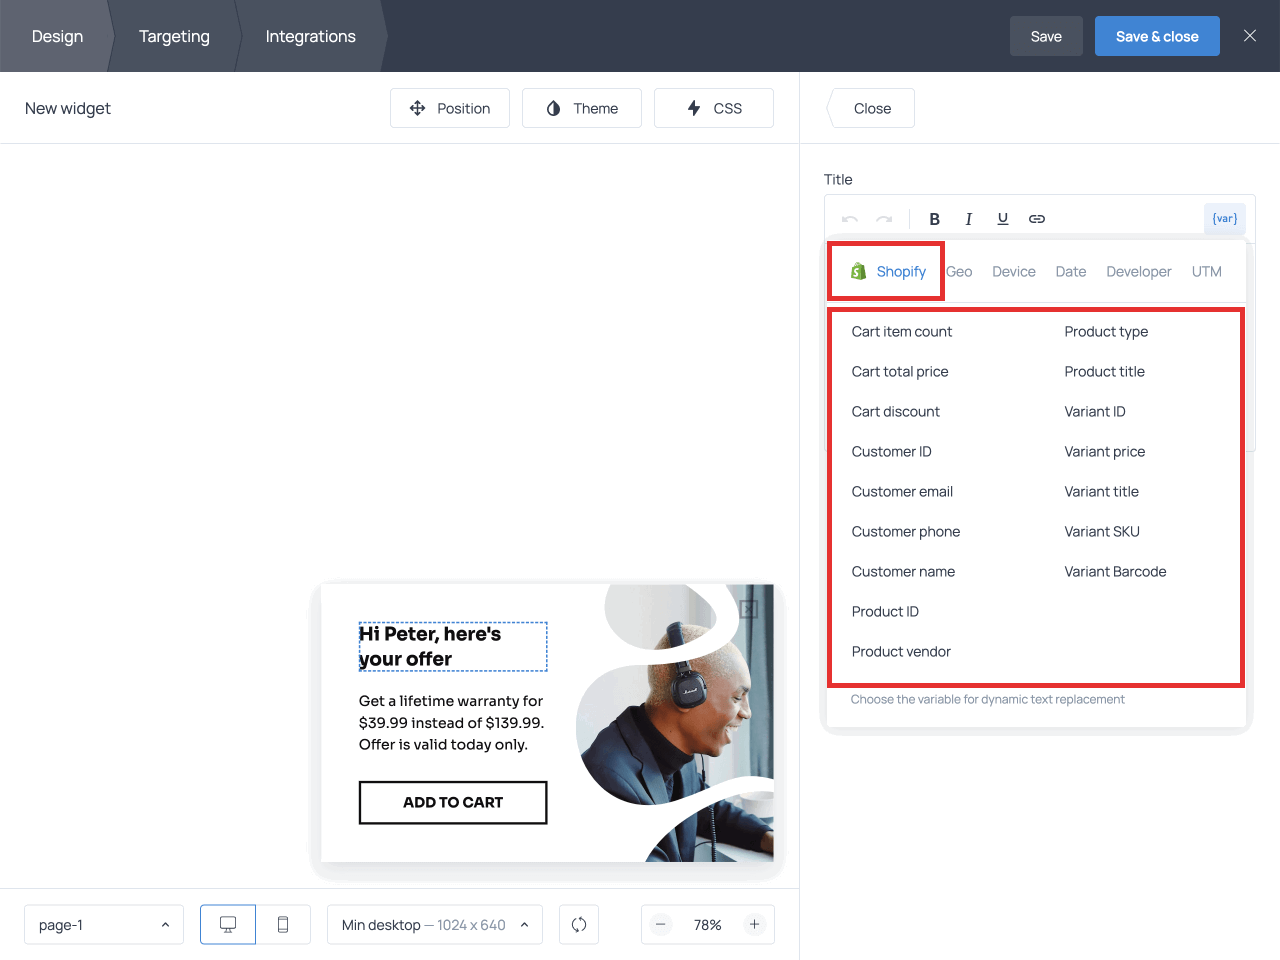
{{var}}To add a variable, select the necessary text element on the widget, click the {var} button, and select a variable from the list:
It’s possible to add variables to the following elements of your widget:
- title
- description
- note
- field labels
- field placeholder text
- field default value
- button URL
- follow-up email text
- follow-up email subject
- follow-up email preview
Depending on where on the widget you’re adding a variable, it can be displayed within a block or in curly brackets.
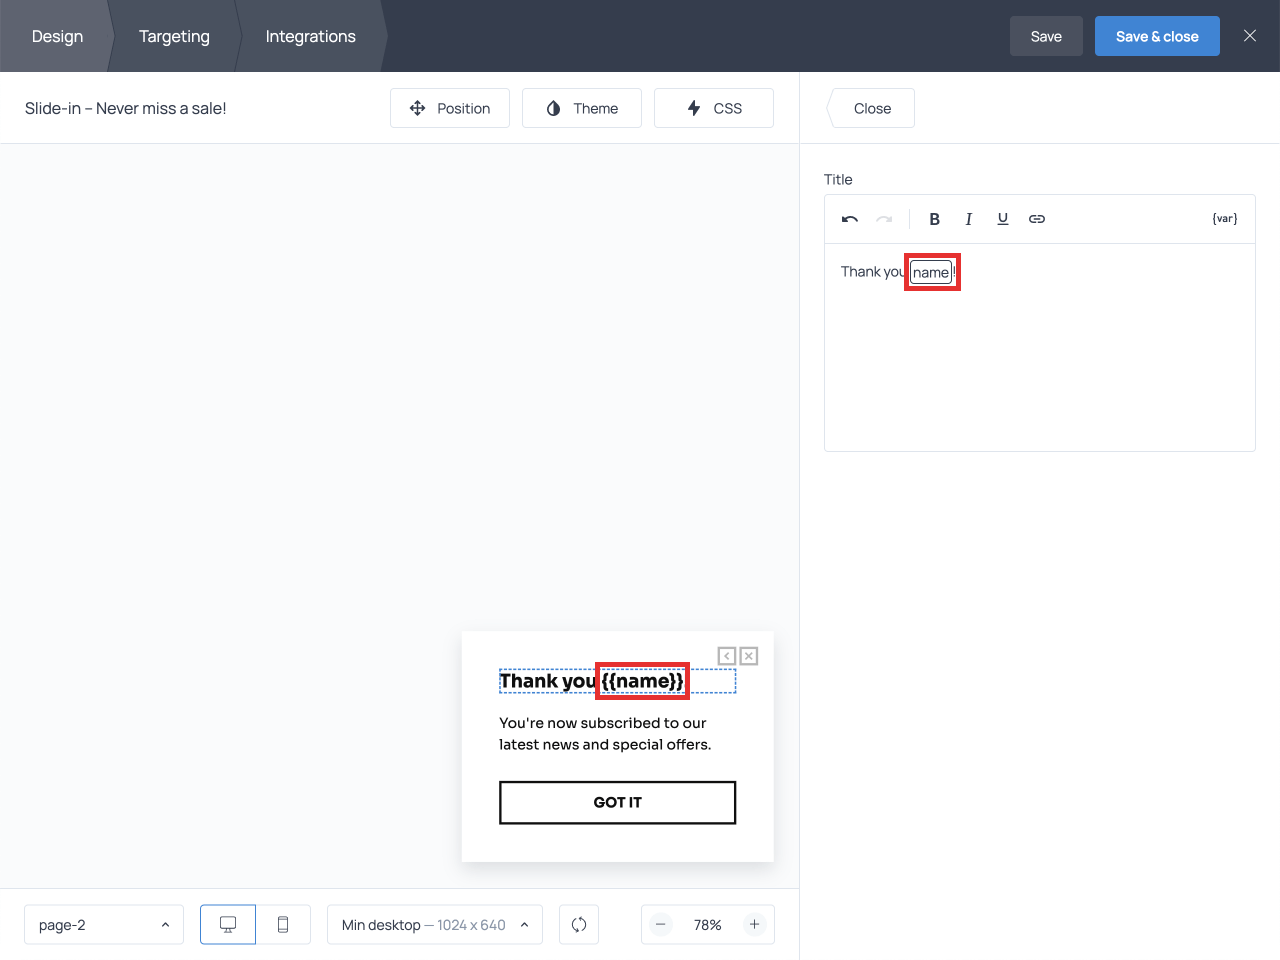
For example, when you add a variable to the title, description, and note fields, it will be displayed as a block:
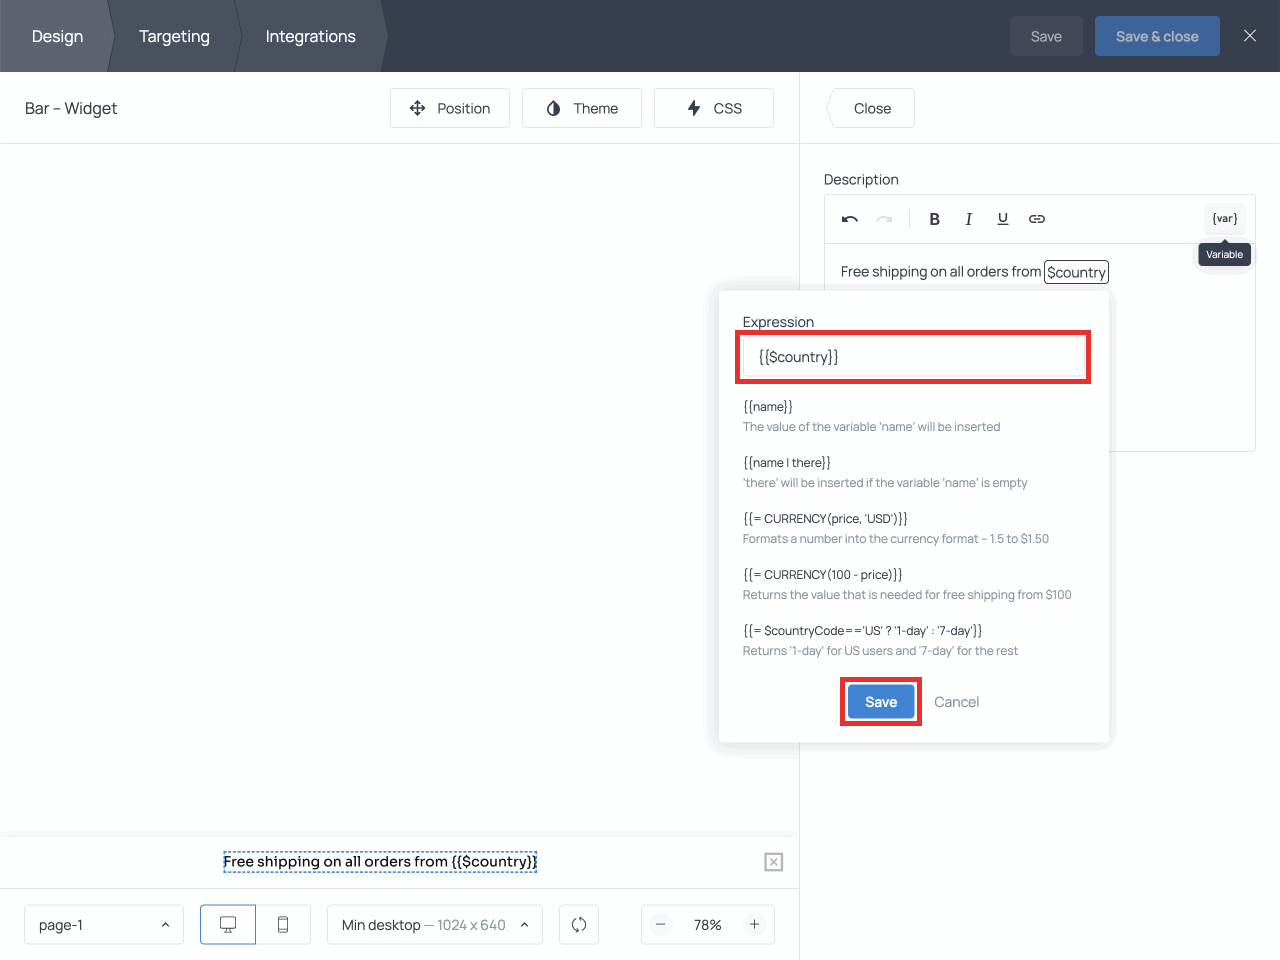
To edit this variable, click on its block and apply your changes to the Expression field (we’ll talk more about expressions in a few moments):
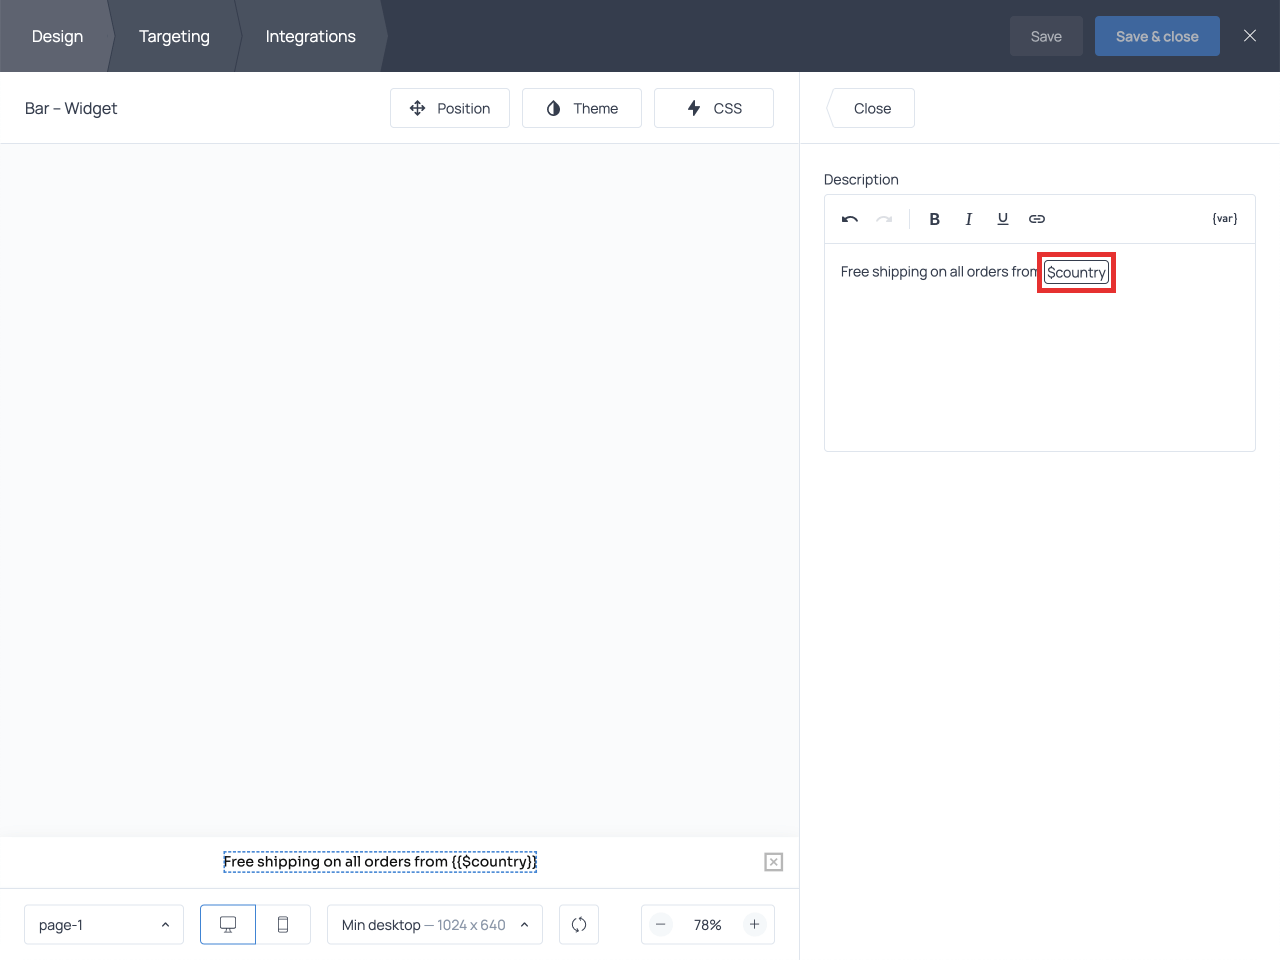
When you add a variable to a simple text field — the placeholder text field, the default value field, or the button URL field, for example — the variable will be displayed as simple text in curly brackets:
You can edit these variables as you would edit any other piece of text.
💡 It’s possible to add a default value that will be displayed if the variable is empty (i.e. there is no data in the system to show for that variable). In that case, you should express the variable in the following format:
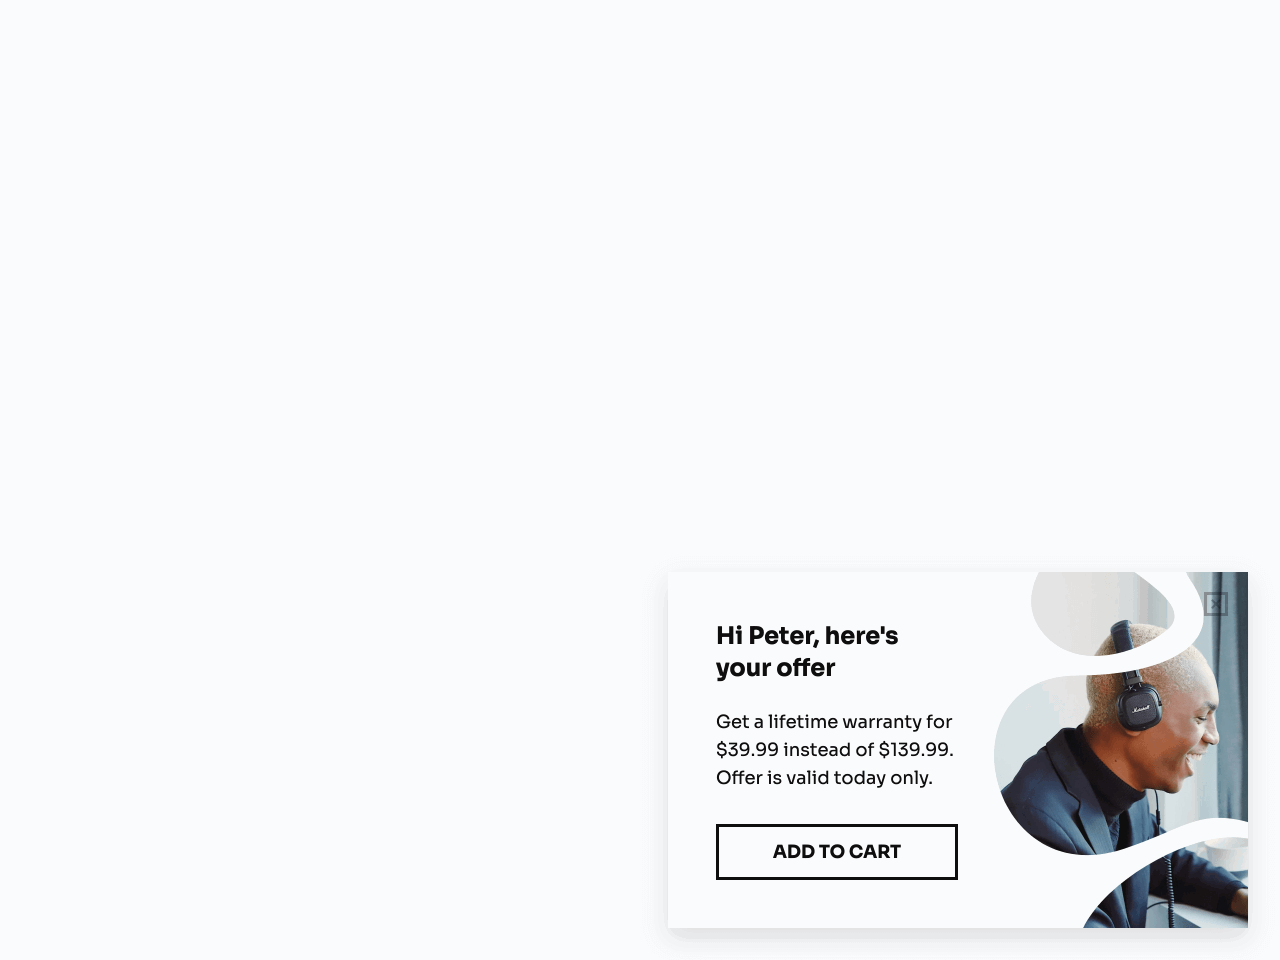
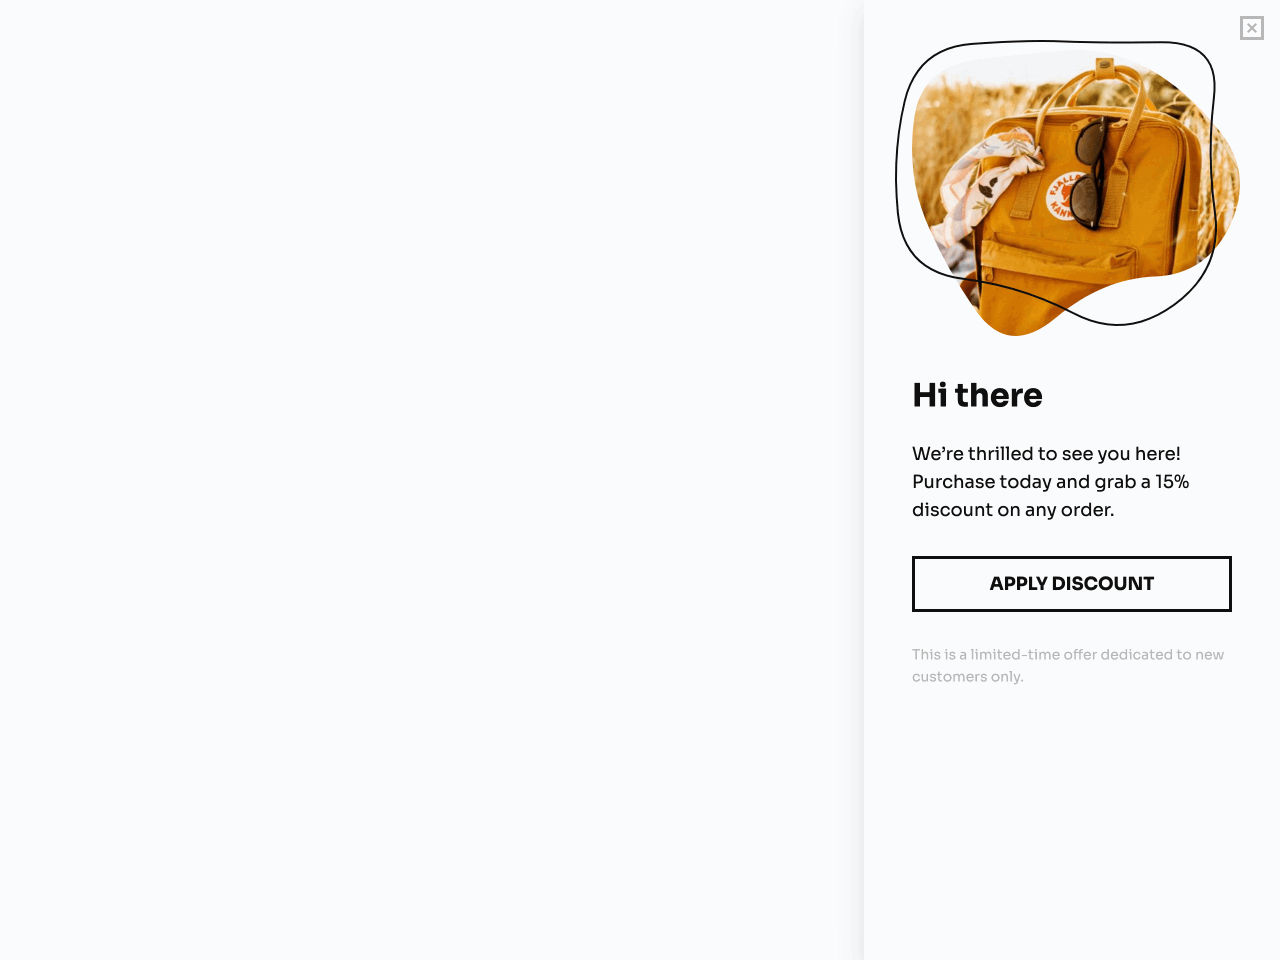
{{var | default}}For example, the following expression allows you to display the text “Hi there!” instead of “Hi (name)!” if there is no data to display for the {{name}} variable:
{{name | there}}This is what the visitor will see if their name is not in the database:
In the upcoming sections, we’ll discuss variable subsets from the built-in {var} menu in detail. Then, we’ll proceed to introduce some advanced options.
Form data
Form variables allow you to use the information a visitor has previously submitted through the form.
For example, if you are collecting names on the first page of a form, you can display the name entered by the visitor on the submission success page of the same form:
The Form subset of variables features the IDs of all fields in the form:
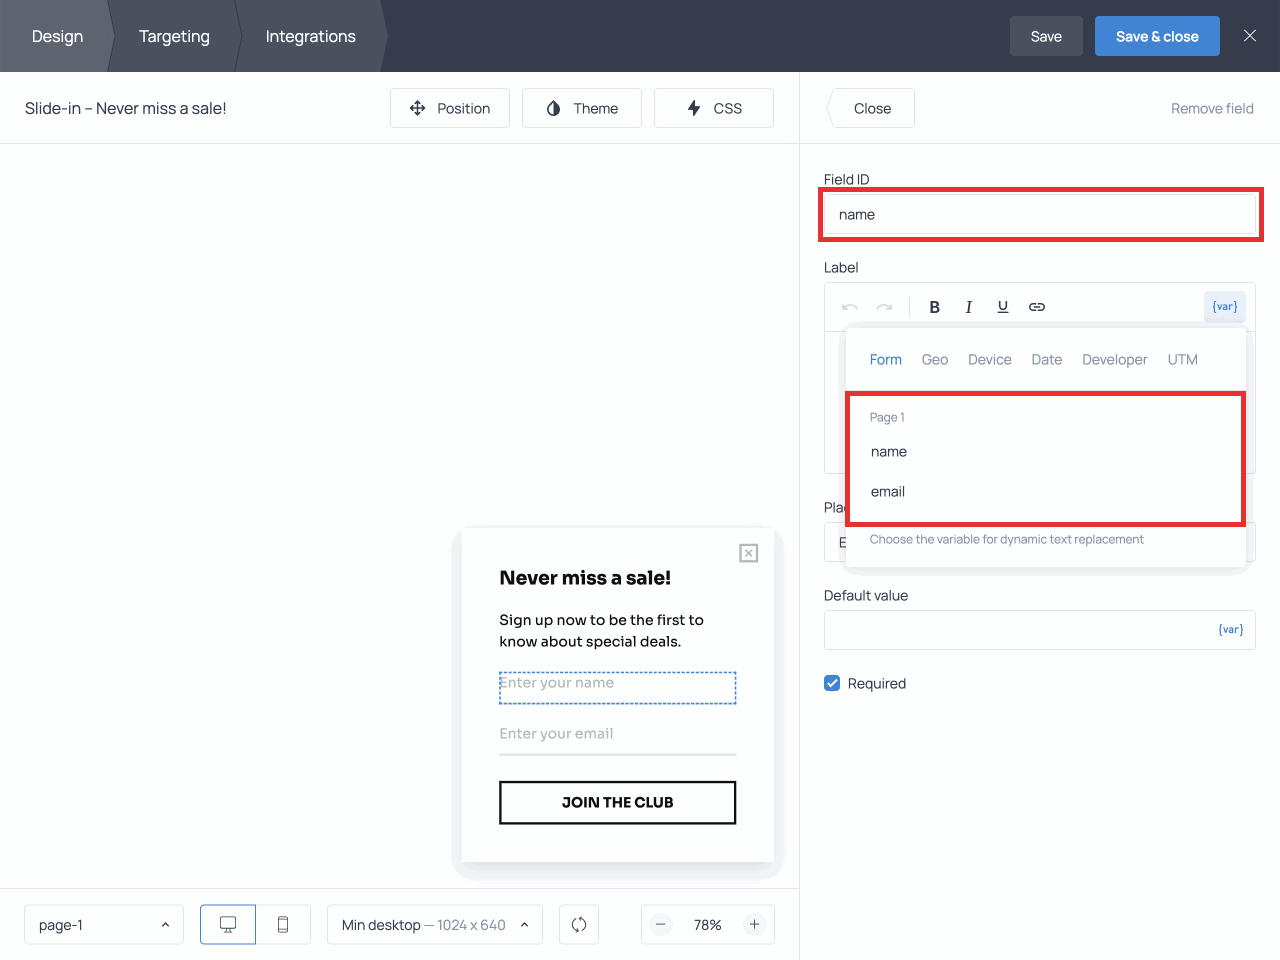
To display the data collected by a specific field, select its ID from the {var} menu when adding it to the text.
Geo
The variables from the Geo subset allow you to display the visitor’s location on the widget.
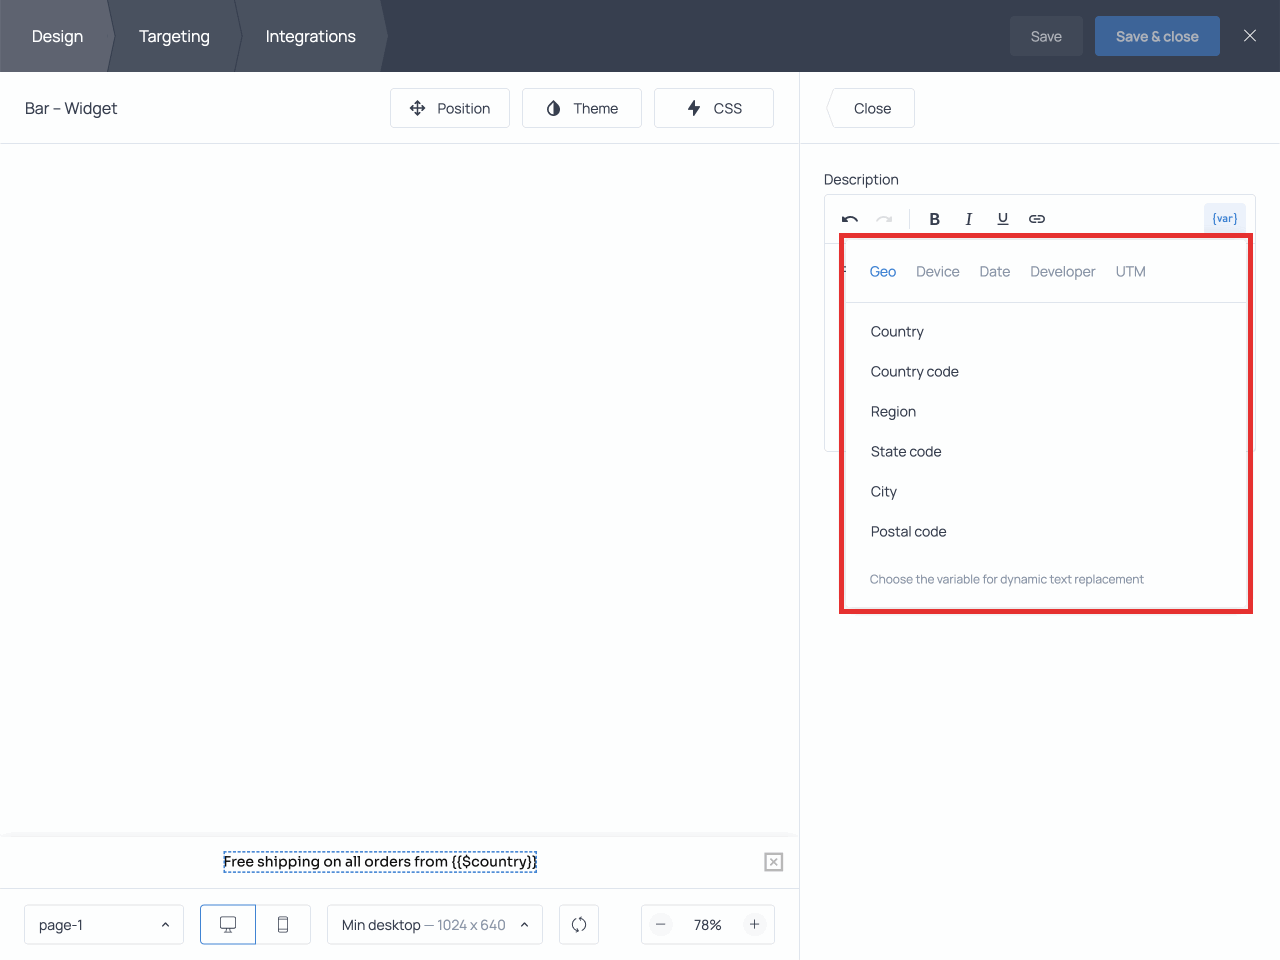
For example, you can display your visitors’ current city on a free shipping bar. To do that, choose the City variable from the list:
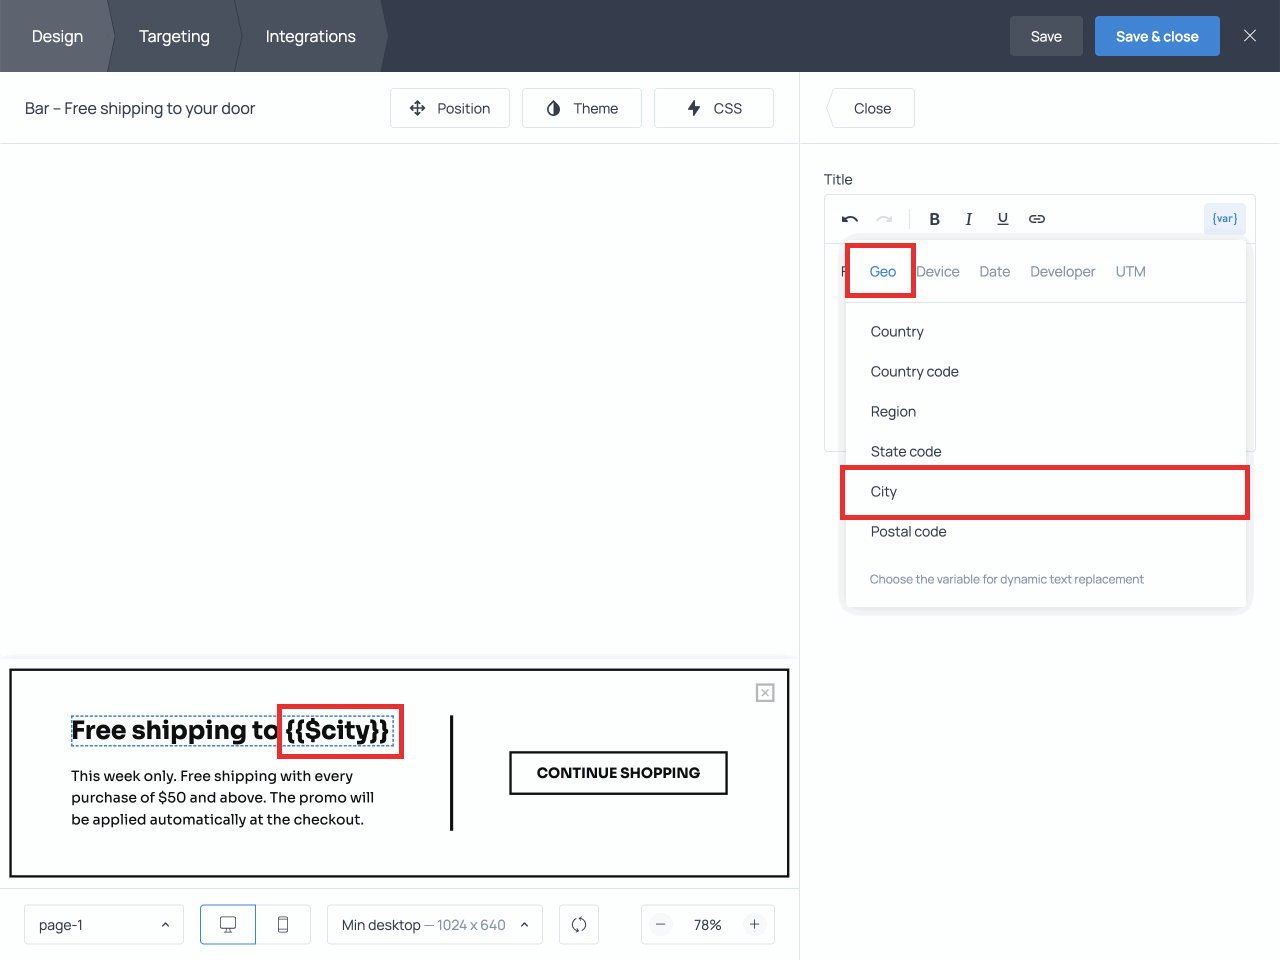
Other options from the Geo variable subset include:
- Country
- Country code
- Region
- State code
- Postal code
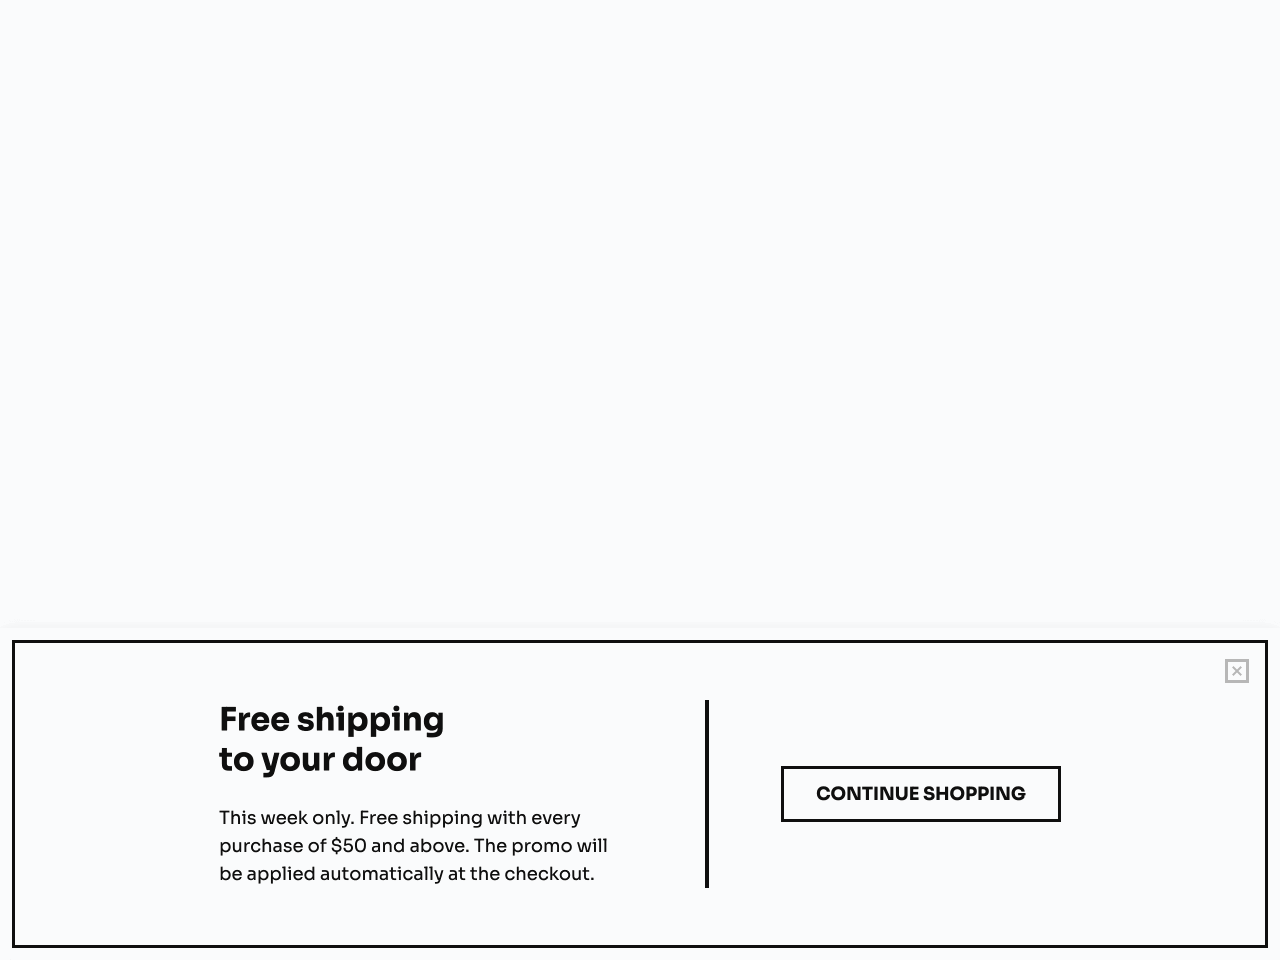
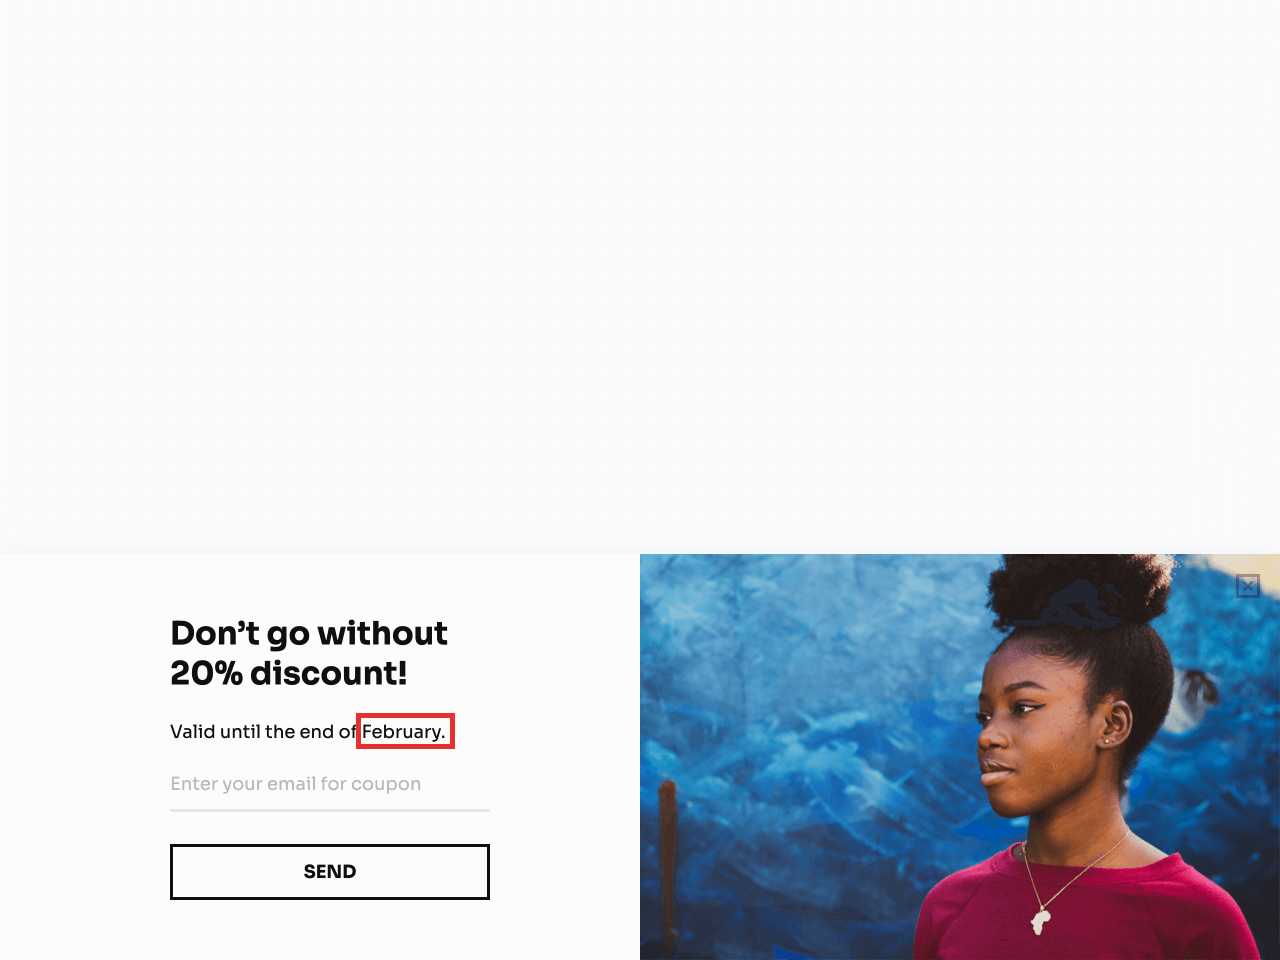
💡 We recommend expressing location-based variables in the following format:
{{$city | your door}}This way, if the visitor is hiding their location, the popup will display a message like this one:
Device
The variables from the Device subset let you display personalized messages based on the visitor’s device properties and settings.
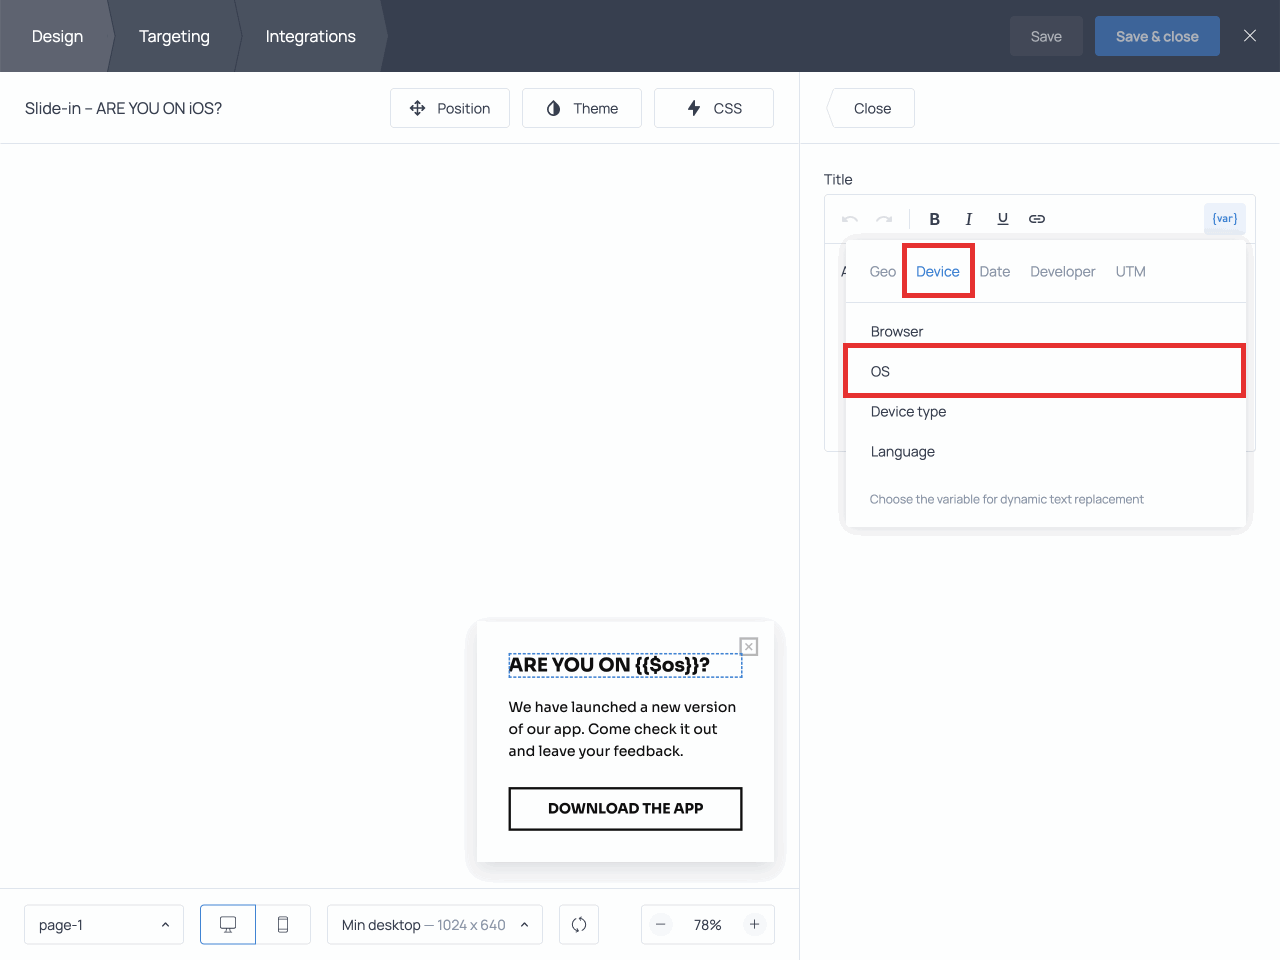
For example, let’s say you want to display your visitor’s operating system on the widget, and open a different link via a button click depending on the visitor’s OS.
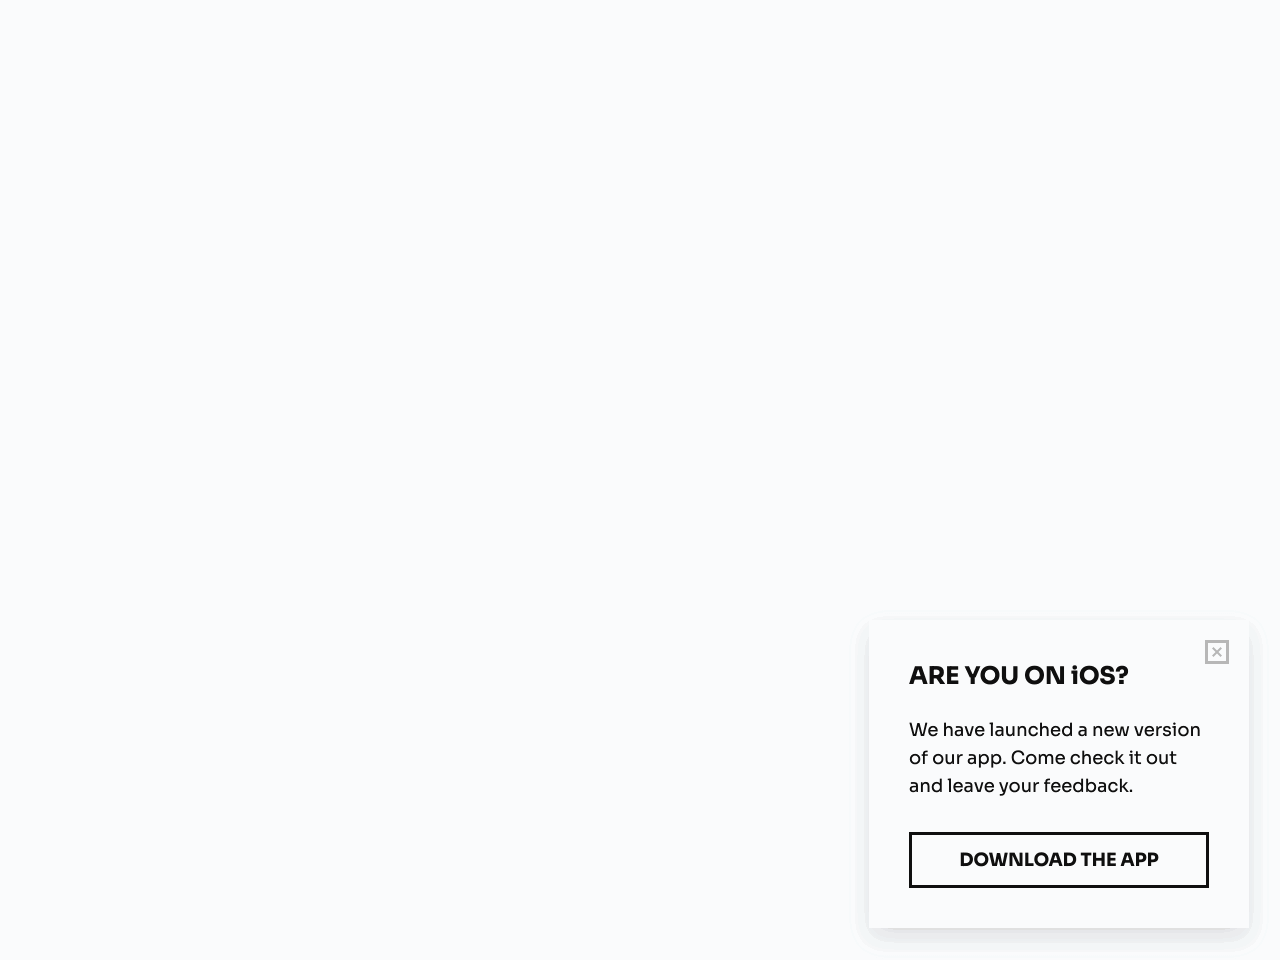
To set up this scenario, choose the OS variable from the menu and add it to the widget’s text:
Then, to set up the button to open the link corresponding to the visitor’s OS, proceed as follows:
- Open the settings of your action button by clicking on it
- Click + Add action and choose Open URL from the dropdown menu
- Paste the JavaScript expression below into the URL field:
{{!= $os == 'iOS' ? 'https://apps.apple.com/your-app' : 'https://play.google.com/your-app'}}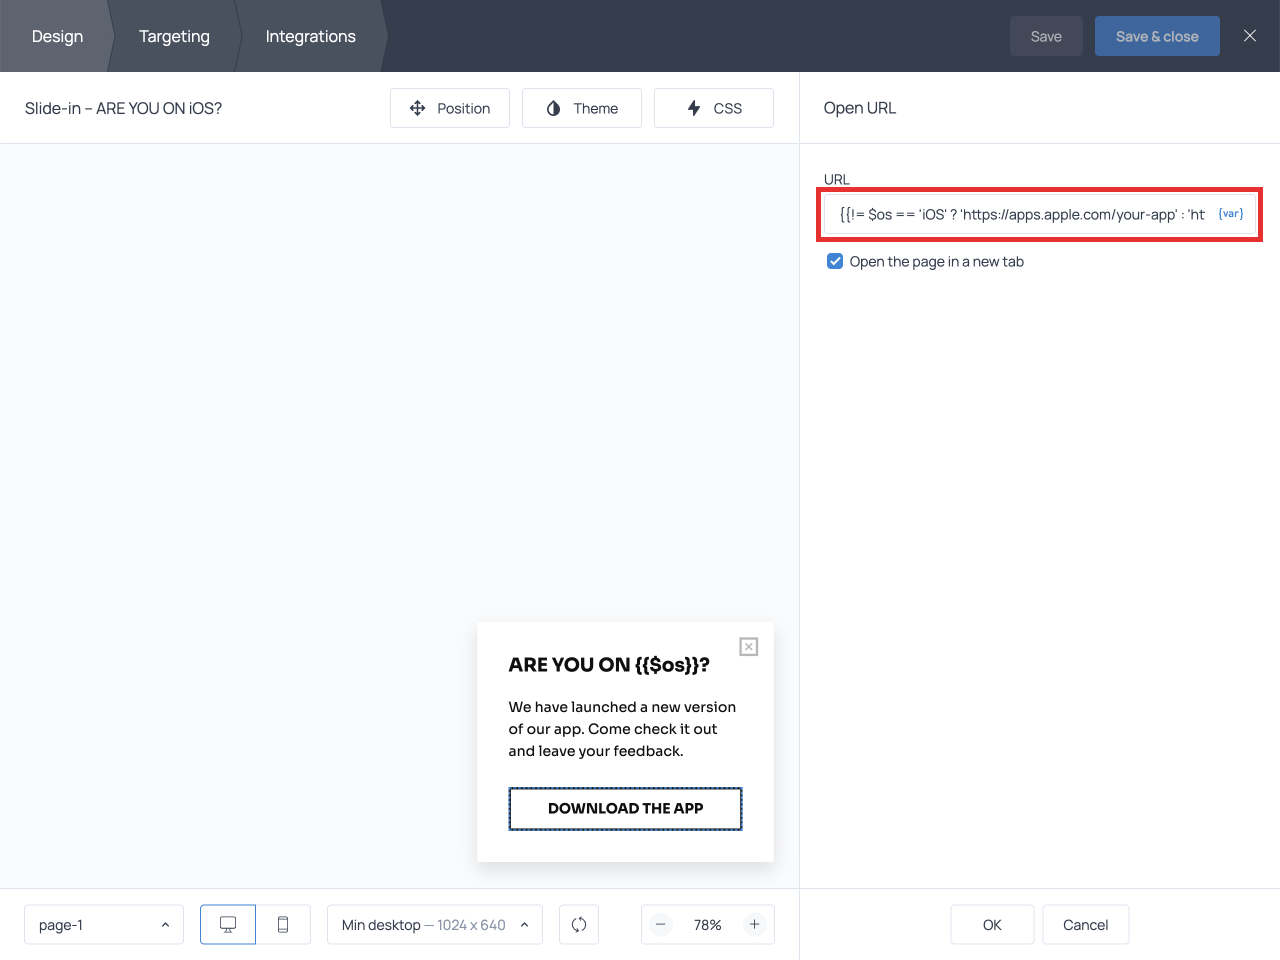
Now Android users will be redirected to Google Play, and iOS users will be taken to the App Store.
To learn more about using JavaScript expressions, check out the section dedicated to them.
Here are other variables you can use in the text of your widget from the Device subset:
- Language
Displays the language set from the visitor’s browser. - Browser
Displays the name of the browser the visitor is using. - Device
Displays the visitor’s device name, e.g. iPhone. - Device
Type displays the visitor’s device type, e.g. Desktop, Mobile, or Tablet.
Date
Date variables allow you to show the current date based on the visitor’s system settings.
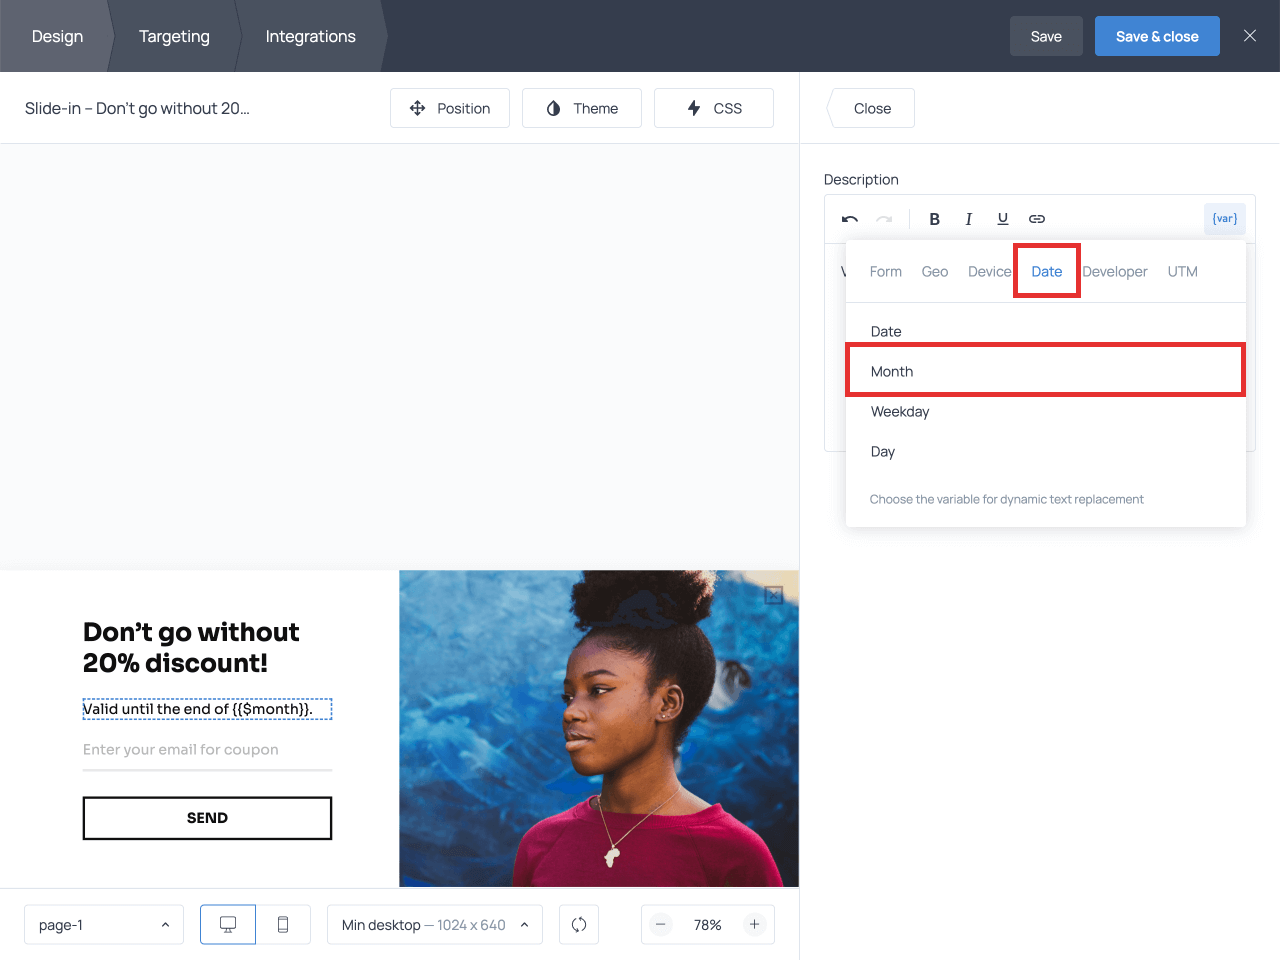
For example, you may want to display the current month as the ending date of a promo to add urgency to your offer:
To set this up, switch to the Date subset of variables in the menu, and proceed to select Month
Below are the other variables in the Date subset:
- Date displays the current date, e.g. 02/23/2023.
- Weekday displays the current day of the week, e.g. Thursday.
- Day displays the day of the month, e.g. 23.
Developer
The Developer variables allow you to use custom API parameters to display the information you have in your database about the visitor.
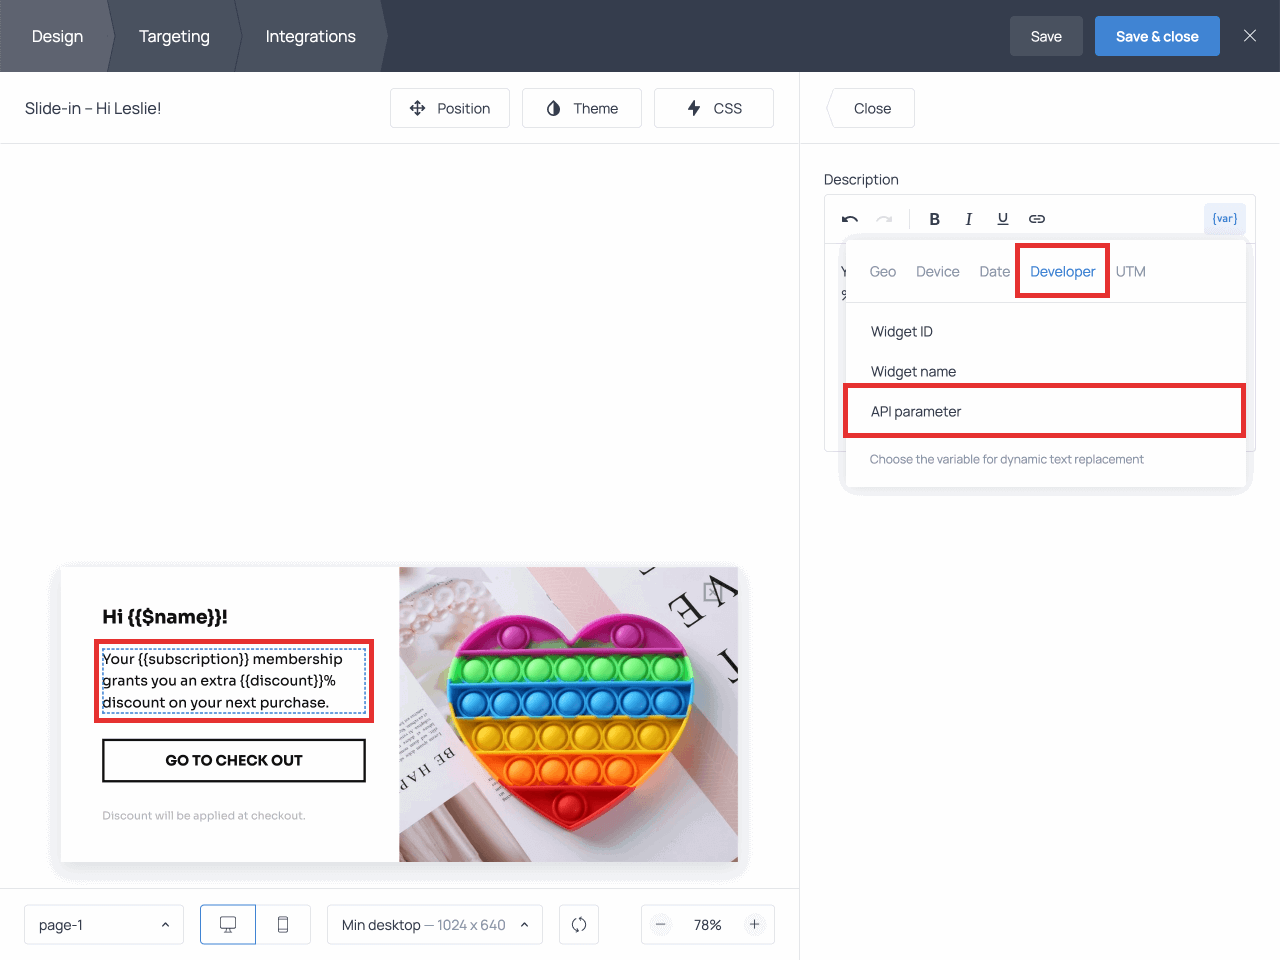
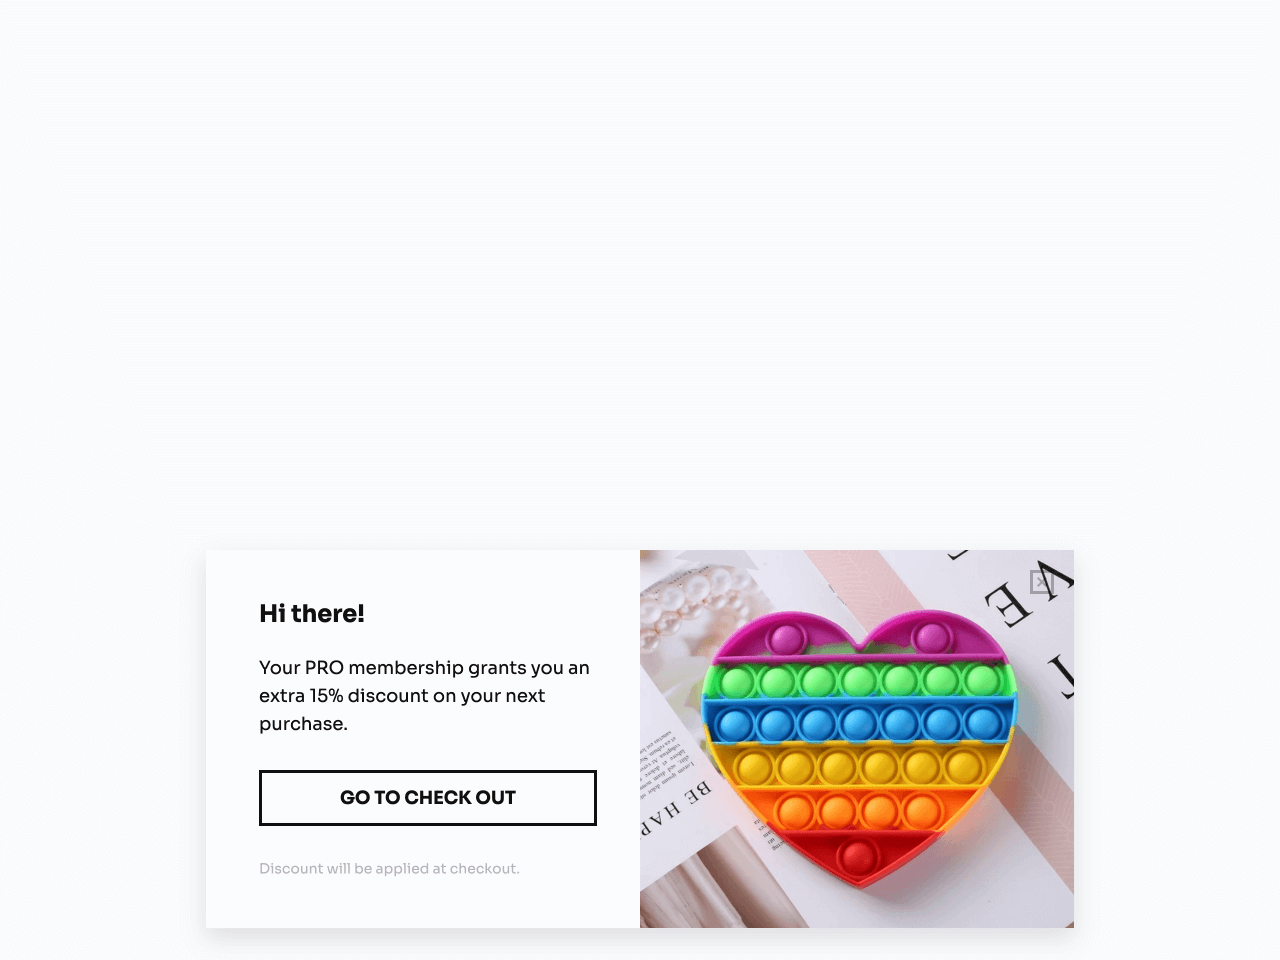
For example, you can display the visitor’s name, subscription status, and their personal discount, as in the example below:
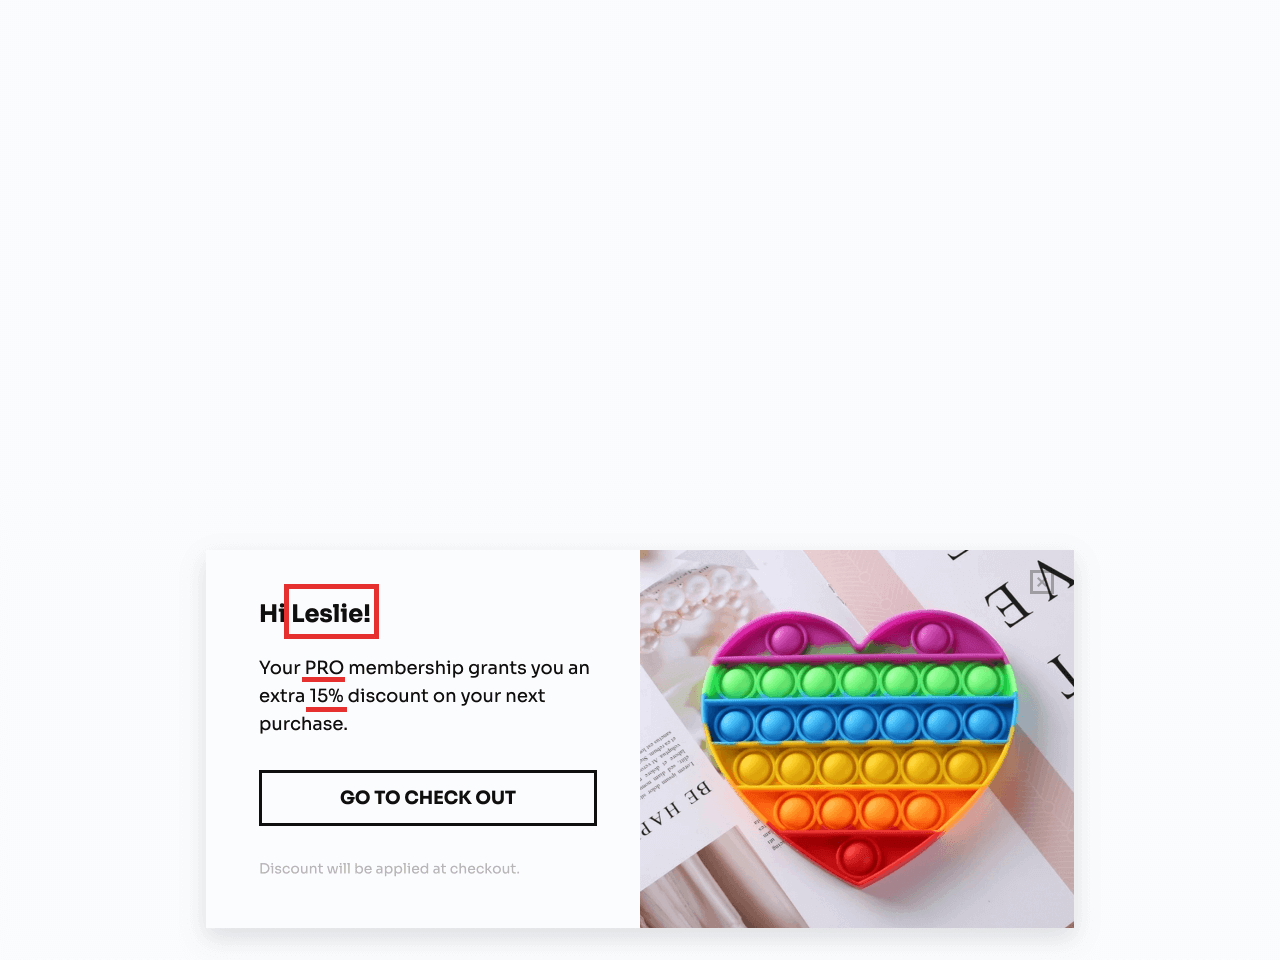
To set up custom variables like these ones, select API parameter from the Developer variable subset in the menu:
💡 You can set a default alternative text to display in case there is no value to show for one of the Developer variables, like the visitor’s name, for example:
{{name | there}}This is the message your visitors will see if their name is not in your database:
You will find detailed instructions on how to use the Getsitecontrol API feature in this guide.
UTM
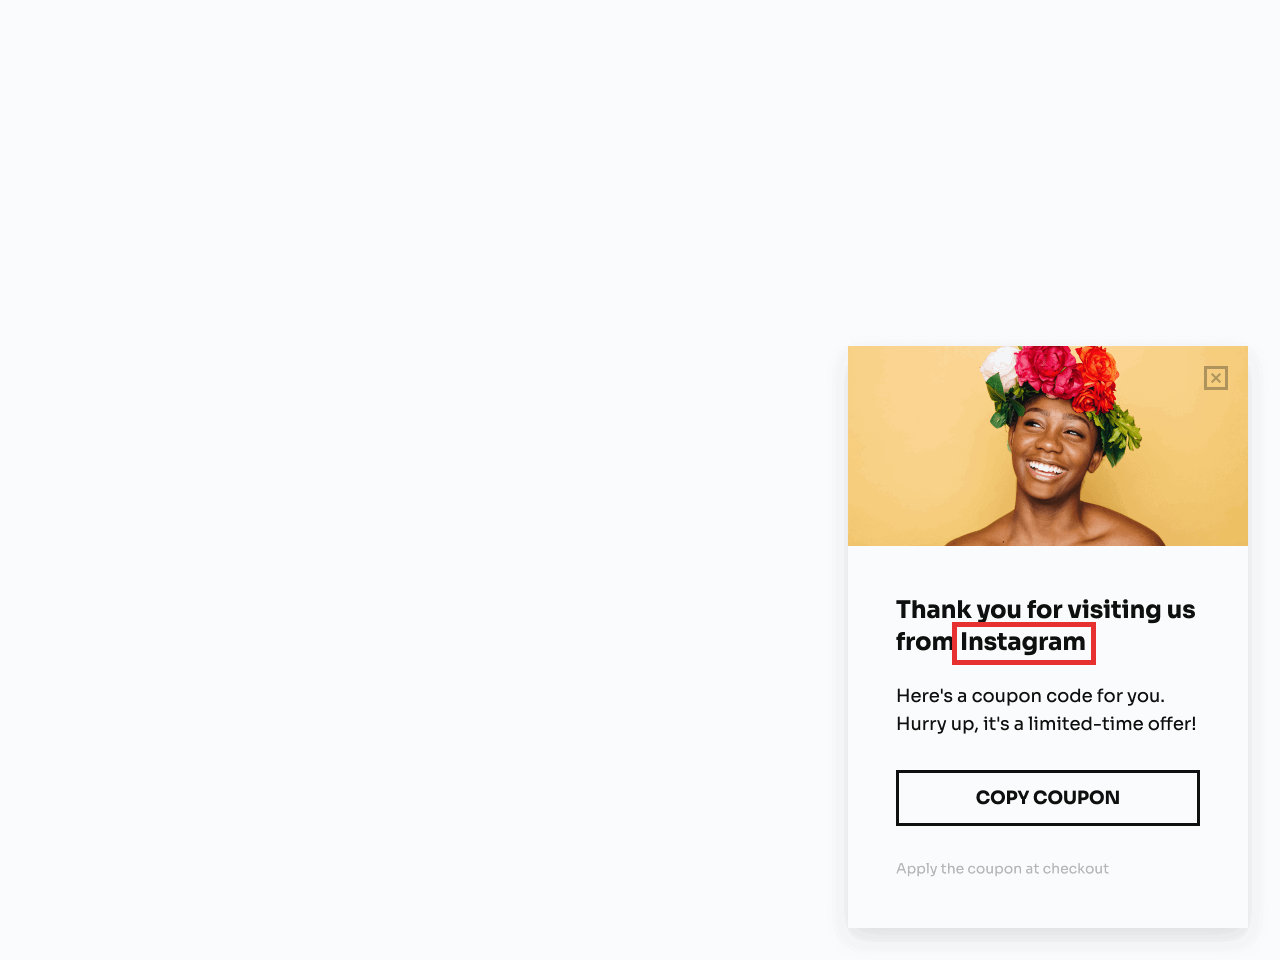
The UTM variables allow you to display the source the visitor is coming from, the marketing channel, the campaign, or specific keywords.
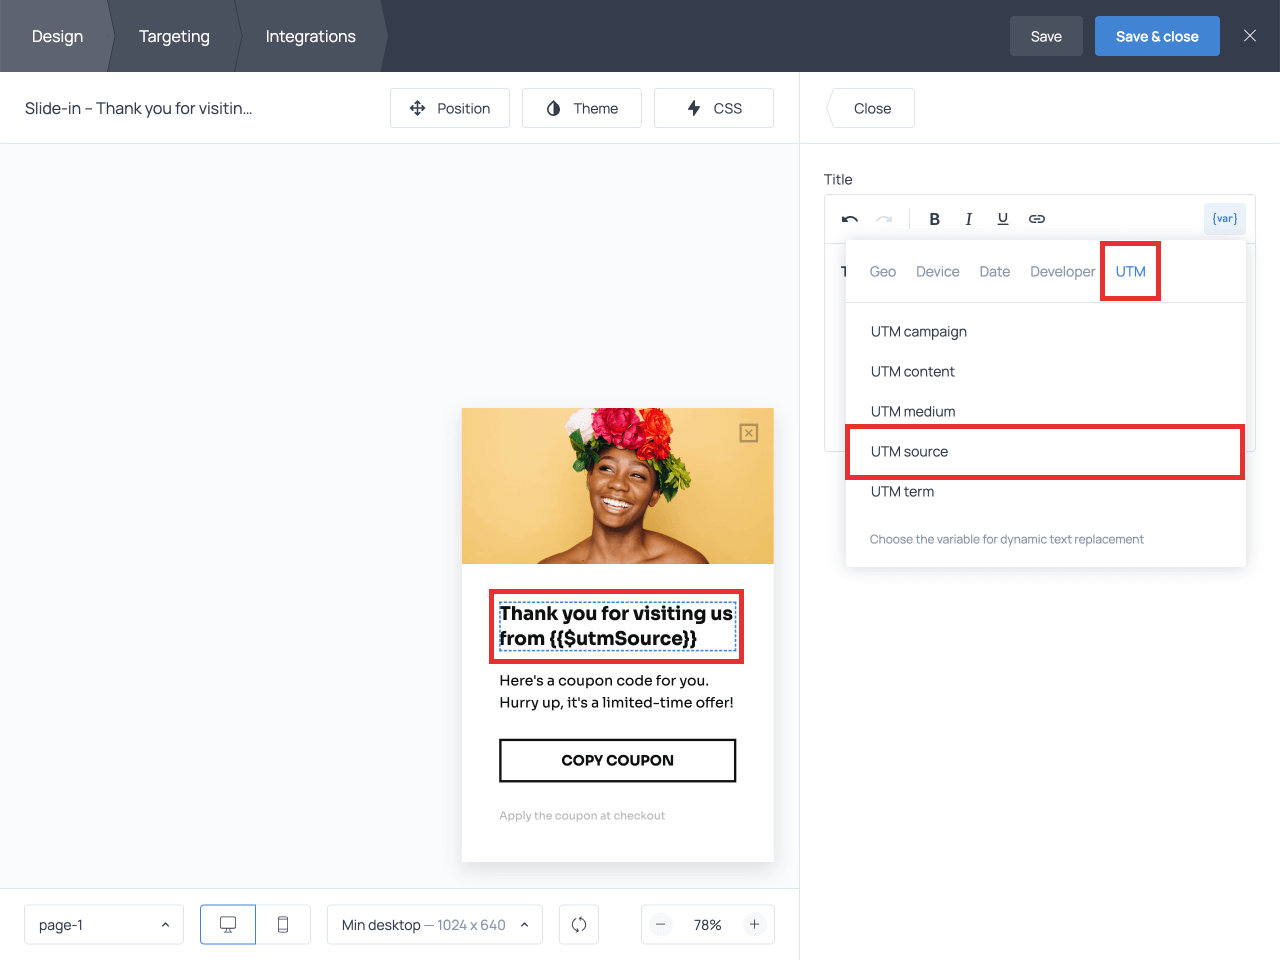
For example, you can use a UTM Source variable to display the source a visitor is coming from and greet them with a personalized message:
To set this up, select UTM Source from the UTM subset of variables in the menu:
This subset includes variables for all other UTM tags as well, namely:
- UTM Medium
- UTM Campaign
- UTM Content
- UTM Term
Shopify
If you’re on Shopify, you’ll find an extra subset of variables labeled Shopify in your menu.
In the following sections, we’ll discuss popular use cases for the variables in this category.
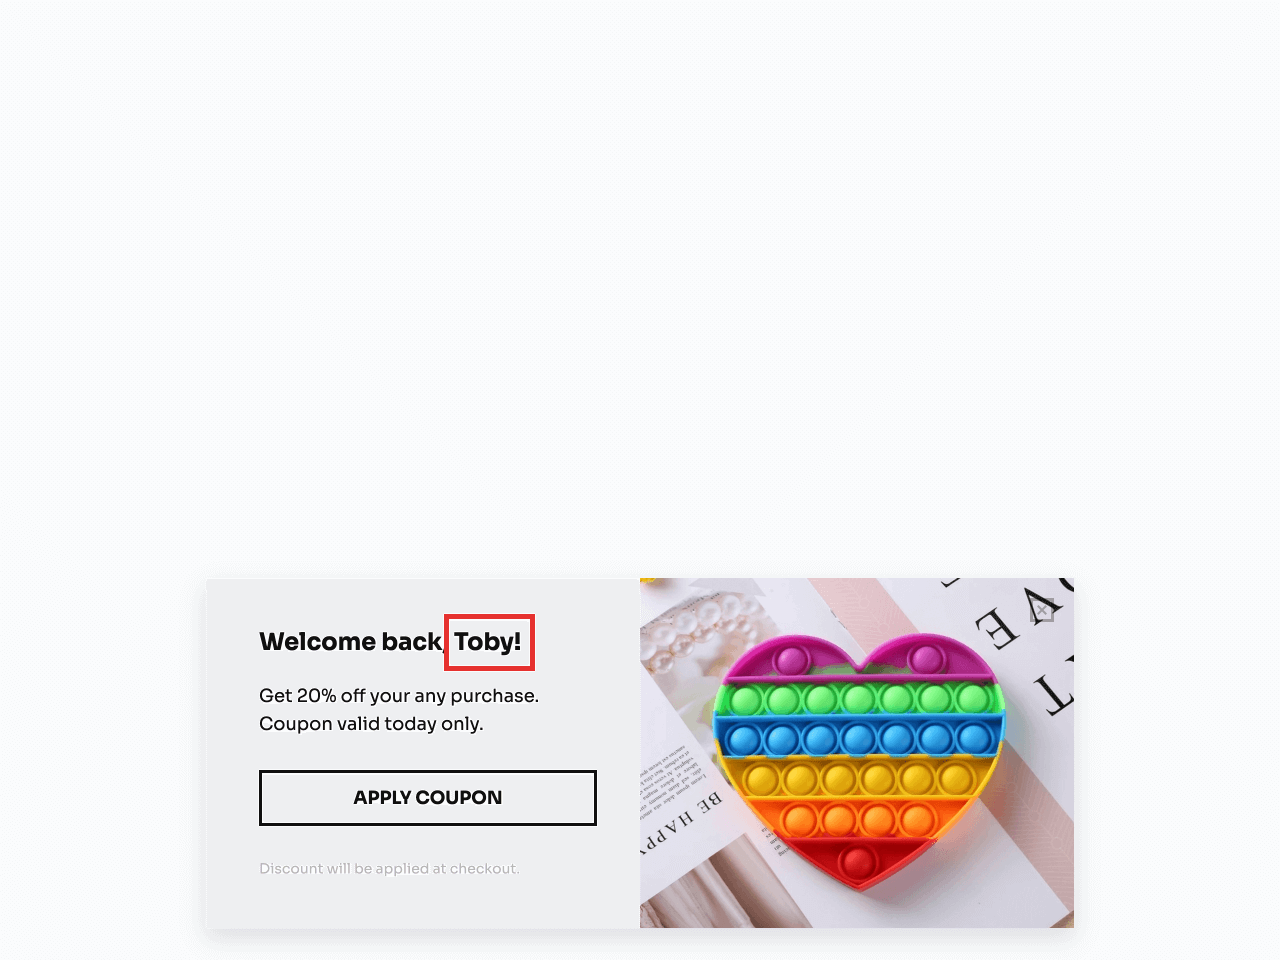
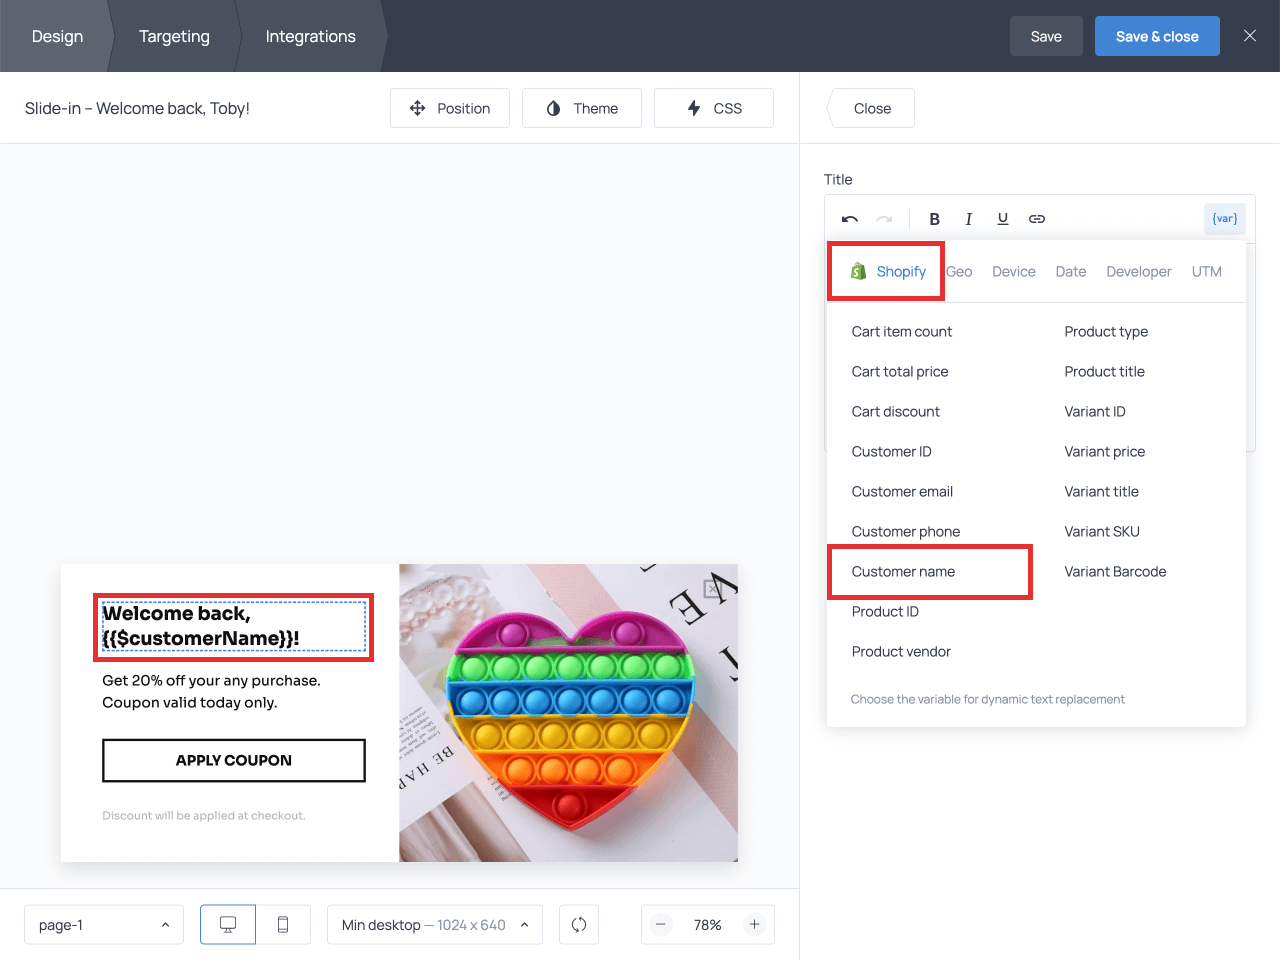
Displaying the customer’s name
If a customer has logged in to your store while browsing your products, you can display their name on your popups:
To make this happen, choose Customer name from the Shopify subset and add the variable to the text of your popup:
Offering free shipping on the currently viewed item
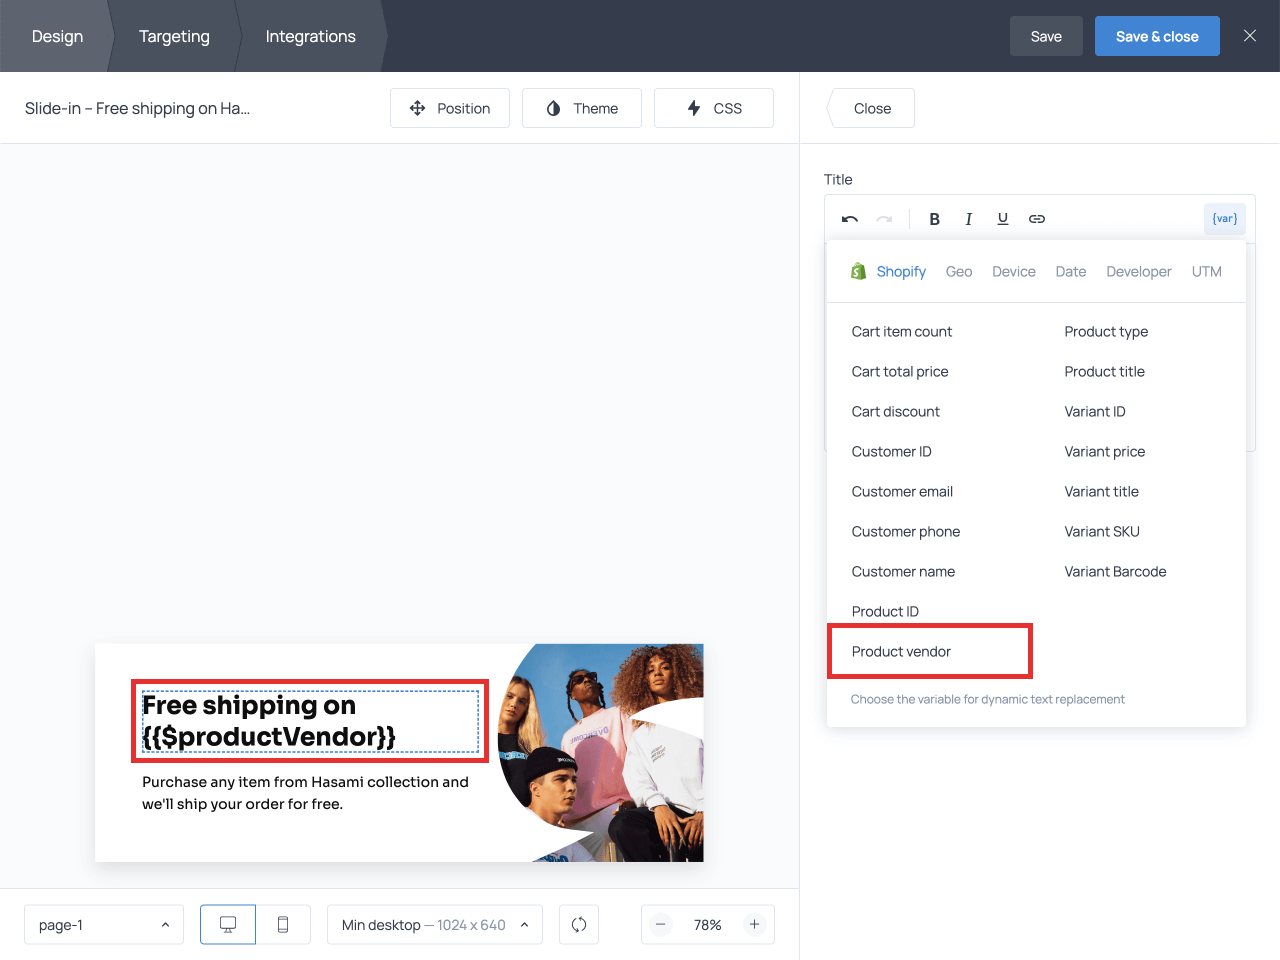
To give your customers that extra nudge to purchase the item they are checking, you can display a free shipping offer on that item.
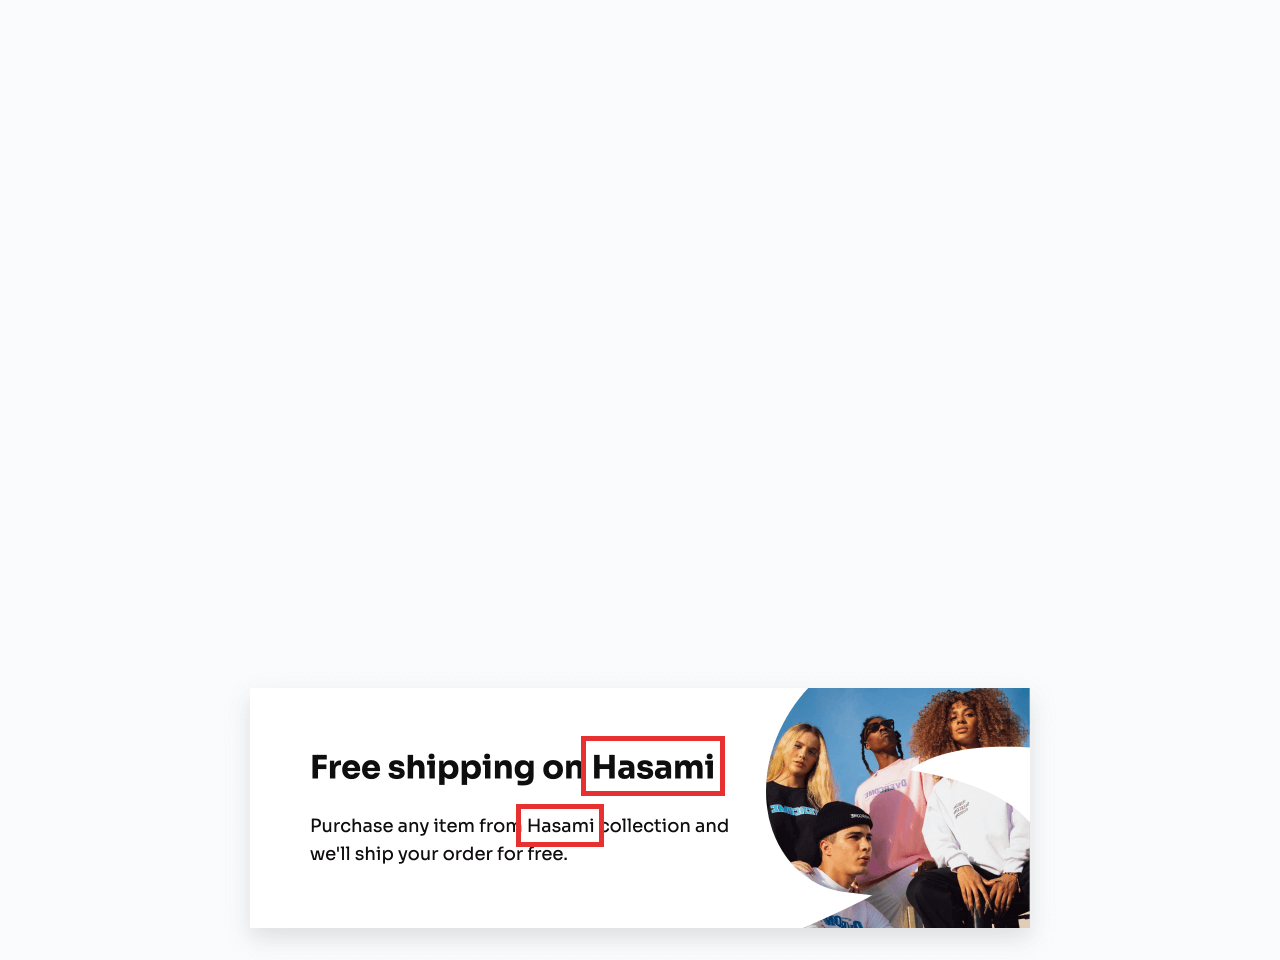
In the text of the popup, you can display the name of the specific item on the page ( Variant title ); the product category it belongs to, e.g. “Accessories” ( Product Type ); or the vendor ( Product vendor ):
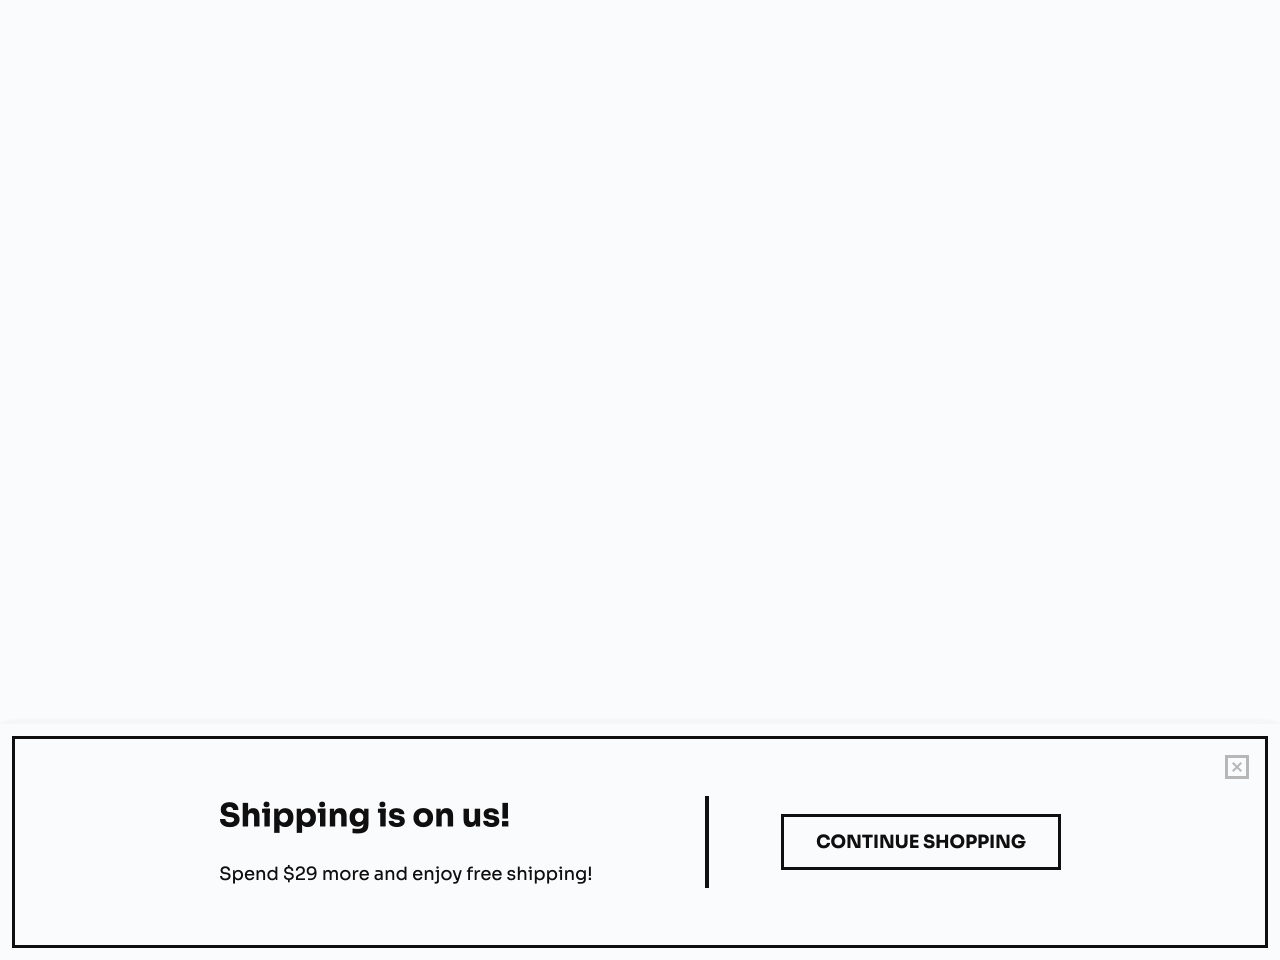
Displaying how much is left to spend to get free shipping
To increase the average order value on your store, you can tempt your customers with free shipping if they spend more than X amount of money.
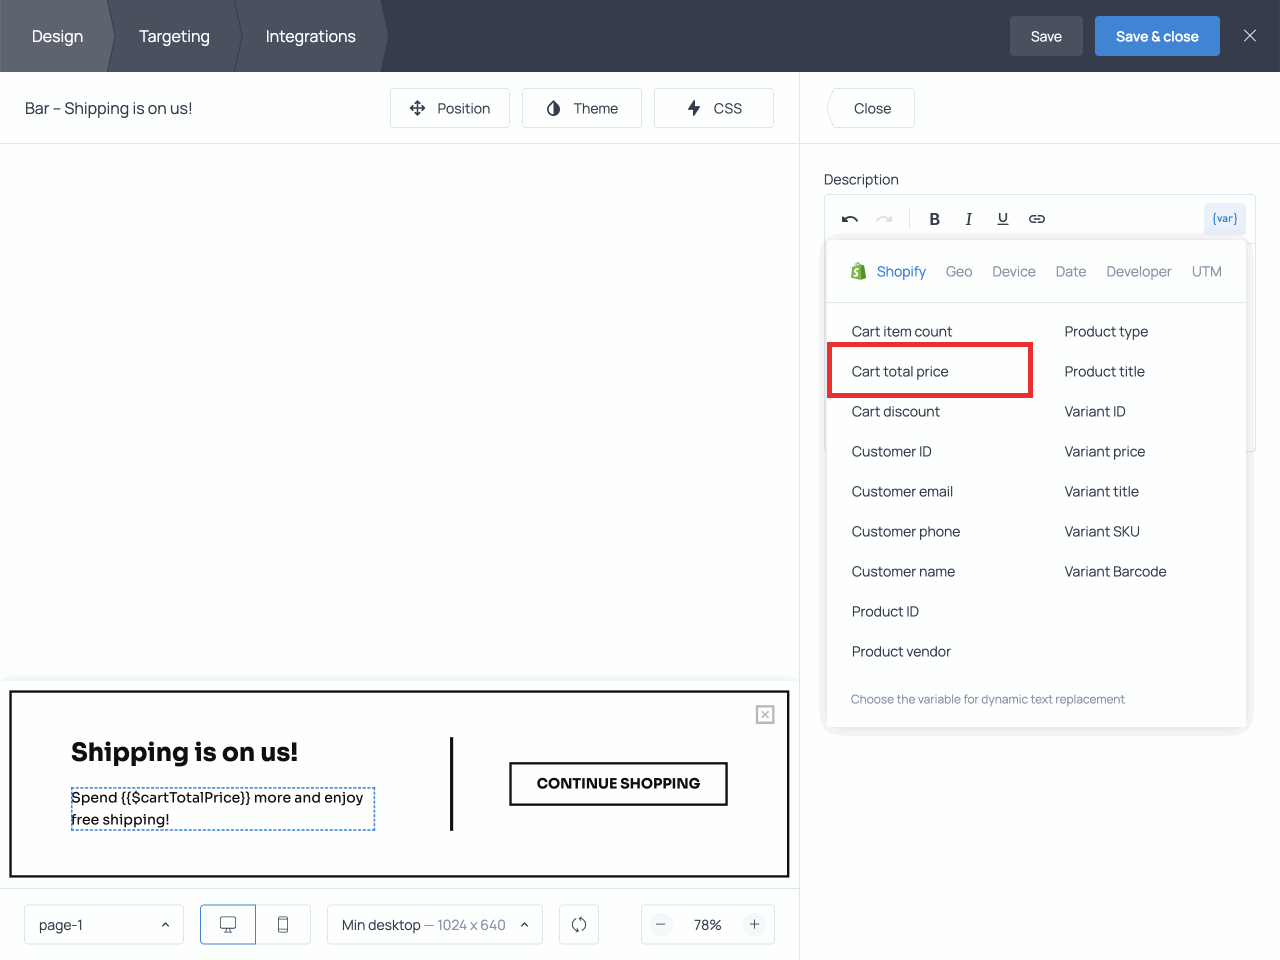
Setting this up will require you to use the Cart total price variable within a simple JavaScript expression. Let’s take a look at the steps.
Let’s say you want to offer free shipping to customers who spend more than $100.
First, choose Cart total price from the {var} menu:
Click the {{$cartTotalPrice}} block in the rich text editor and copy the following expression from the suggestions menu:
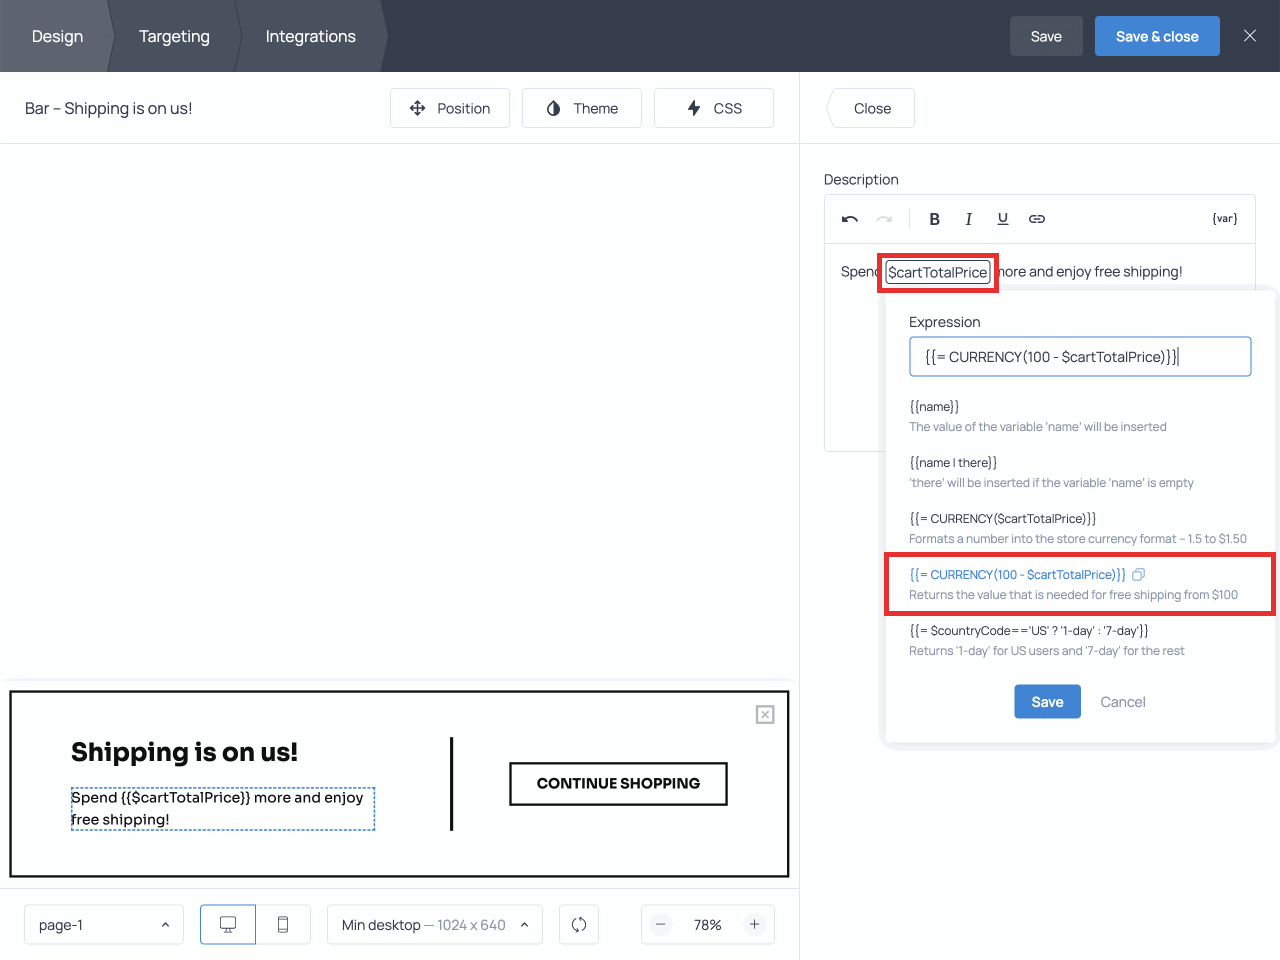
Paste {{= CURRENCY(100 - $cartTotalPrice)}} into the Expression field and save the changes.
This expression will show visitors how much more they have to spend to get free shipping. The value will be preceded by the symbol of the currency of your store.
Find more DTR use cases in our blog post. And to learn more about JavaScript expressions, check out the dedicated paragraph in this guide.
Advanced options
In this section you’ll find advanced DTR options that allow for deeper text customization.
Adding variables to the Open URL action
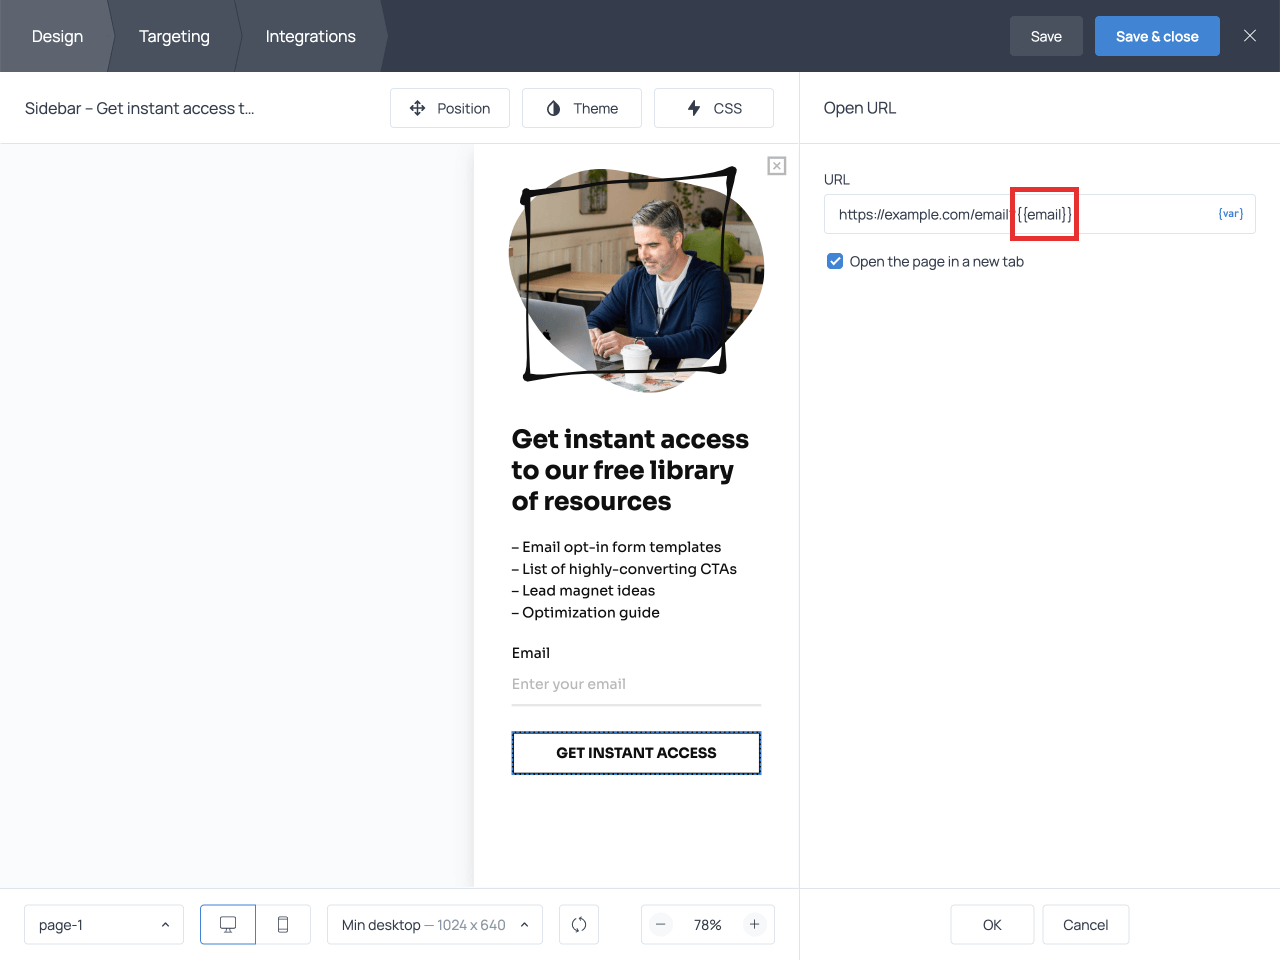
The DTR feature allows you to add variables to the button URL, and pass along data collected by the widget.
For example, you can pass emails collected by a form field to the ‘Open URL’ action.
To set this up, open the action button settings and add the ‘Open URL’ action. Next, enter the chosen URL in the corresponding field in the following format:
https://example.com?email={{email}}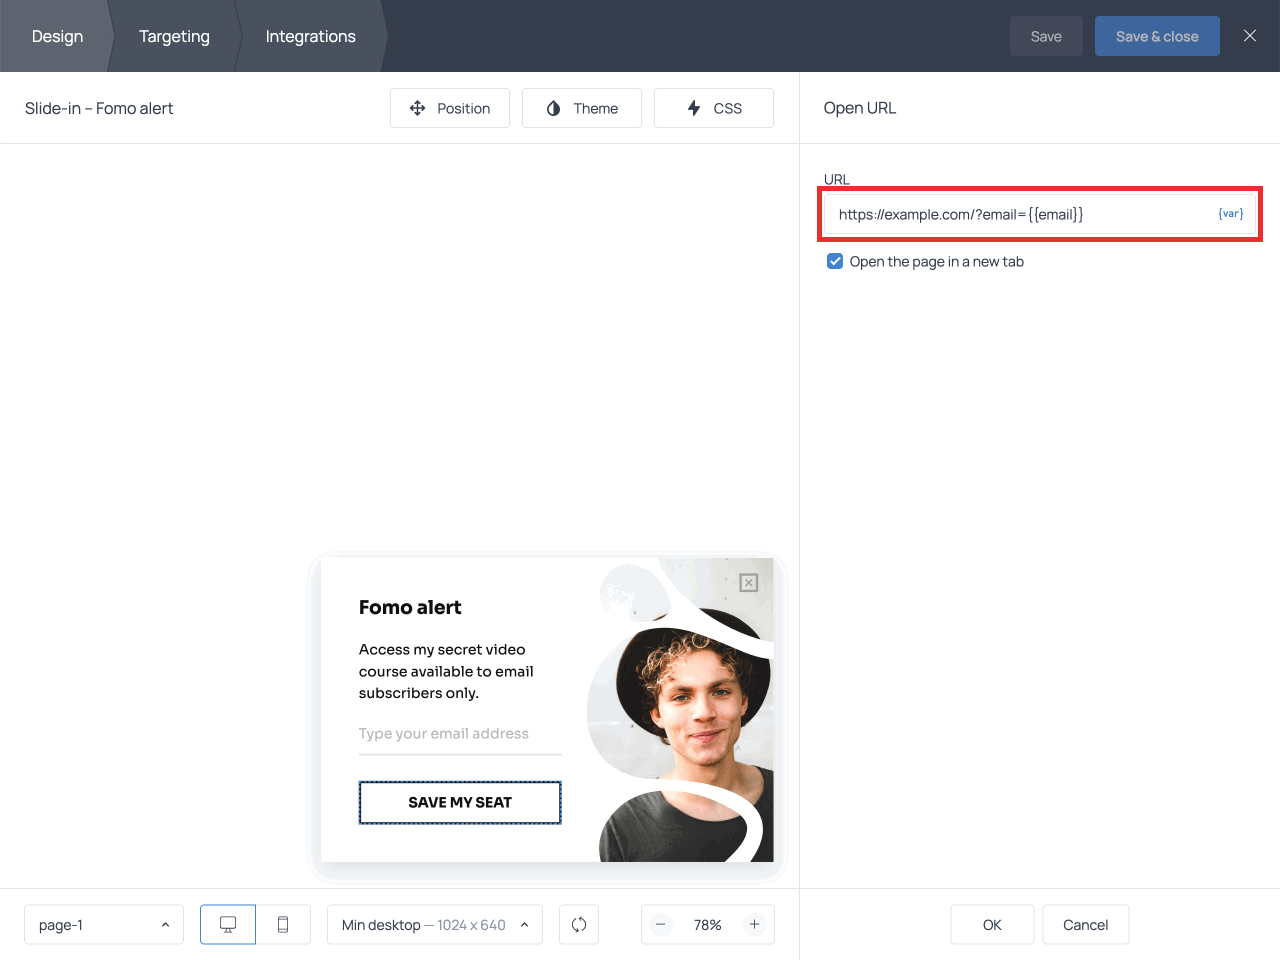
Upon button click, the popup will now open the URL containing the submitted email.
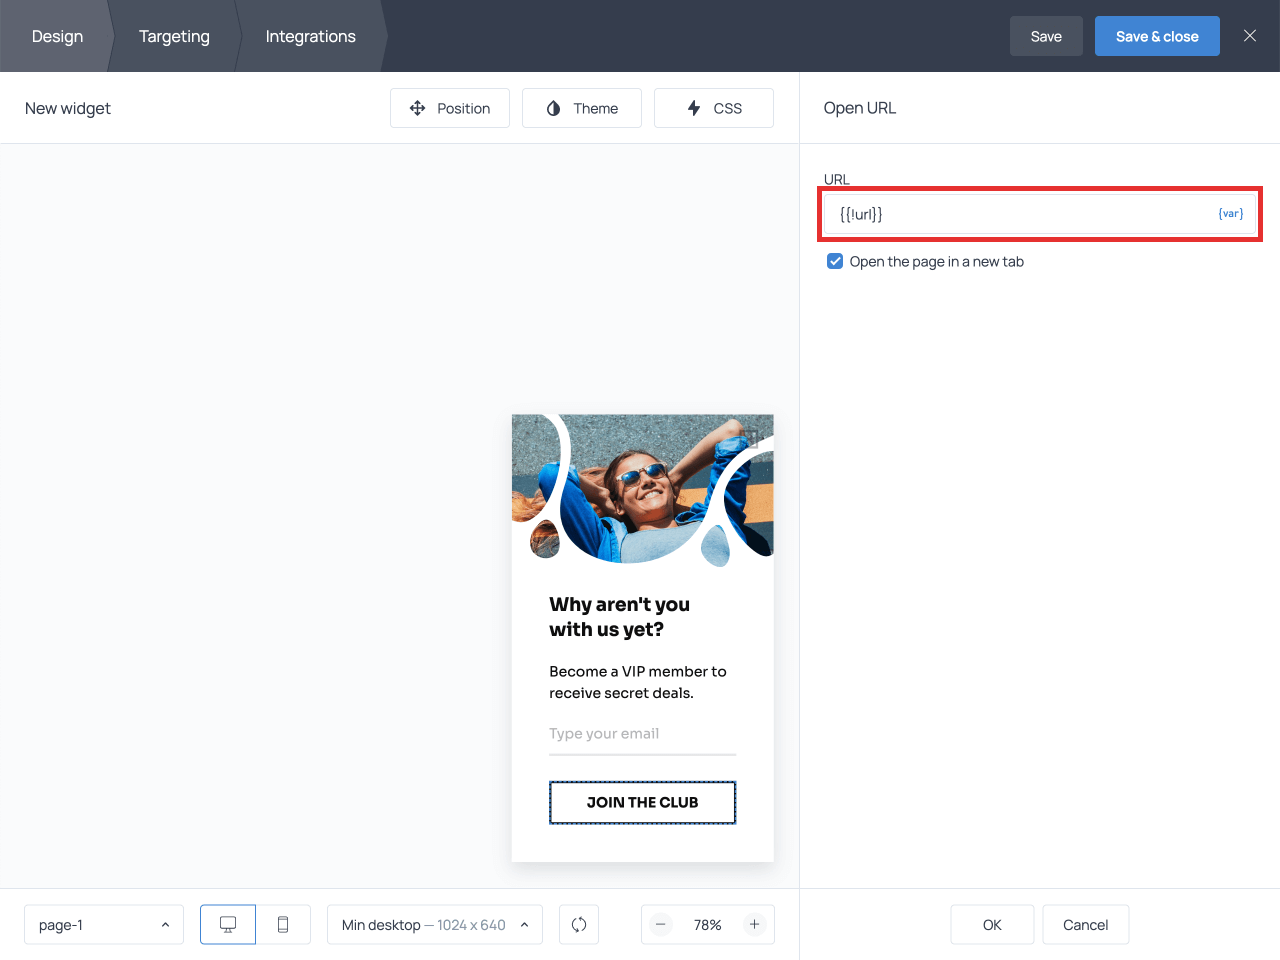
It’s also possible to pass variables into an Open URL action with the help of API. Here is the method you should use:
gsc('params', {url: 'https://example.com?var=123'})After you’ve added this script to your site, add {{!url}} to the URL field in the action settings. The exclamation character at the beginning prevents URL encoding.
If necessary, you can pass along a query string containing several GET parameters. Here is the method to achieve that:
gsc('params', {query: 'price=10&quantity=2'})Make sure to add {{!query}} to the URL field in the Open URL action settings:

The final URL should look like the following:
https://example.com?{{!query}}Using JavaScript expressions
You can use JavaScript expressions in the rich text editor of your widget to create personalized messages for your visitors. The following is the correct format to add JS expressions to the widget’s text:
{{=expression}}expression represents any valid JavaScript expression whose result is displayed to the visitor.
To prevent HTML escaping in the expressions (which happens by default in the widget editor), add an exclamation mark at the beginning of the expression:
{{!= expression }}In an expression, you can use different variables.
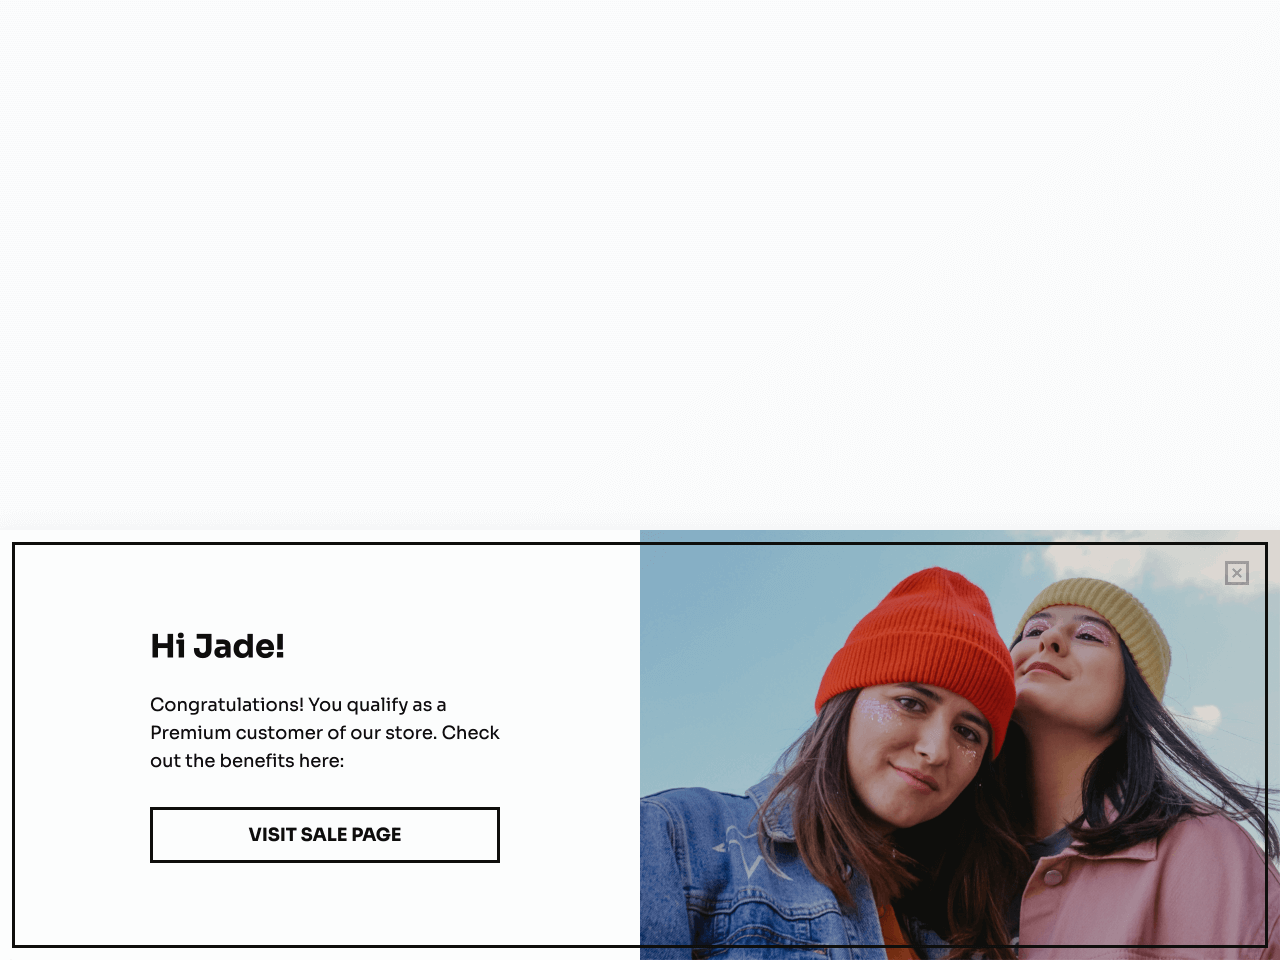
For example, you can use the expression below to display a specific customer status depending on how much the customer has spent:
{{= totalSpent>1000 ? 'Premium' : 'Basic' }}Here is an example of a popup featuring the above-mentioned expression:
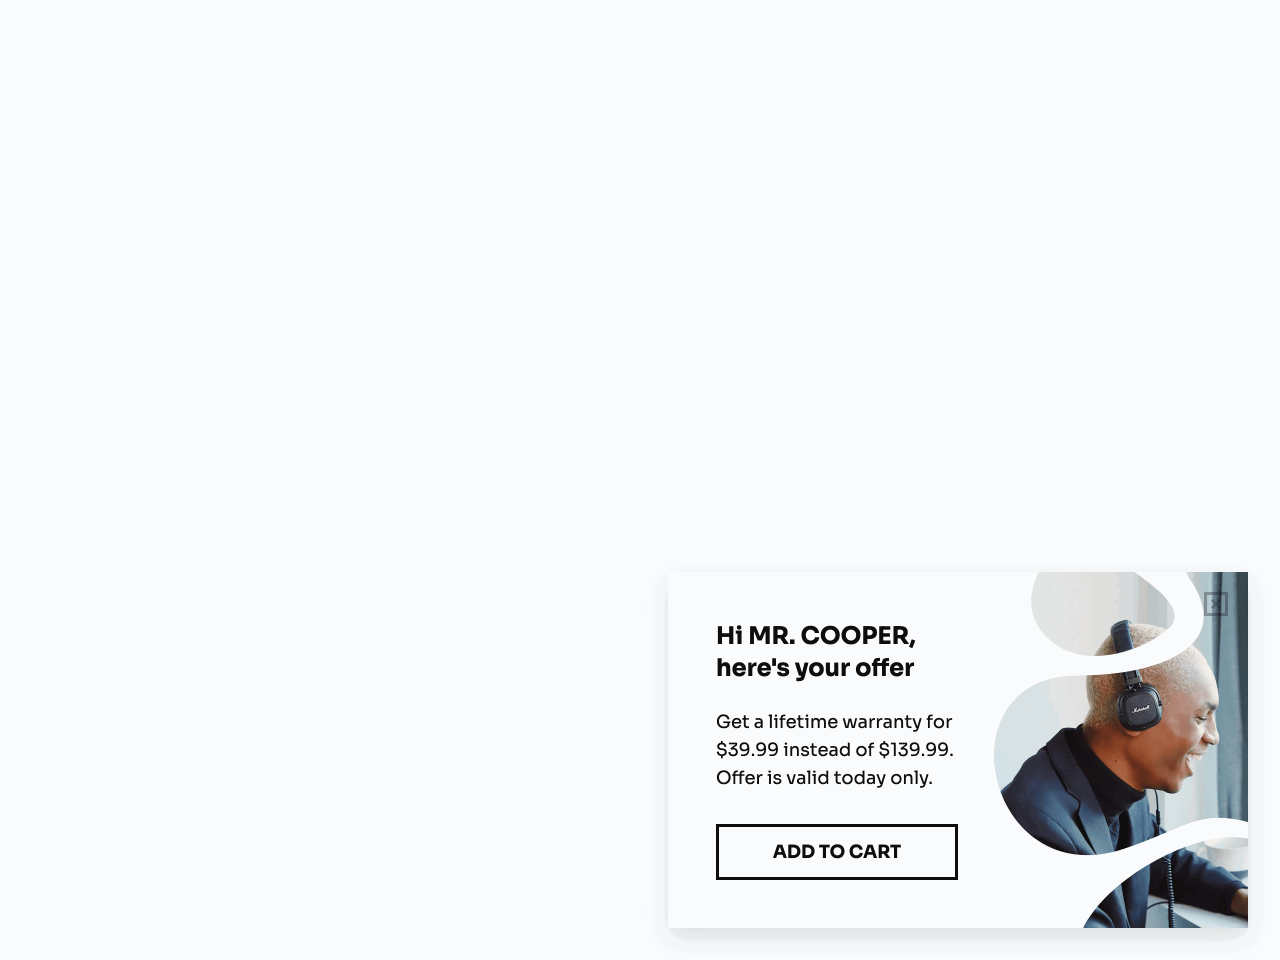
Or, you can use the expression below to format the visitor’s name and add a title:
{{= 'MR. ' + name.toUpperCase() }}Here is the result of the expression on a popup:
For more examples of text personalization, check out our dedicated blog post.
If you have any questions or thoughts, feel free to contact us, we’ll be happy to help you implement your idea!