How to use the widget API to trigger widgets, personalize content, target visitors, and track events
The Getsitecontrol API gives you greater control over how widgets behave and interact with your website. You can use it to trigger widgets programmatically, pass custom visitor data, display personalized content, and track widget interactions.
This is an advanced feature intended for users with JavaScript knowledge and experience working with website code. The examples in this guide are meant to illustrate common use cases and should be adapted to fit your specific requirements.
API: general information
First, to be able to use the Getsitecontrol widget API, you need to add the code snippet that will define the global gsc() function. This function provides a base interface for almost anything you may want to achieve with the API.
<script>
  window.gsc=window.gsc||function(){
  (gsc.q=gsc.q||[]).push(arguments)
  };
</script>
Place this script as high in the code of the page as possible. This allows the Getsitecontrol API to function regardless of whether the main Getsitecontrol script has finished loading. You only need to add this snippet once per page.
The following sections describe common use cases for the Getsitecontrol API and provide code snippets you can adapt to your needs.
Display widgets based on your site logic
You can configure your widget to appear when a site visitor performs a certain action on your website. For example, when they click a ‘Contact us’ button or add an item to the cart. Here are the steps you need to take.
Adjust the widget settings
First, set the widget to appear programmatically on your website, so that it doesn’t appear unless a specific action is performed. Open the widget editor and switch to the Targeting tab. Under Start displaying widget, select Display widget programmatically.
Note that when you trigger a widget programmatically, it appears immediately, regardless of any other targeting conditions set for the widget.
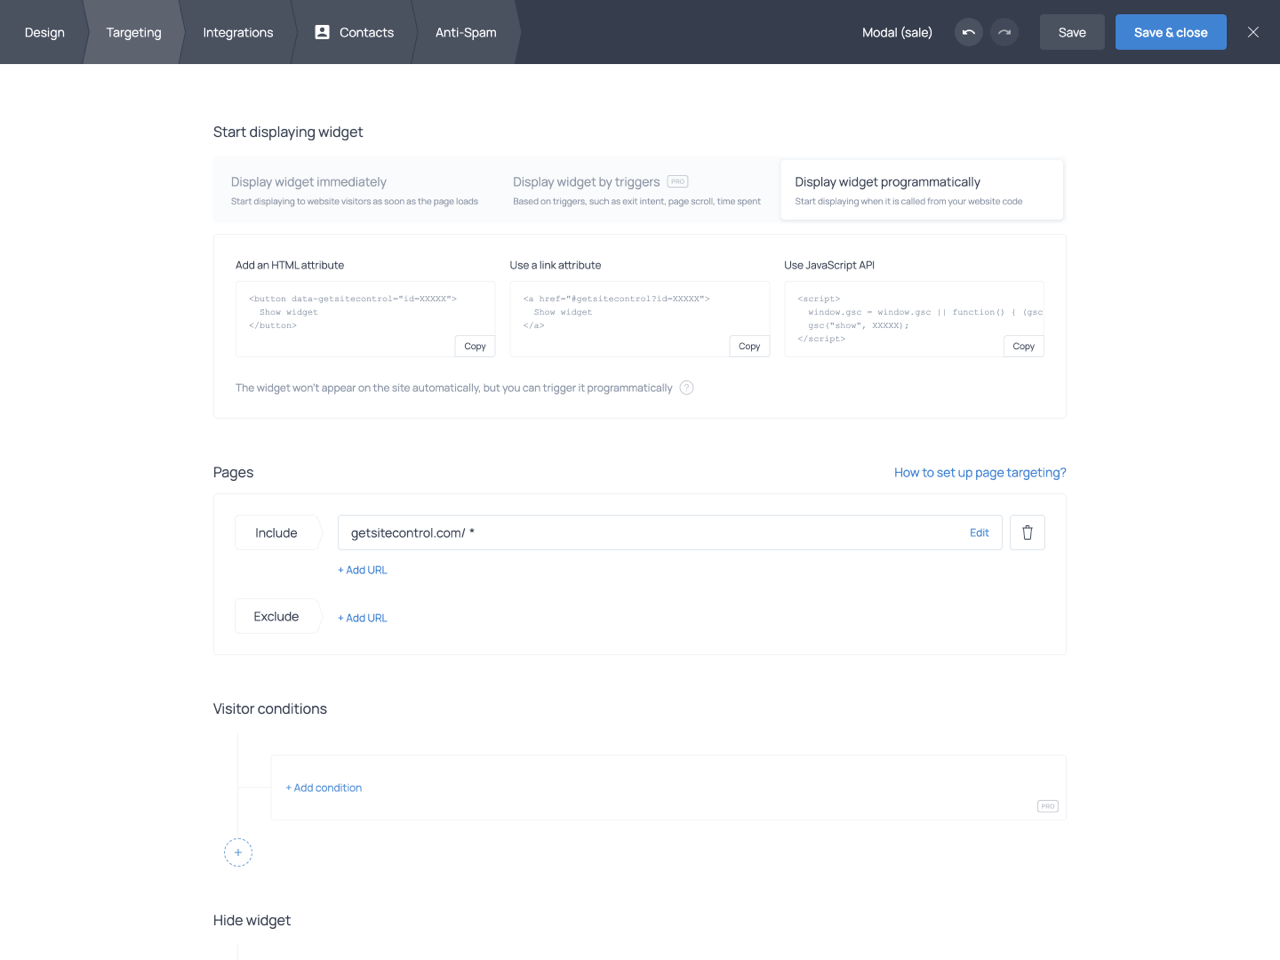
Setting the widget to appear programmatically from the Targeting tab
Copy the code to trigger the widget
Under Display widget programmatically, you’ll find code snippets for different implementation methods. Choose the option that best suits your site’s logic and copy the corresponding piece of code.
Add an HTML attribute
Use this method to trigger a widget when a visitor clicks a specific button or any other element on your website. Add a data-getsitecontrol attribute to the relevant button or page element.
<button data-getsitecontrol='id=1740'>
  show widget id=1740
</button>
Use a link attribute
Use this method to trigger a widget when a visitor clicks a link.
<a href='#getsitecontrol?id=1740'>
  show widget id=1740
</a>
Use JavaScript API
Use this method to trigger a widget as part of your website logic. For example, you can display a widget after a visitor adds an item to the cart or completes another action on your site.
<script>
  window.gsc = window.gsc || function() { (gsc.q = gsc.q || []).push(arguments); };
  gsc('show', 1740);
</script>
Link a hash address
This last method is not listed in the Targeting tab. Use it to display a widget when a visitor lands on a URL containing a hash parameter.
/page.html#getsitecontrol?id=1740The code snippets provided in the dashboard already include your widget’s ID. With this method, you’ll need to replace 1740 with your own widget ID. You can find the ID on the All widgets tab in your Getsitecontrol dashboard.
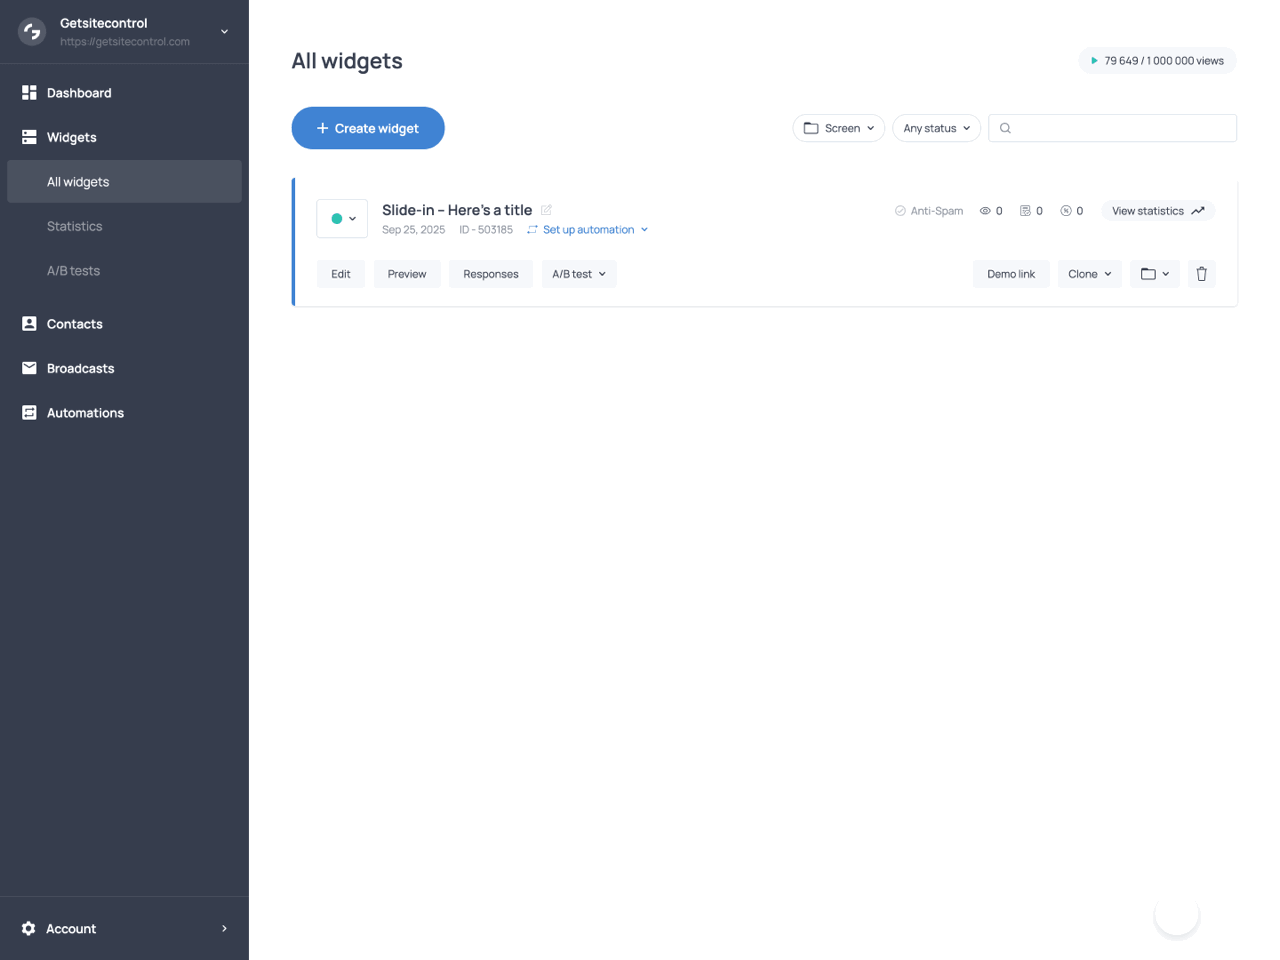
The widget ID on the widget card in the All widgets tab of the dashboard
Save the changes and place the code
Once you have copied the code for the method you intend to use, save the changes to the widget and place the code on your website according to the method you have chosen.
Alternative method for Shopify
If you’re using Shopify, there’s a simpler way to display a widget when visitors click a button or a link. This method doesn’t require adding any additional code to your website.
To display a widget when a visitor clicks a button, add the following snippet to the button settings instead of a URL:
javascript:gsc('show', 1740)To display a widget when a visitor clicks a link, use the following as the link URL:
#getsitecontrol?id=1740Make sure to replace the example ID (1740) with your widget’s ID. You can find the ID on the All widgets page in your Getsitecontrol dashboard.
Hide widgets based on your site logic
Using a similar method, you can configure your widget to hide when a visitor performs a specific action on your website (for example, clicking a button or link). To achieve that, use the following JavaScript code. Please note that 1740 is an example ID; you need to replace it with the ID of your widget.
<script>
  window.gsc = window.gsc || function() { (gsc.q = gsc.q || []).push(arguments); };
  gsc('close', 1740);
</script>
Hiding a widget via the API is recorded as a close action, just as if the visitor had closed the widget manually. As a result, any targeting rules that prevent the widget from appearing after it has been closed will apply.
Pass extra information about visitors
If your website has registered users, you can attach the user’s email address, username, customer ID, or any other information you possess to the data they have submitted via a form.
For example, you can pass along the logged-in visitor’s email address as they interact with a widget on your website. This information will be associated with the data they submit and included in the corresponding reports. Here is the method you should use.
<script>
  gsc('params', {
    email: 'user@example.com',
    name: 'John',
    subscription: 19
  })
</script>
You can add additional properties as needed. They will be associated with the data collected by the widget and included in the downloadable reports. You can find the reports by clicking on the Responses button on the widget card (All widgets tab of the dashboard).
Display personalized messages to visitors
If you have information about your users, such as their name, email address, or gender, you can use it to show them personalized messages while they navigate your site. Use the following method.
<script>
gsc('params', {
first_name: 'John',
last_name: 'Smith',
discount: 30
})
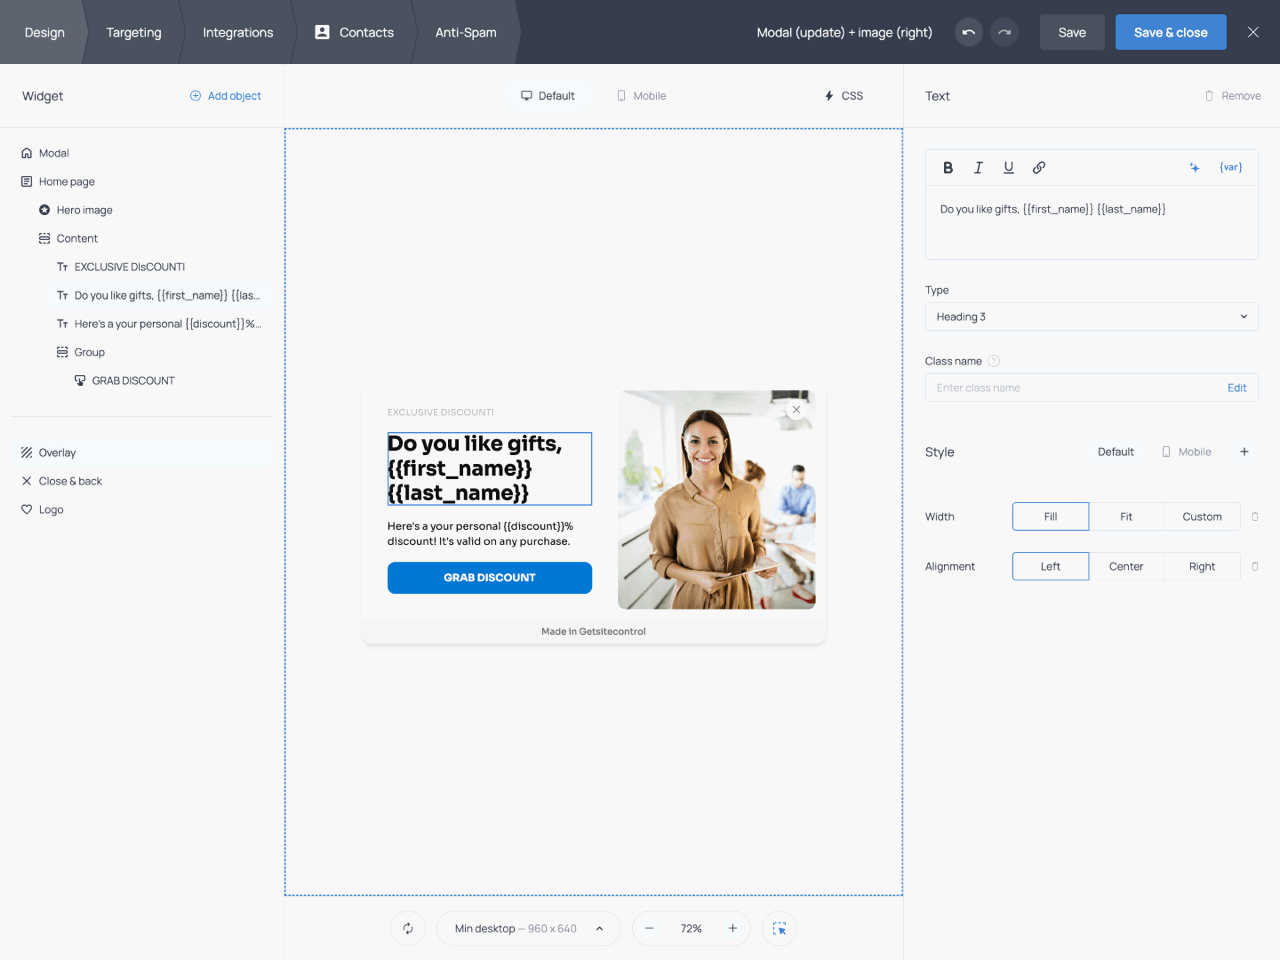
</script>Once you add this snippet to your site code, you will be able to use the corresponding variables (first_name, last_name, discount, etc.) in the widget text or button URLs. Add the variables to the widget content in curly brackets: {{first_name}}.
Target visitors by custom API parameters
You can use API targeting to display widgets based on certain information or properties in your web application logic. First, add to your website the code that passes the necessary parameters to the Getsitecontrol API.
<script>
gsc('params', {
isPaid: 'yes'
})
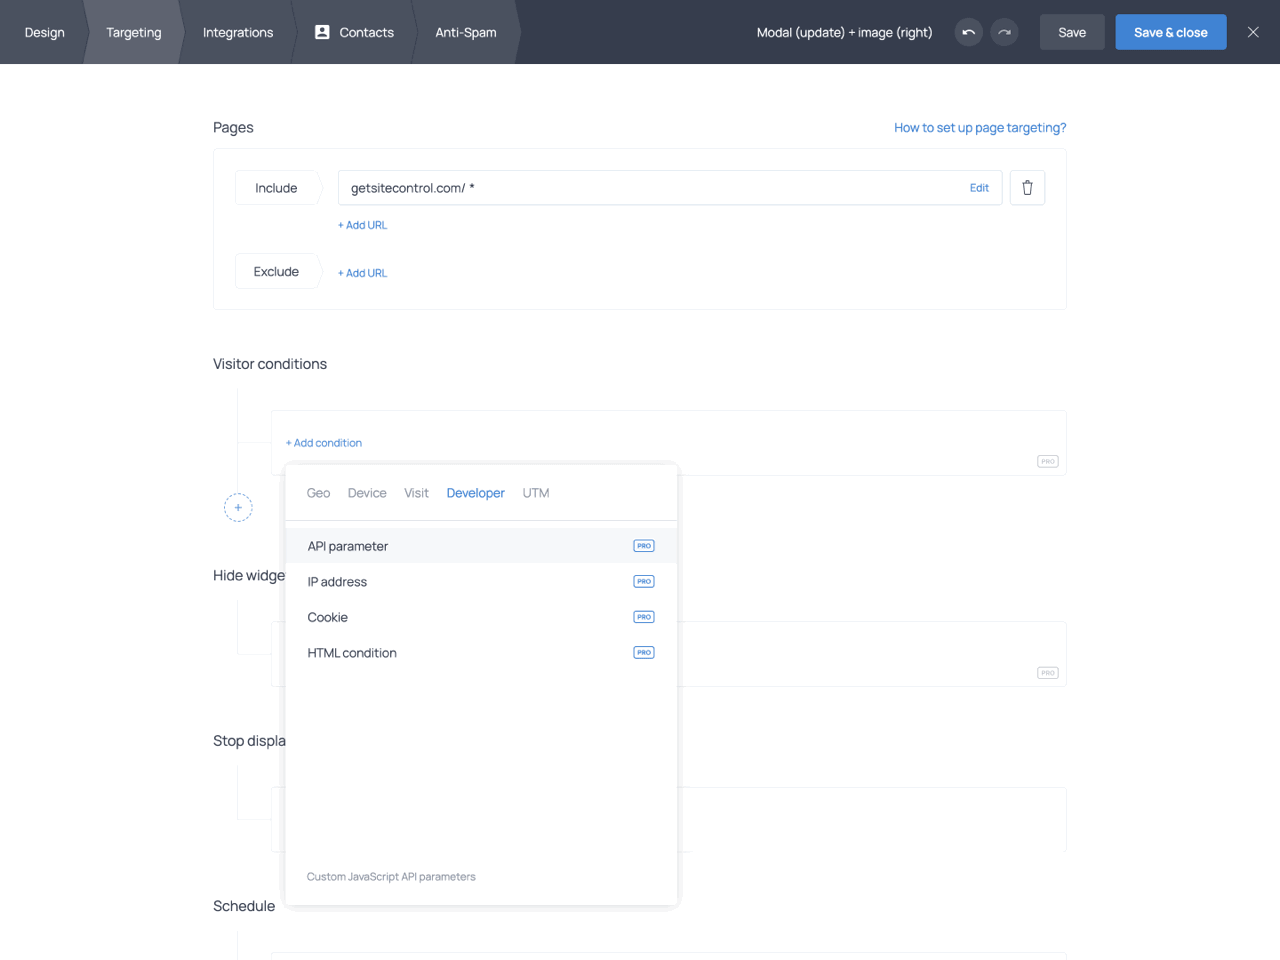
</script>Next, adjust the widget’s targeting settings. Open the widget and switch to the Targeting tab. Find the Visitor conditions section and click +Add condition. From the Developer tab, choose API parameter. Enter your custom parameter, choose the necessary logical operator, and click Done. You can add more parameters by repeating the procedure. Make sure to save the changes to the widget settings.
Use event handler callbacks
You can register your own JavaScript functions as callbacks when website visitors submit data via a form. Here is the method you should use.
<script>
  gsc('onSubmit', function(widgetId, data) {
    if (widgetId === 1740){
      console.log(data);
// outputs { email: 'user@example.com', name: 'Alex' }
    }
  })
</script>
1740 is an example ID that you will need to replace with the ID of your widget. You can find the ID on the All widgets tab in your Getsitecontrol dashboard.
The callback function accepts two arguments, which provide information about the widget and the data submitted by the visitor.
| Argument | Content |
|---|---|
| widgetId | The unique widget ID |
| data | The collected data dictionary |
The data argument contains the data submitted via the form in the format below. Here, each key corresponds to a field ID, which you can view or edit in the field settings in the widget editor.
{
  email: 'user@example.com',
  name: 'Alex
}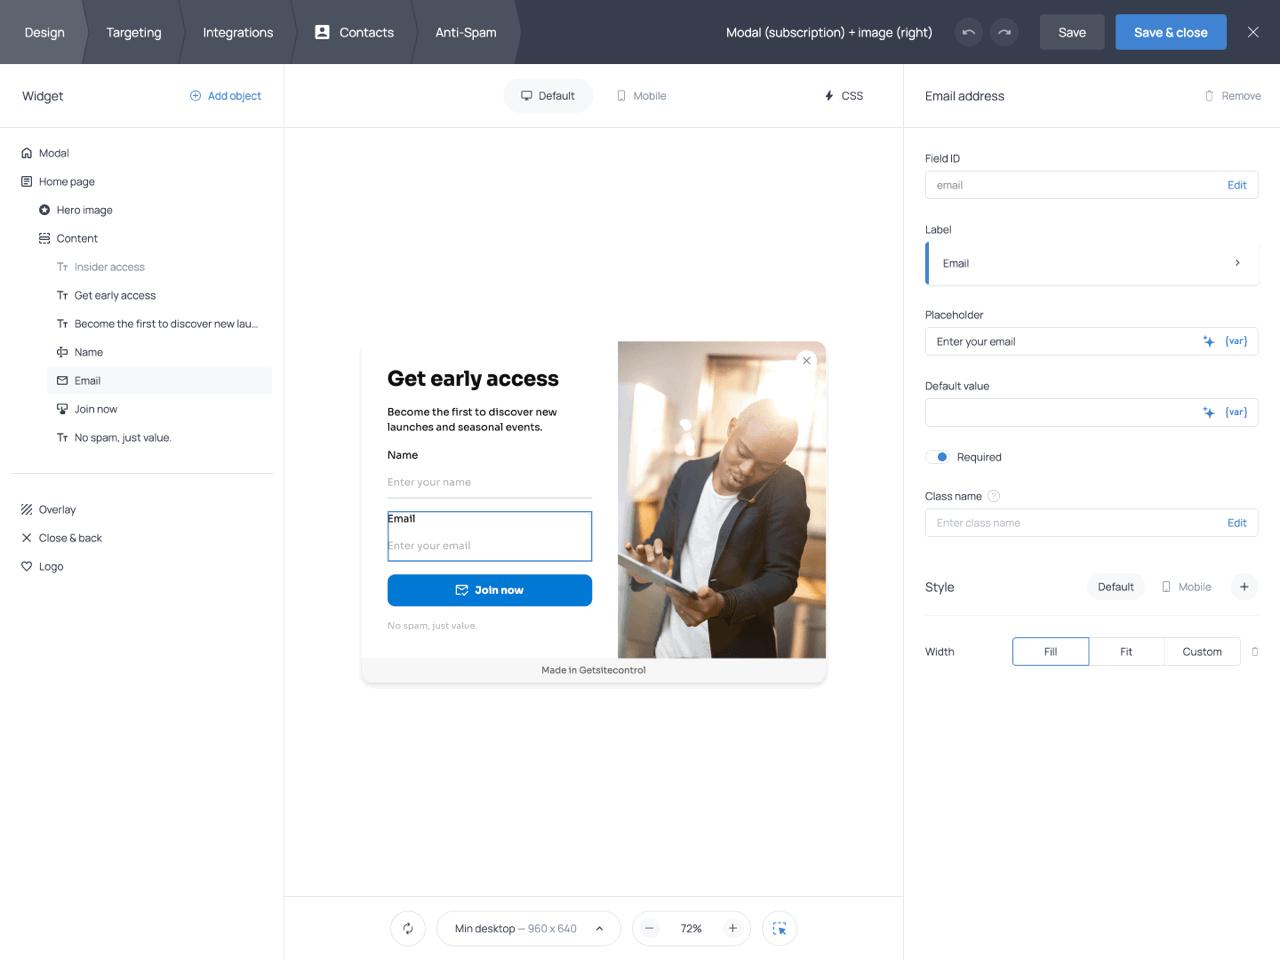
The Field ID in the field settings (right panel)
Send data to a third-party application
If you want to send the data collected by the widget to a third-party application, you’ll need to add the following lines of code to your website.
gsc('onSubmit', function (widgetId, data) {
  if (data && data.email) {
    someThirdPartyProvider.registerEmail(data.email);
  }
});
Track submissions and other widget events in GA4
You can also use the onSubmit callback to send data to Google Analytics 4. For example, the following code sends an event to GA4 whenever a visitor submits data through a form on your website.
gsc('onSubmit', function (widgetId, data) {
  gtag('event', 'getsitecontrol_event', {
    'type': 'submit',
    'widget_id': widgetId
  });
});
You can use the same approach to send data to GA4 when other widget events occur. Here are the callbacks available for that purpose.
| Callback | Description |
|---|---|
| onShow | Sends data to GA4 when the widget appears on a page. |
| onClose | Sends data when a visitor closes the widget. |
| onOpenUrl | Sends data when a visitor clicks a link on the widget. |
| onCopyToClipboard | Sends data when a visitor copies text to the clipboard via a button click. |
| onShowWidget | Sends data when a button click on the widget triggers another widget. |
| onAddToCart | Sends data when a visitor adds a product to the cart via a button click. |
| onApplyCoupon | Sends data when a visitor uses a button to apply a discount to the cart. |