Create a cookie banner for free
Choose a template and tailor it to your website
You’ve probably noticed that nearly every website you visit displays a cookie banner.
Now, you might be wondering: Does my site need one of those cookie consent notices? And if so, how can I create one?
The short answer to the first question is ‘probably.’ As for the second — that’s exactly what this post covers.
Below, you’ll get a quick primer on whether your site actually needs a cookie consent banner. Then, we’ll share a step-by-step tutorial on how to create a cookie consent banner for your site for free and without any special knowledge.
You’ll be able to create a banner that slides in from the side of the screen 👇
… or appears as a compact floating bar at the top or bottom of the screen.
Using these templates and the app named Getsitecontrol, you can create a banner that:
If your website uses cookies for analytics, advertising, or tracking — and you receive traffic from the EU — you likely need a cookie consent banner.
This requirement stems from the ePrivacy Directive, along with the GDPR. Under current EU law, websites must obtain consent before using most types of cookies — except those that are strictly necessary for core site functions, like maintaining a shopping cart.
If you use tools like Google Analytics or Facebook Pixel, you’re probably collecting personal data — and consent is required. In practice, in today’s global web, most websites need a cookie banner to stay compliant.
The purpose of a cookie banner is to get informed consent to use cookies before visitors start using your site.
This means that you need to:
In the sections below, we’ll show you how to do exactly that.
You can place your cookie banner wherever you want, as long as it’s visible enough to attract readers' attention and get informed consent.
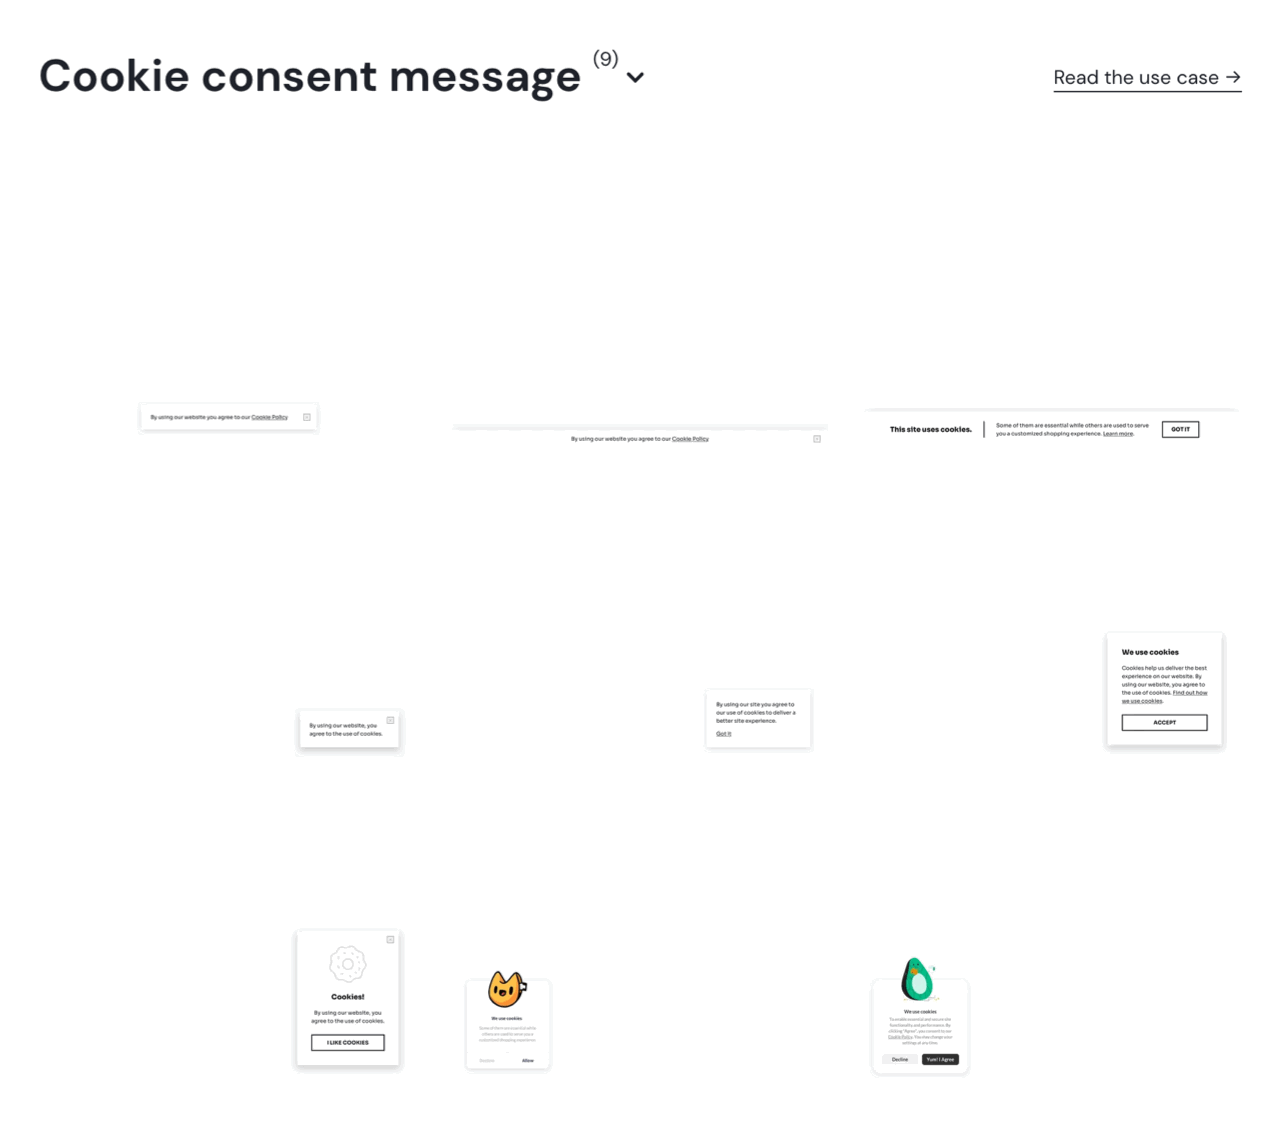
Let’s look at a few examples, and then we’ll show you how to recreate them on your site — no code needed.
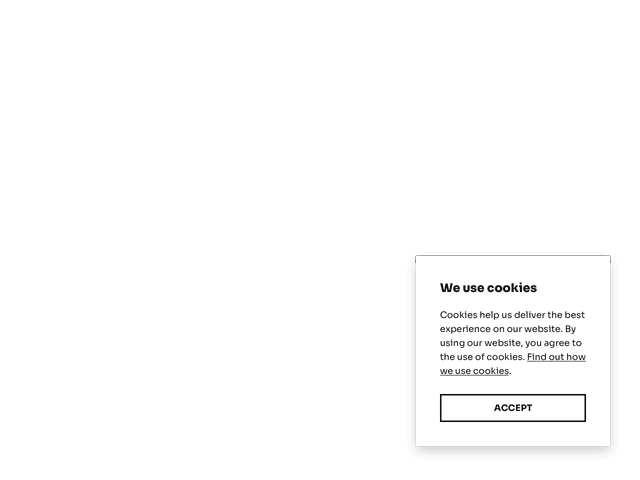
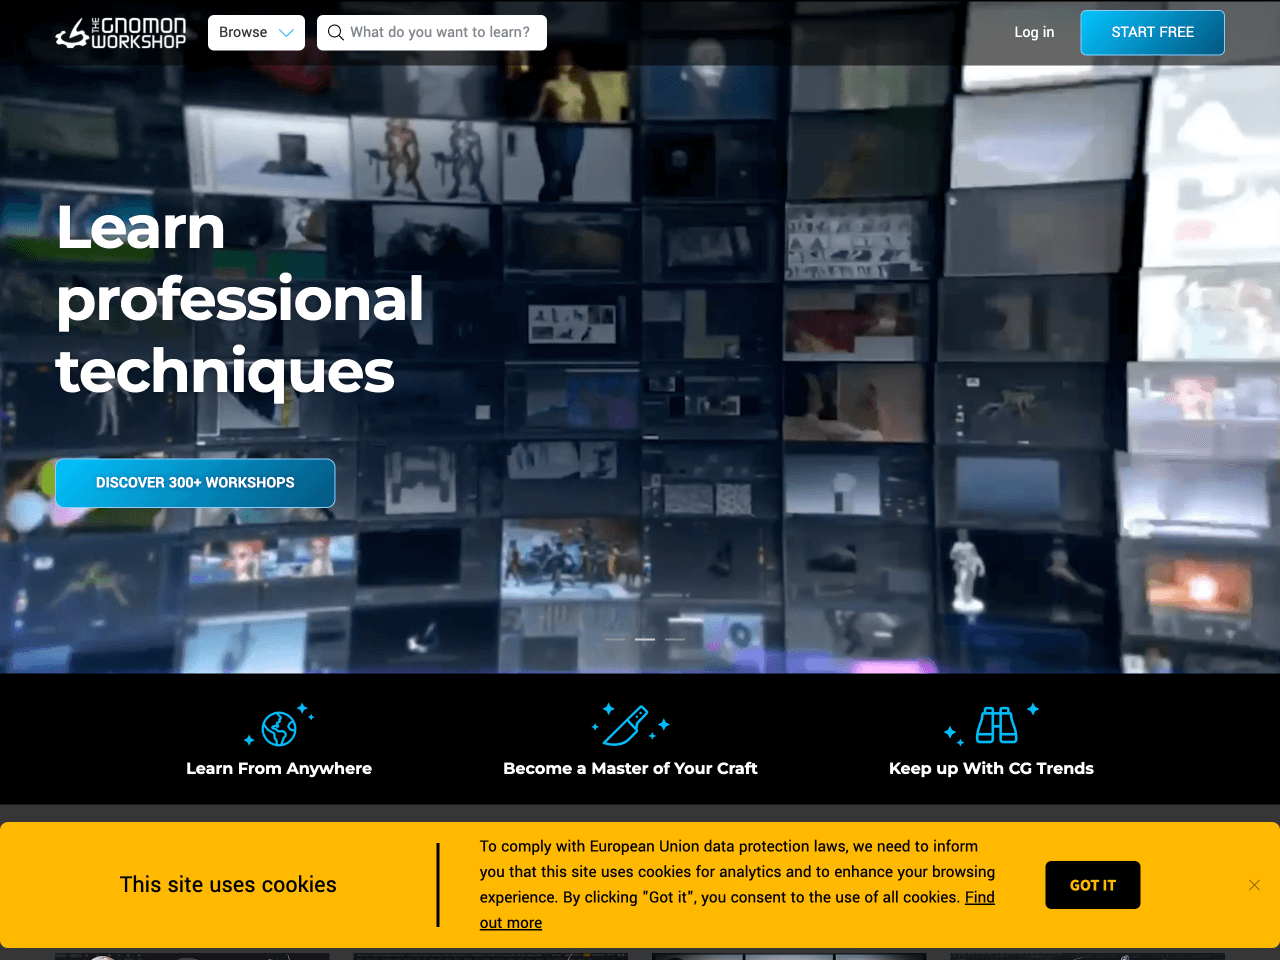
The Gnomon Workshop opts for a bold yellow bottom bar that spans the entire width of the screen. The message is straightforward and to the point, while the color choice and prominent “Got it” button ensure the banner doesn’t go unnoticed. It’s a good example of a no-frills banner that prioritizes visibility and compliance.
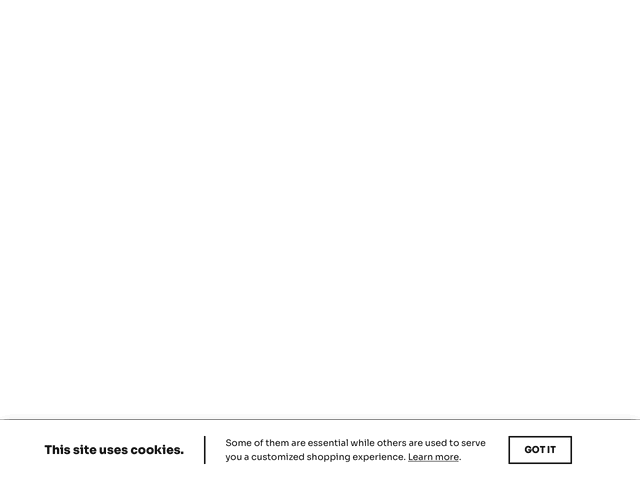
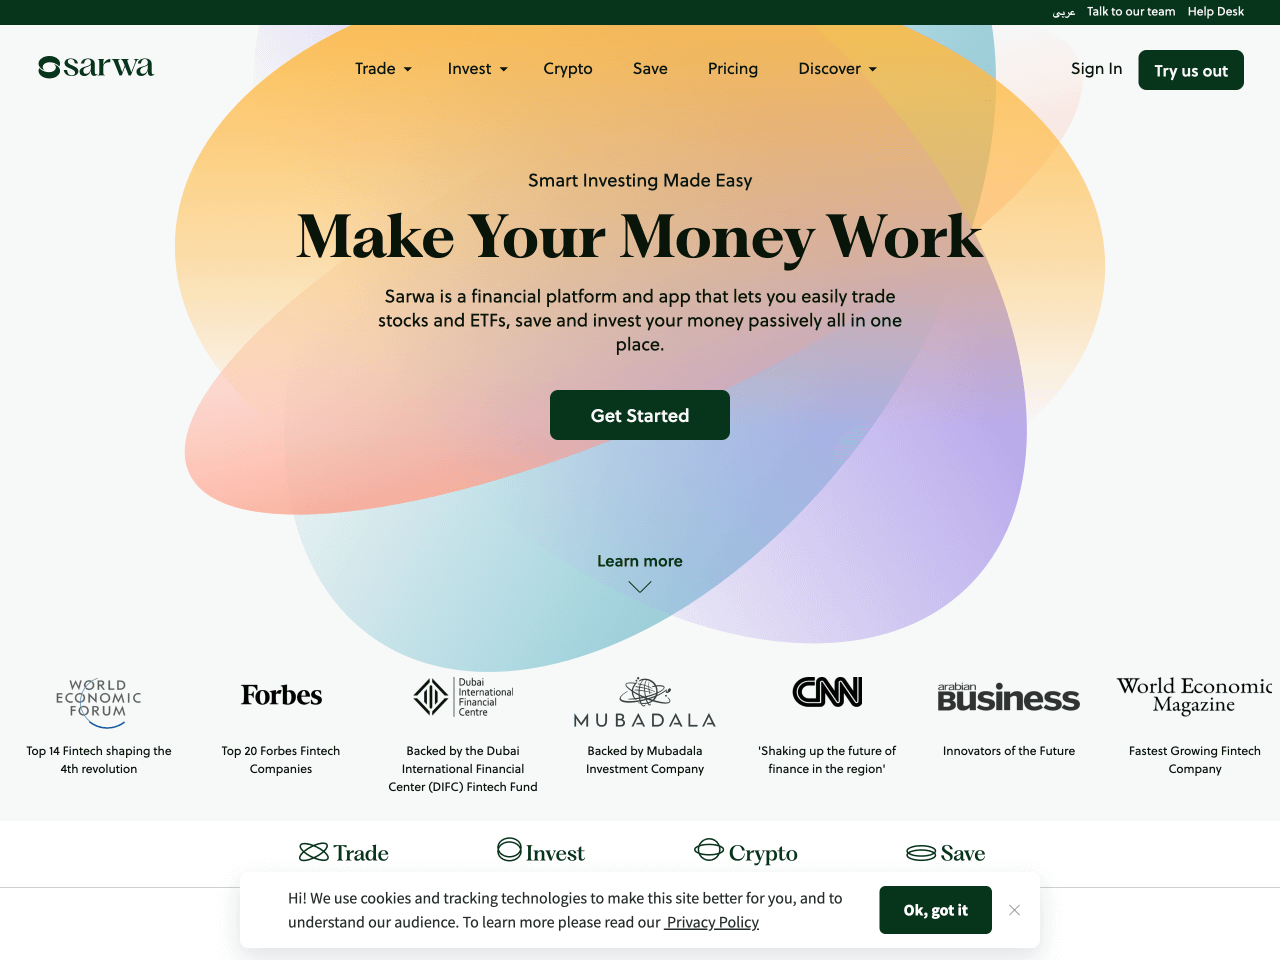
Sarwa’s cookie consent banner sticks to the bottom of the screen and blends well with the brand’s soft, modern aesthetic. The copy is neutral and informative, with a prominent link to the Privacy Policy.
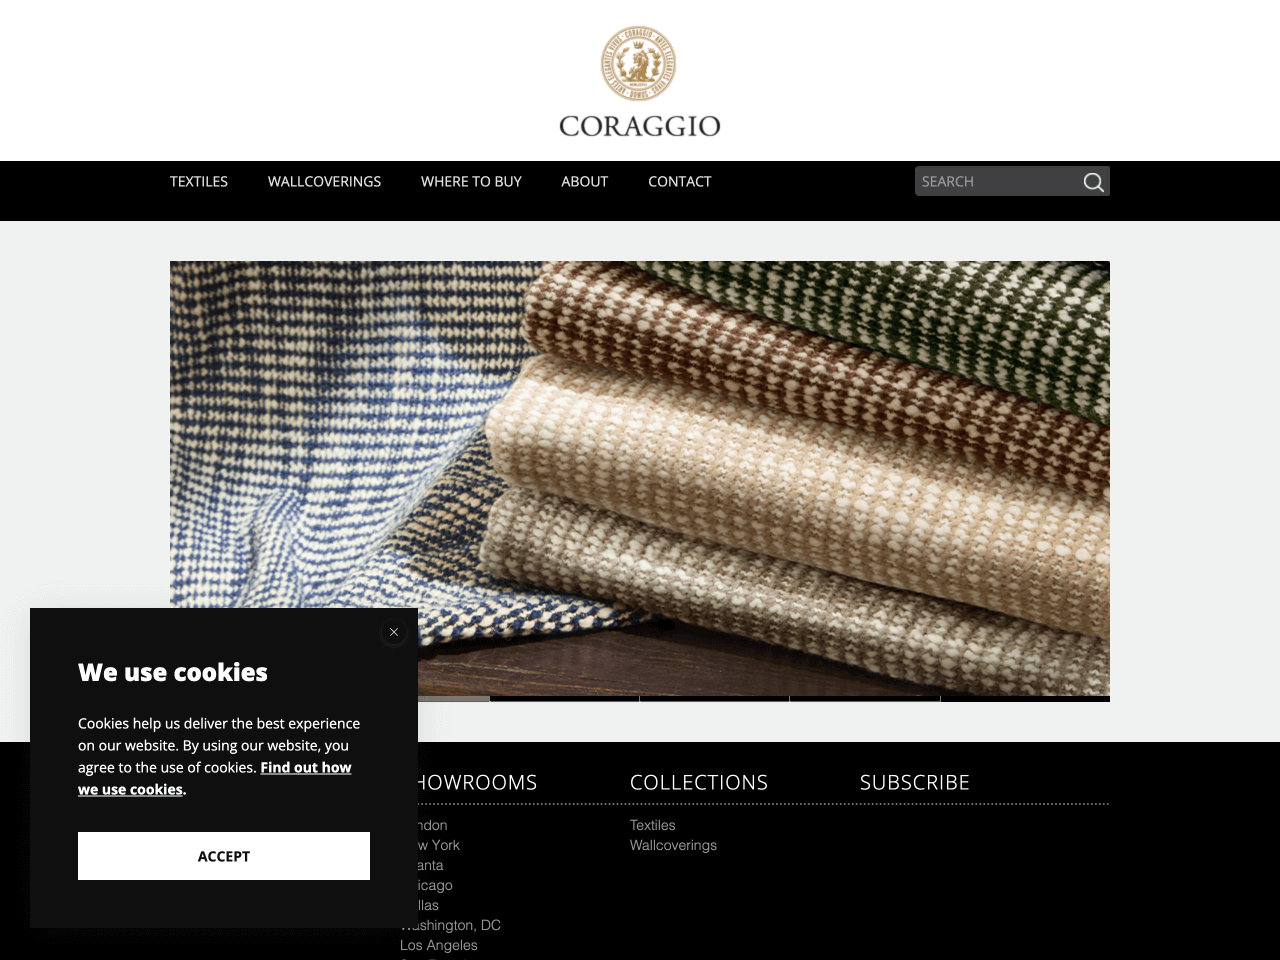
Coraggio uses a high-contrast slide-in banner that appears at the bottom left corner. The bold header and minimalist styling make the message clear and accessible.
Now for the fun part: creating a cookie consent banner for your website.
All three examples above are powered by Getsitecontrol, which is a tool that lets you add different types of widgets to your website. Widgets can be floating contact buttons, email popups, online feedback forms, or – you guessed it – cookie consent banners.
Using a simple interface, you’ll be able to customize your banner’s:
Here’s how to get started 👇
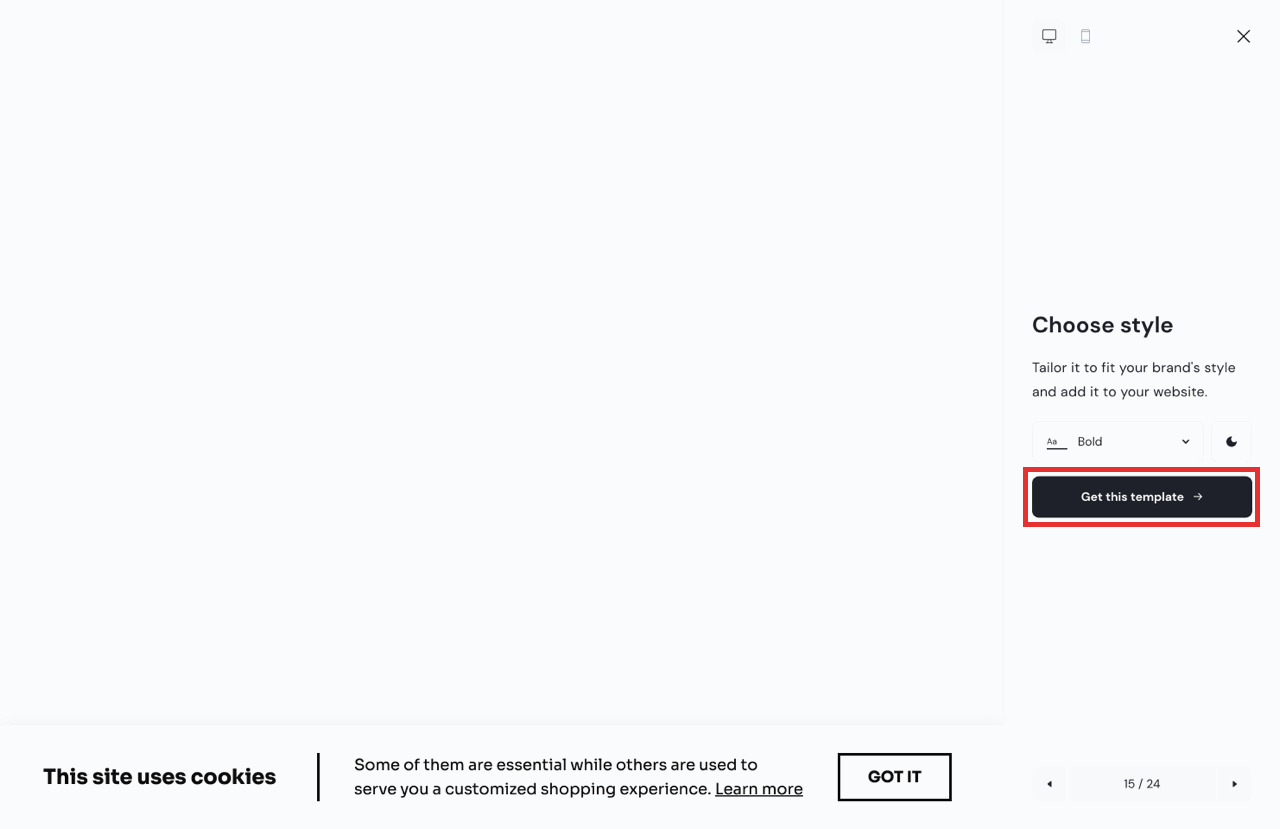
The easiest way to add a cookie banner to your website is to start with a premade template and customize it to match your branding. Visit the template gallery and choose the format you’d like to use on your website.
The gallery includes everything from minimalist banners to more prominent designs. Once you’ve found a template that works for you, proceed to Get this template → on the right to create an account and send the template to your dashboard.
Now that you’ve got the template, it’s time to adjust the consent message for your visitors. You can fine-tune the default text to match your tone and add a link to your cookie policy. To change the copy, just click on it and type a new message using the built-in text editor.
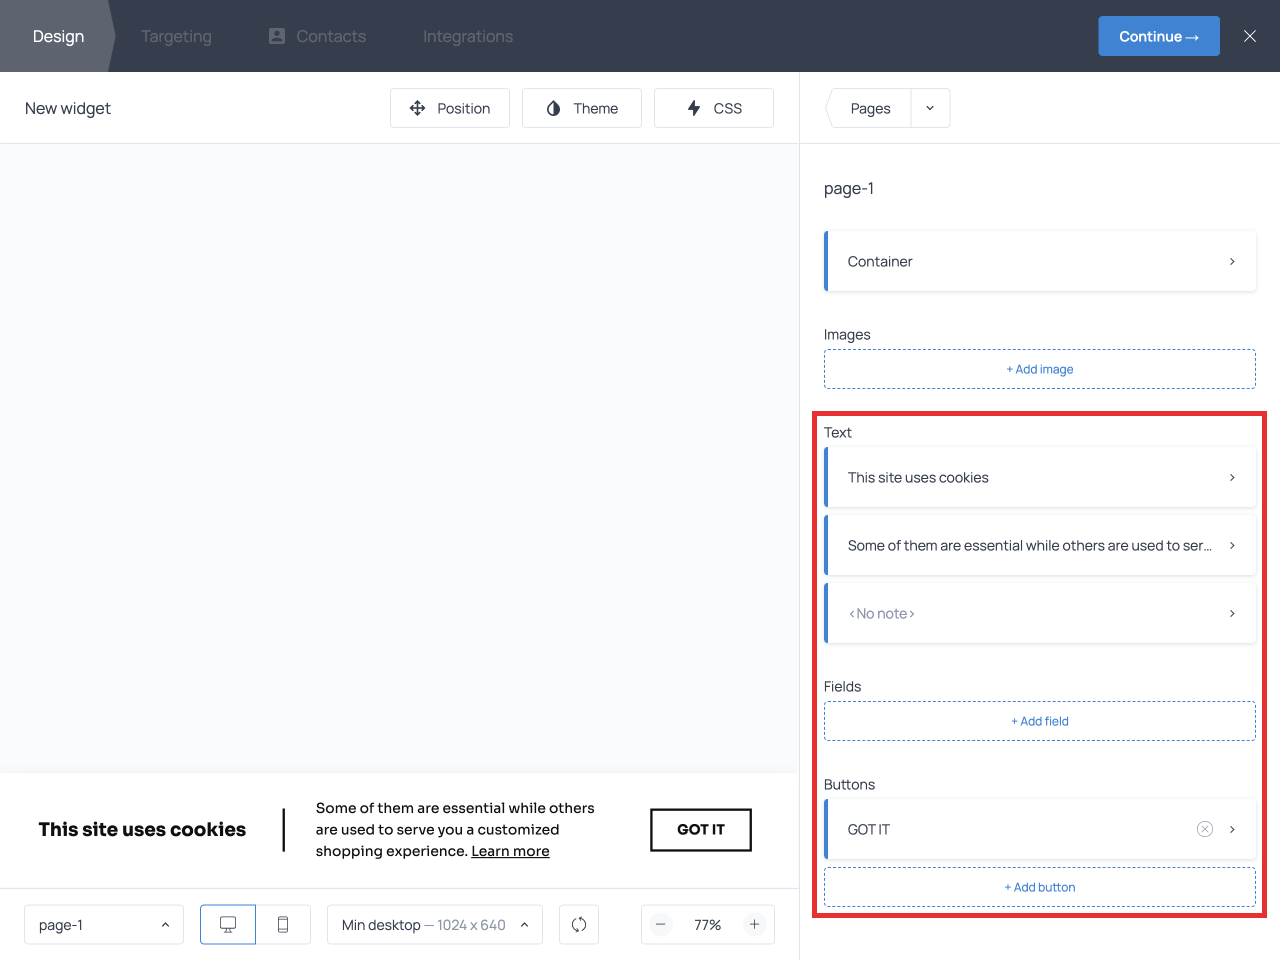
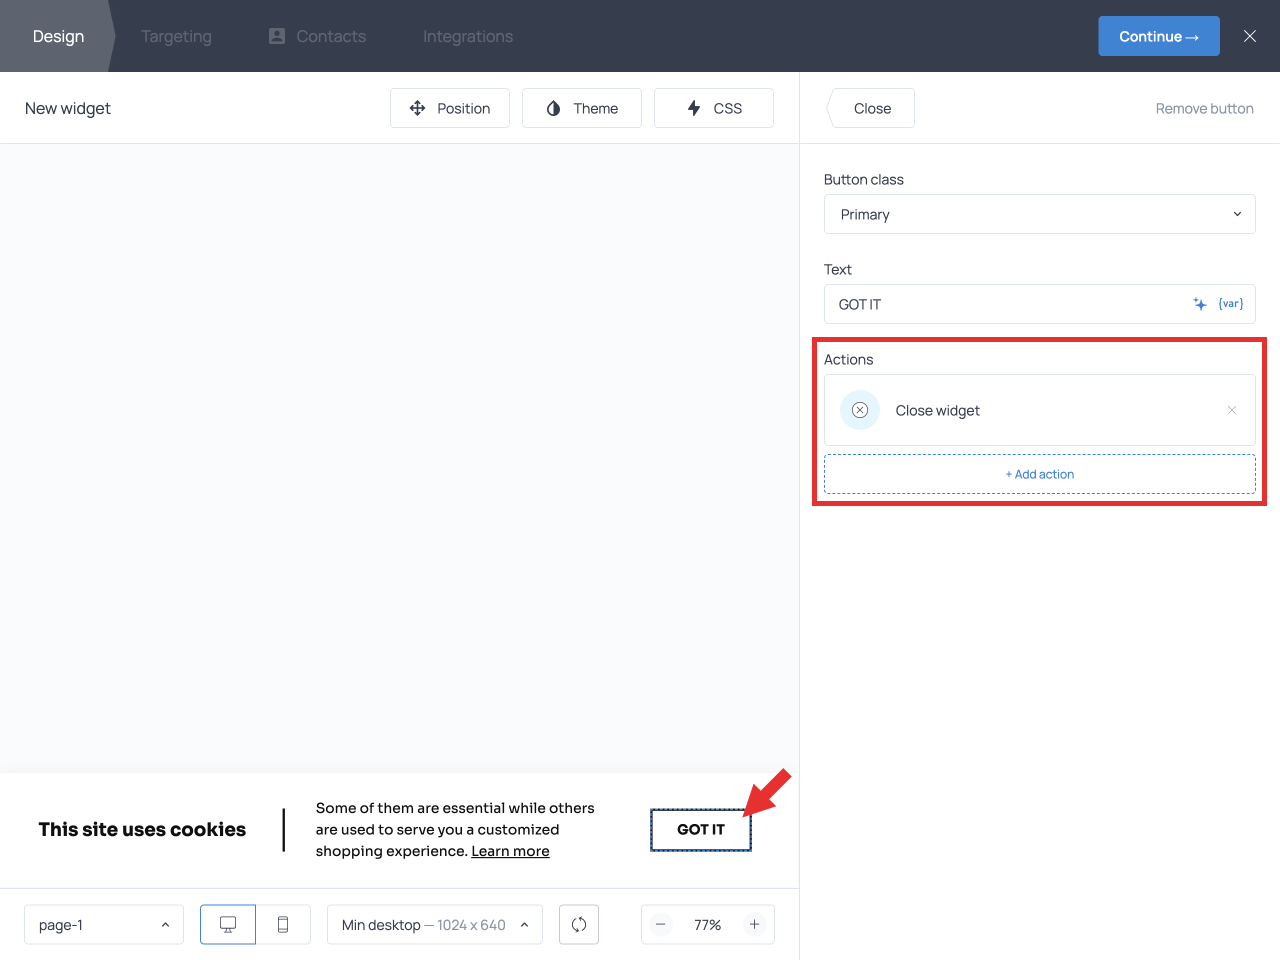
Note that you can edit the text on the button as well. In this case, it serves for explicit collection of the visitors’ consent, and the banner will close if a visitor clicks through.
There’s no requirement for the exact text that you should put on your banner – but again, the goal here is to get “clear, informed consent”. So, here is an alternative copy you may want to use:
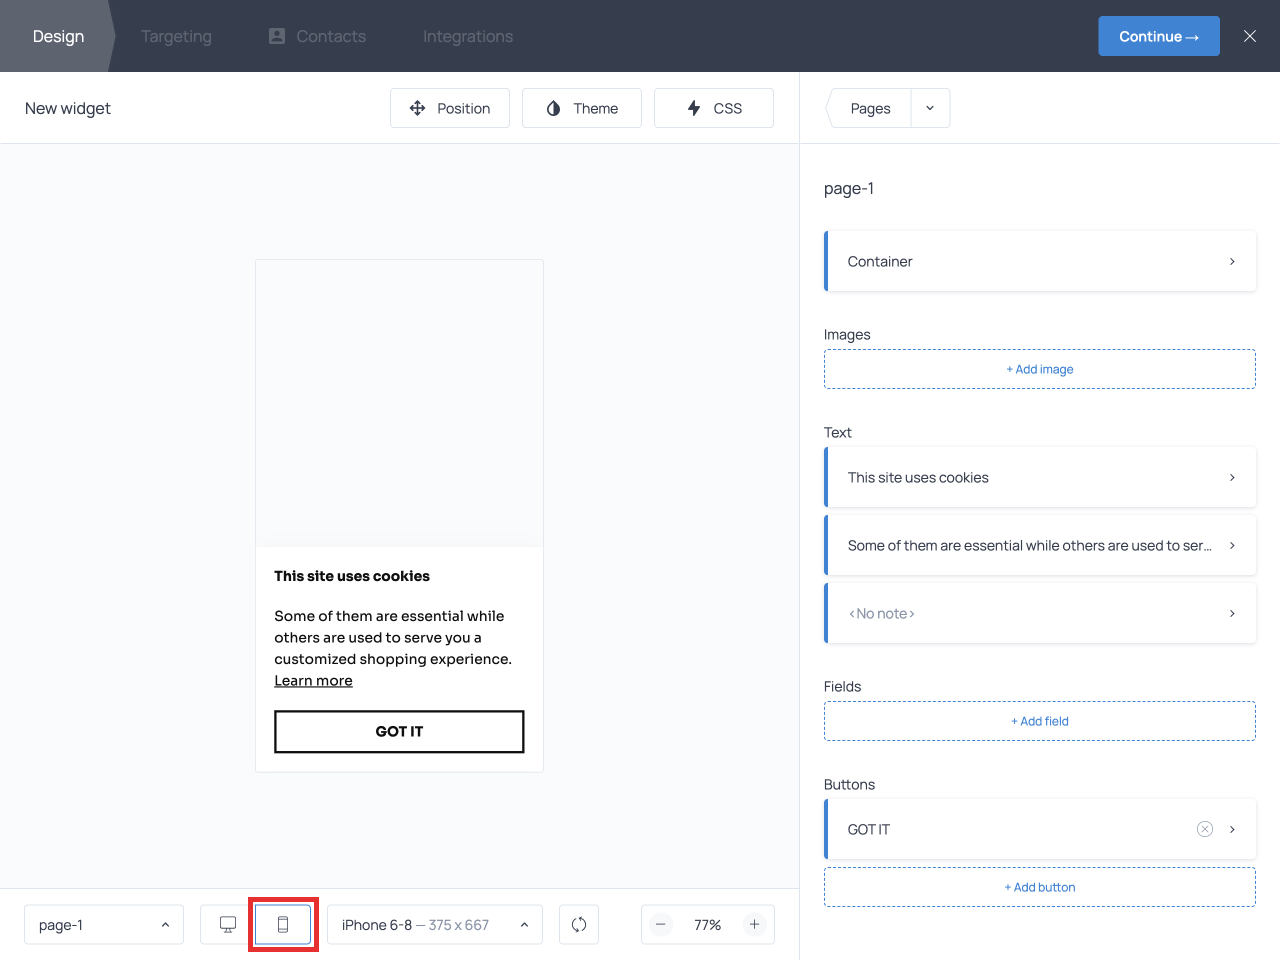
To see how the banner will appear to mobile visitors, switch to mobile mode below the preview window.
💡 It’s typically recommended to clarify which types of cookies you’re collecting from your website visitors and for what purpose. It’s also a good practice to link to the page where visitors can read your Privacy Policy and Cookie Policy.
In the gallery, templates are available in two default color themes: black and white. However, if you want your banner’s colors to match the rest of your site, you can do that using the Theme settings. Getsitecontrol allows you to change the font and set the colors for:
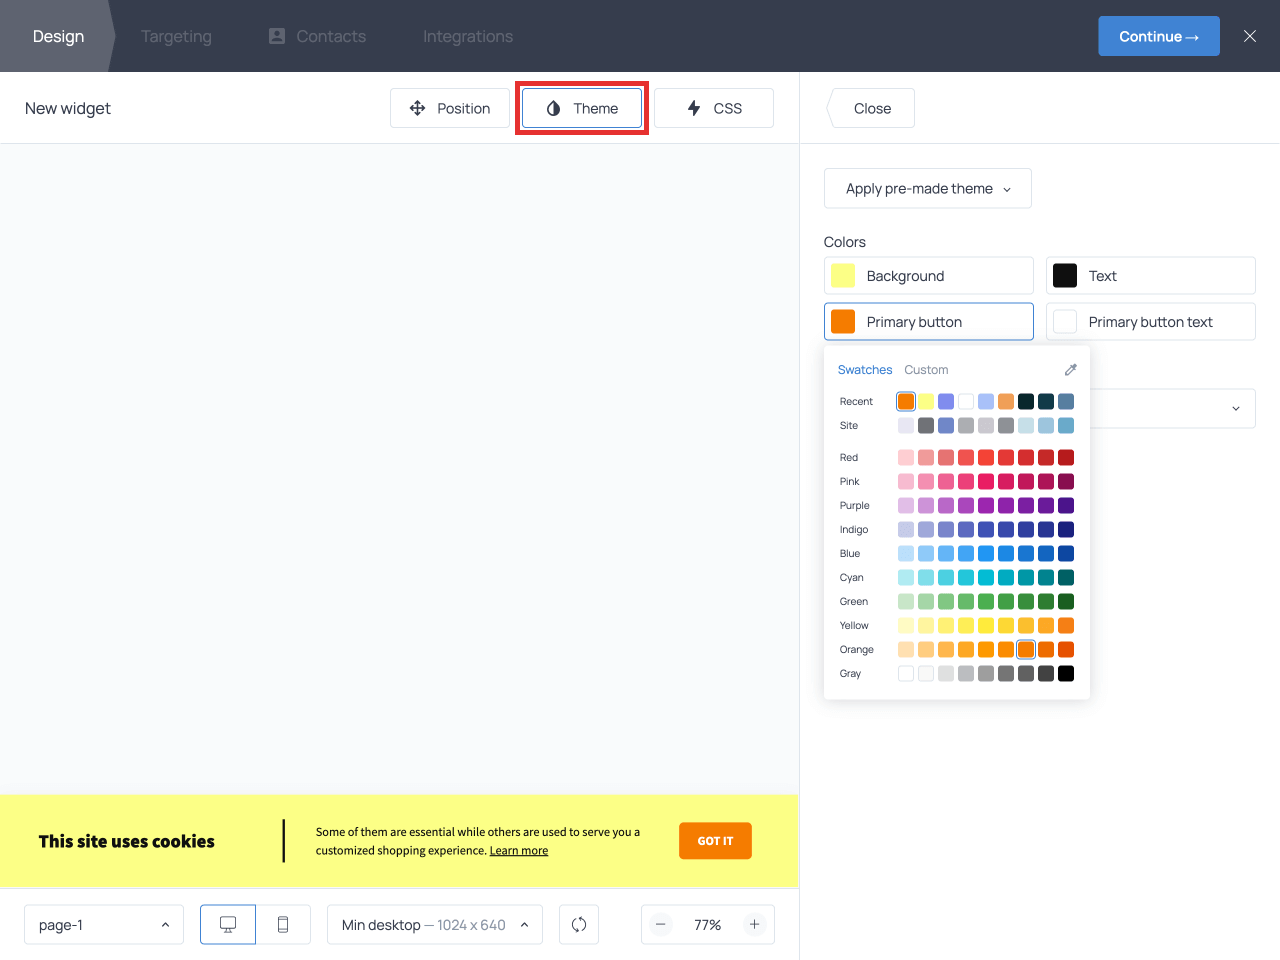
You can also use the Position menu at the top to change the banner’s position on the screen.
First things first, you want to display your cookie banner to your visitors as soon as they arrive at your website. That’s the default setting available in the free plan, so there’s no need to change that.
To avoid showing the banner repeatedly, you also want to ensure that the banner stops appearing after a visitor clicks the ‘I agree’ button. This can be set up in the Targeting tab.
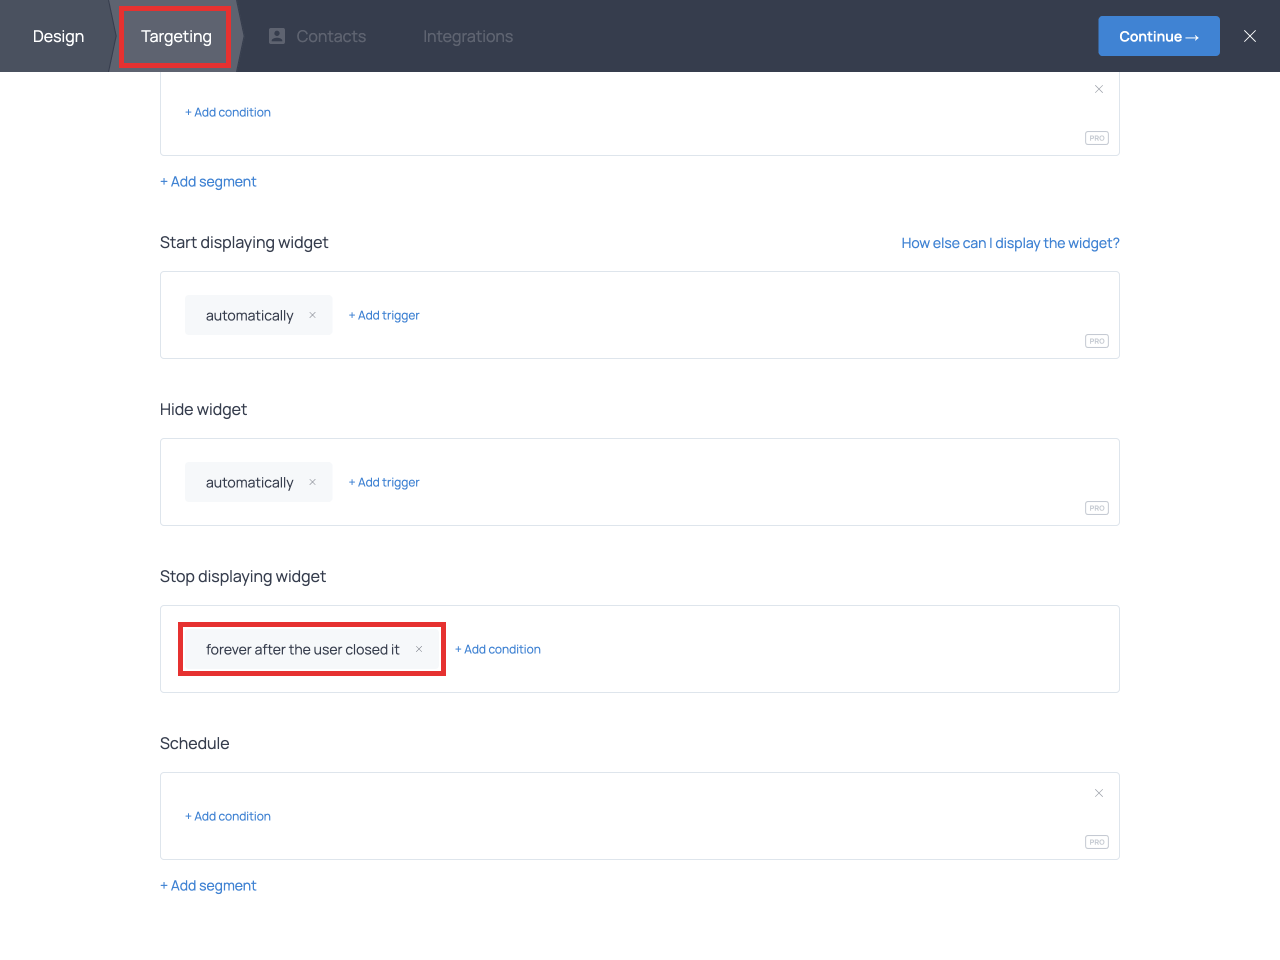
All you need to change is the following control:
In this case, the “closure” is the visitor clicking the button to consent to cookie usage. You don’t need to change any other settings in the Targeting tab.
💡 If a visitor returns to your website from a different device or clears their browser cache before the next visit, they’ll be considered first-time visitors, so they’ll see the cookie consent banner again.
Now, you’re pretty much done! Click Continue → in the top right corner to finish configuring the banner and close the editor.
Then, choose the option to activate the widget as suggested by the app:
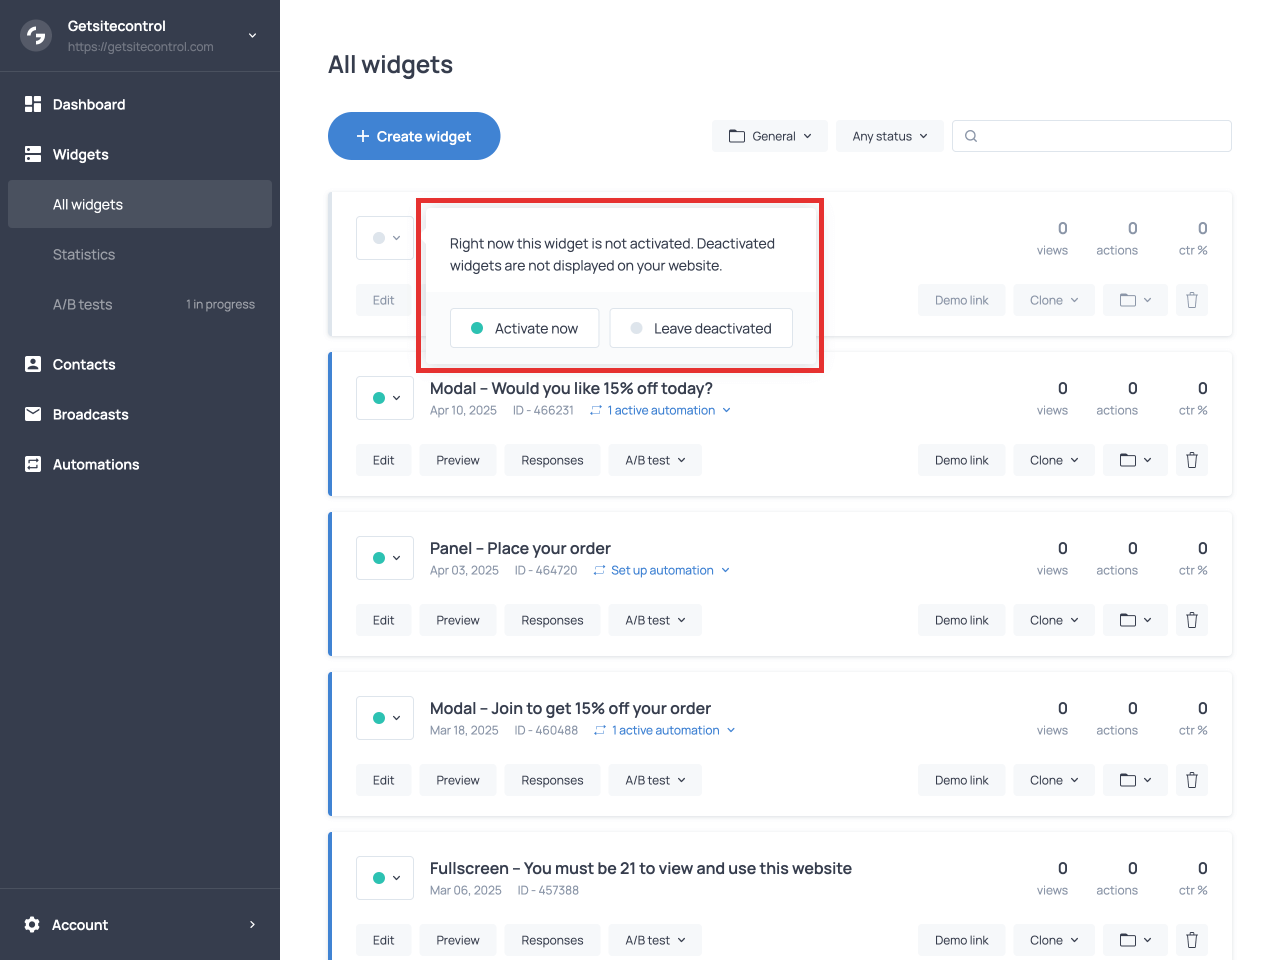
If Getsitecontrol is already connected to your site, your visitors will start seeing the banner immediately after activation. And after they click the button to agree to cookie usage, they’ll no longer see the banner.
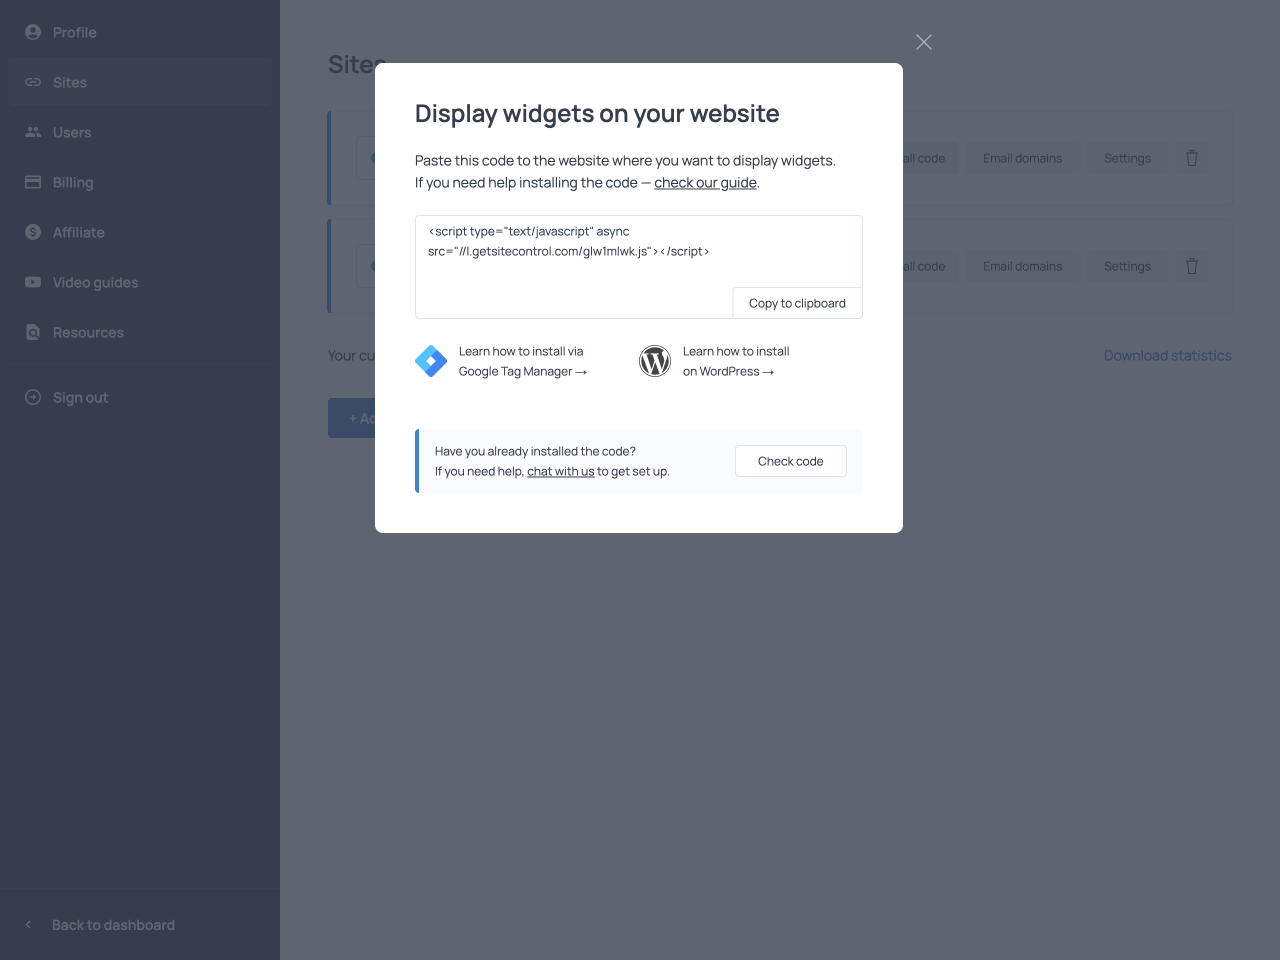
While you’ll do most of the work in Getsitecontrol’s web interface, you’ll need to add Getsitecontrol to your website so that you can display your cookie consent banner once you publish it.
If you’re using WordPress, the simplest way is to use the official Getsitecontrol plugin. It will handle the integration for you. If you’re using Shopify, install the dedicated Shopify app to speed things up.
For other sites, you’ll need to manually add the code before the closing </body> tag on your site. If you’re not sure how to do this, the Getsitecontrol documentation has detailed tutorials for most popular platforms including Squarespace, Joomla, and others.
You can also access the code installation guidance from the Getsitecontrol admin dashboard. Go to Account → Sites → Install code and follow the pop-up installation guide or request assistance via 24/7 live chat.
You don’t need a developer to stay compliant with cookie consent laws. By using Getsitecontrol and the principles outlined in this post, you can set up your own custom cookie consent banner that communicates your policy and matches the design of your website. All for free – and without needing to write a single line of code.
Colin Newcomer is a freelance writer with a background in SEO and affiliate marketing. He helps clients grow their web visibility by writing primarily about WordPress and digital marketing.
You’re reading Getsitecontrol blog where marketing experts share proven tactics to grow your online business. This article is a part of Customer engagement section.
Create popups for free
Email forms, promos, coupons, surveys, bounce-stoppers.
Get started, it’s free →Popups are a powerful tool to grow your email list, promote offers, and guide visitors toward key actions.
Our data shows that a well-designed email popup can convert 3.77% of your visitors into subscribers on desktop, and 6.57% on mobile, on average.
But not all popups deliver results — there’s a stark difference between those that fall flat and those that convert.
Looking to grow your email list?
Well, the most effective way to gain new email subscribers is to take advantage of the traffic you’re already generating.
How? By adding an eye-catching subscription form to your website.
In this blog, we’ve talked about creating email popups and collecting email addresses using the Getsitecontrol form builder. But if you’re looking to boost conversion rates significantly, having a great tool isn’t enough.
The global clothing industry continues to dominate ecommerce and is expected to surpass $1 trillion in sales by 2027.
In such a competitive market, standing out is paramount to the brand’s success. For fashion brands using Shopify, that’s where choosing the right theme comes into play.
After analyzing over 2,000 themes from the Shopify theme store, we’ve put together a list of 16 best Shopify themes for clothing brands. Whether you’re launching your store or refreshing your design, these themes offer stunning aesthetics and robust features tailored for fashion retailers.
Subscribe to get updates
Get beginner-friendly tips for growing your online business.