Create simple cookie notice
Add a cookie consent message to your website.
If your website uses analytics, marketing, or personalization cookies, you need a cookie consent message to inform visitors. It typically appears as a banner, bar, or small slide-in notification that explains your cookie policy and allows visitors to acknowledge it.
Depending on your region, displaying a cookie notice may be required under regulations such as the EU ePrivacy Directive and GDPR. But even where it’s not mandatory, most websites use cookie banners to maintain transparency and build trust with visitors.
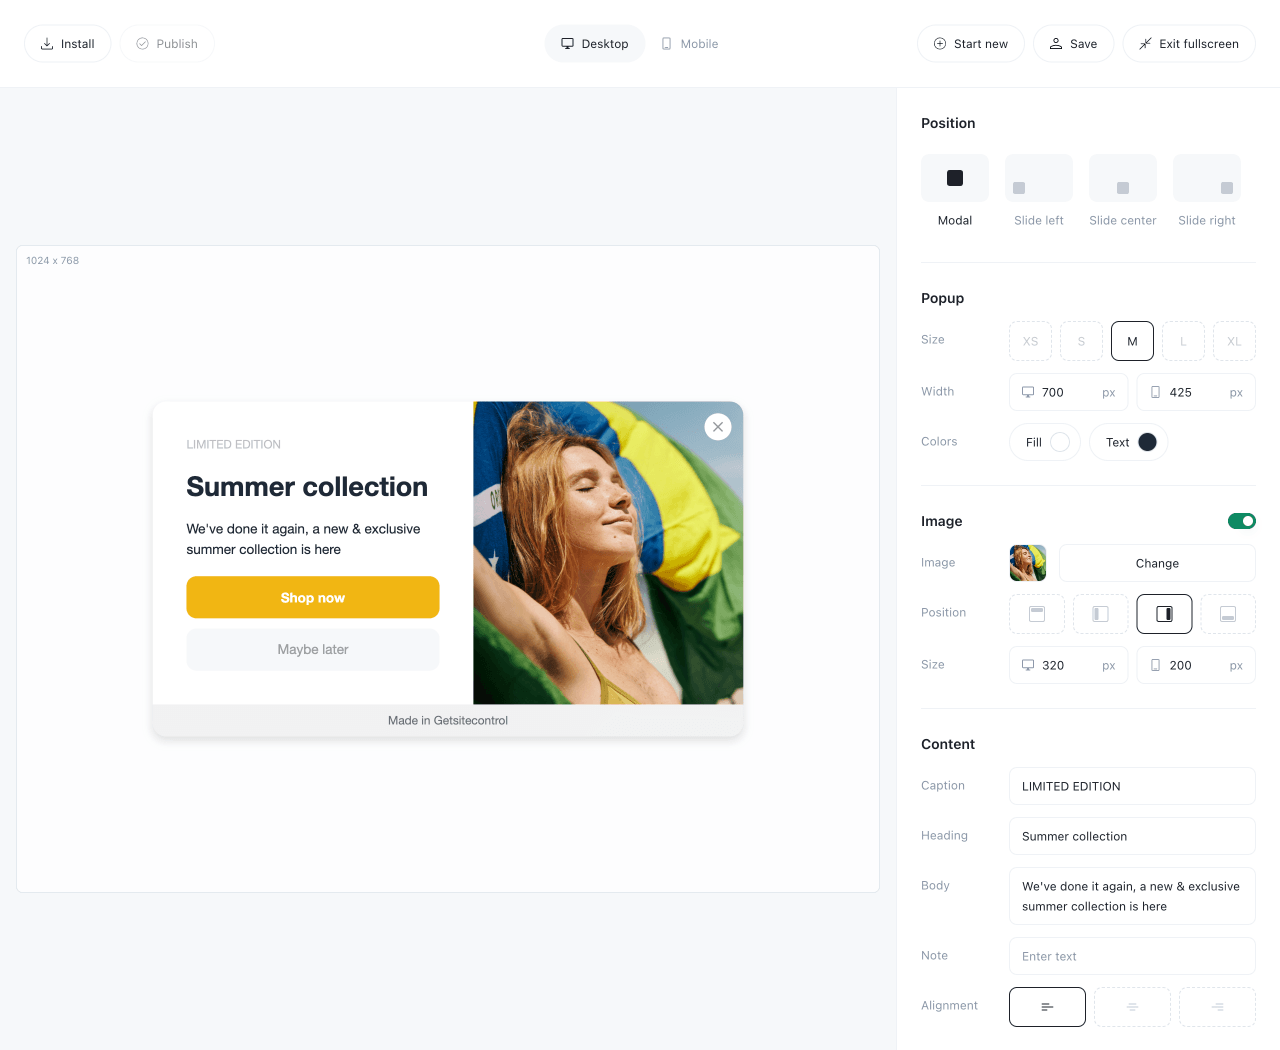
You can add a cookie consent message to your website for free using Getsitecontrol — a popup builder with ready-to-use cookie notice templates. No coding is required, and it works on all major platforms, including Shopify, WordPress, and Squarespace.
These templates are designed to display a simple cookie policy notice and collect acknowledgment via a button click. Advanced consent management features — such as cookie category selection or decline options — are outside the scope of this tool. If your website requires granular consent controls, you may need a dedicated consent management platform.
A slide-in cookie message usually appears in the corner of the screen and may include a supporting visual to match your brand style. Brands use this format when they want the cookie notice to be attention-grabbing and stay visually consistent with the rest of the website.
Most websites choose minimalist slide-in cookie banners when they want a clear notice that doesn’t interrupt the browsing experience. It’s commonly used on blogs, service websites, and small business sites where transparency is priority. This cookie consent notification appears subtly and barely covers the main content of the page.
A compact cookie banner displayed as a bar, typically at the bottom of the screen, remains visible until dismissed. This is one of the most popular cookie message types because it keeps the notice present while preserving full access to the page content. Bottom cookie banners are used when the message is informational: this format is simple, familiar, and easy to interact with.
Most cookie notices communicate two things: that the website uses cookies and why. Visitors don’t need to interpret legal terminology on the banner — detailed explanations belong on a dedicated Cookie Policy or Privacy Policy page, linked directly from the notice.
Effective cookie consent messages are short and direct. For anyone who wants full details before dismissing the notice, there should be a link to the policy page, titled as “Read policy” or “Learn more.”
| Cookie purpose | Example cookie banner text |
|---|---|
| Analytics | We use cookies to analyze website traffic and improve your browsing experience. Learn more in our Cookie Policy. |
| Personalization | Cookies help us remember your preferences and personalize content. |
| Marketing | We use cookies to measure campaign performance and deliver relevant advertising. |
| Essential | We use essential cookies to ensure the website functions properly. |
| Mixed use | We use cookies to improve site performance, analyze traffic, and personalize content. By clicking ‘Accept,’ you acknowledge our Cookie Policy. |
Simple cookie policy notifications work best when they’re clearly visible without blocking access to the page content. Bottom bars and slide-ins allow visitors to continue browsing while the notice remains on screen — that’s why these are a common choice for informational notices where a simple acknowledgment is sufficient. A notice that is too subtle risks being overlooked; one that blocks content entirely may frustrate visitors before they’ve had a chance to engage with the site.
As a rule, cookie consent messages appear on a visitor’s first arrival and remain visible until they click the acknowledgment button. After that, the banner stops displaying for that visitor — preventing the notice from reappearing on every page view.
Getsitecontrol lets you configure the banner to show only to new visitors, suppress it for returning ones, or limit display to visitors from specific countries where cookie regulations apply. If a visitor clears their browser cookies or switches devices, they will be recognized as new and see the banner again.
A lightweight cookie banner with an acknowledgment button can be appropriate for websites that use only essential or limited analytics cookies or operate outside regions requiring granular opt-in consent.
Cookie regulations vary by jurisdiction. For example, in the European Union, websites must obtain clear, informed consent before placing non-essential cookies. In other regions, an informational notice with an acknowledgment button may be sufficient. Where your company is based and where your visitors are located both influence what level of consent mechanism your website needs.
Getsitecontrol templates, including those featured in this guide, display a simple cookie notice and collect acknowledgment via a button click. They don’t include cookie category selection, granular preferences, or decline options. If your website requires that level of control, a dedicated consent management platform may be more appropriate.
Disclaimer
This article provides general informational guidance and does not constitute legal advice. Please consult official regulatory sources or a qualified legal professional if you’re unsure what applies to your website.
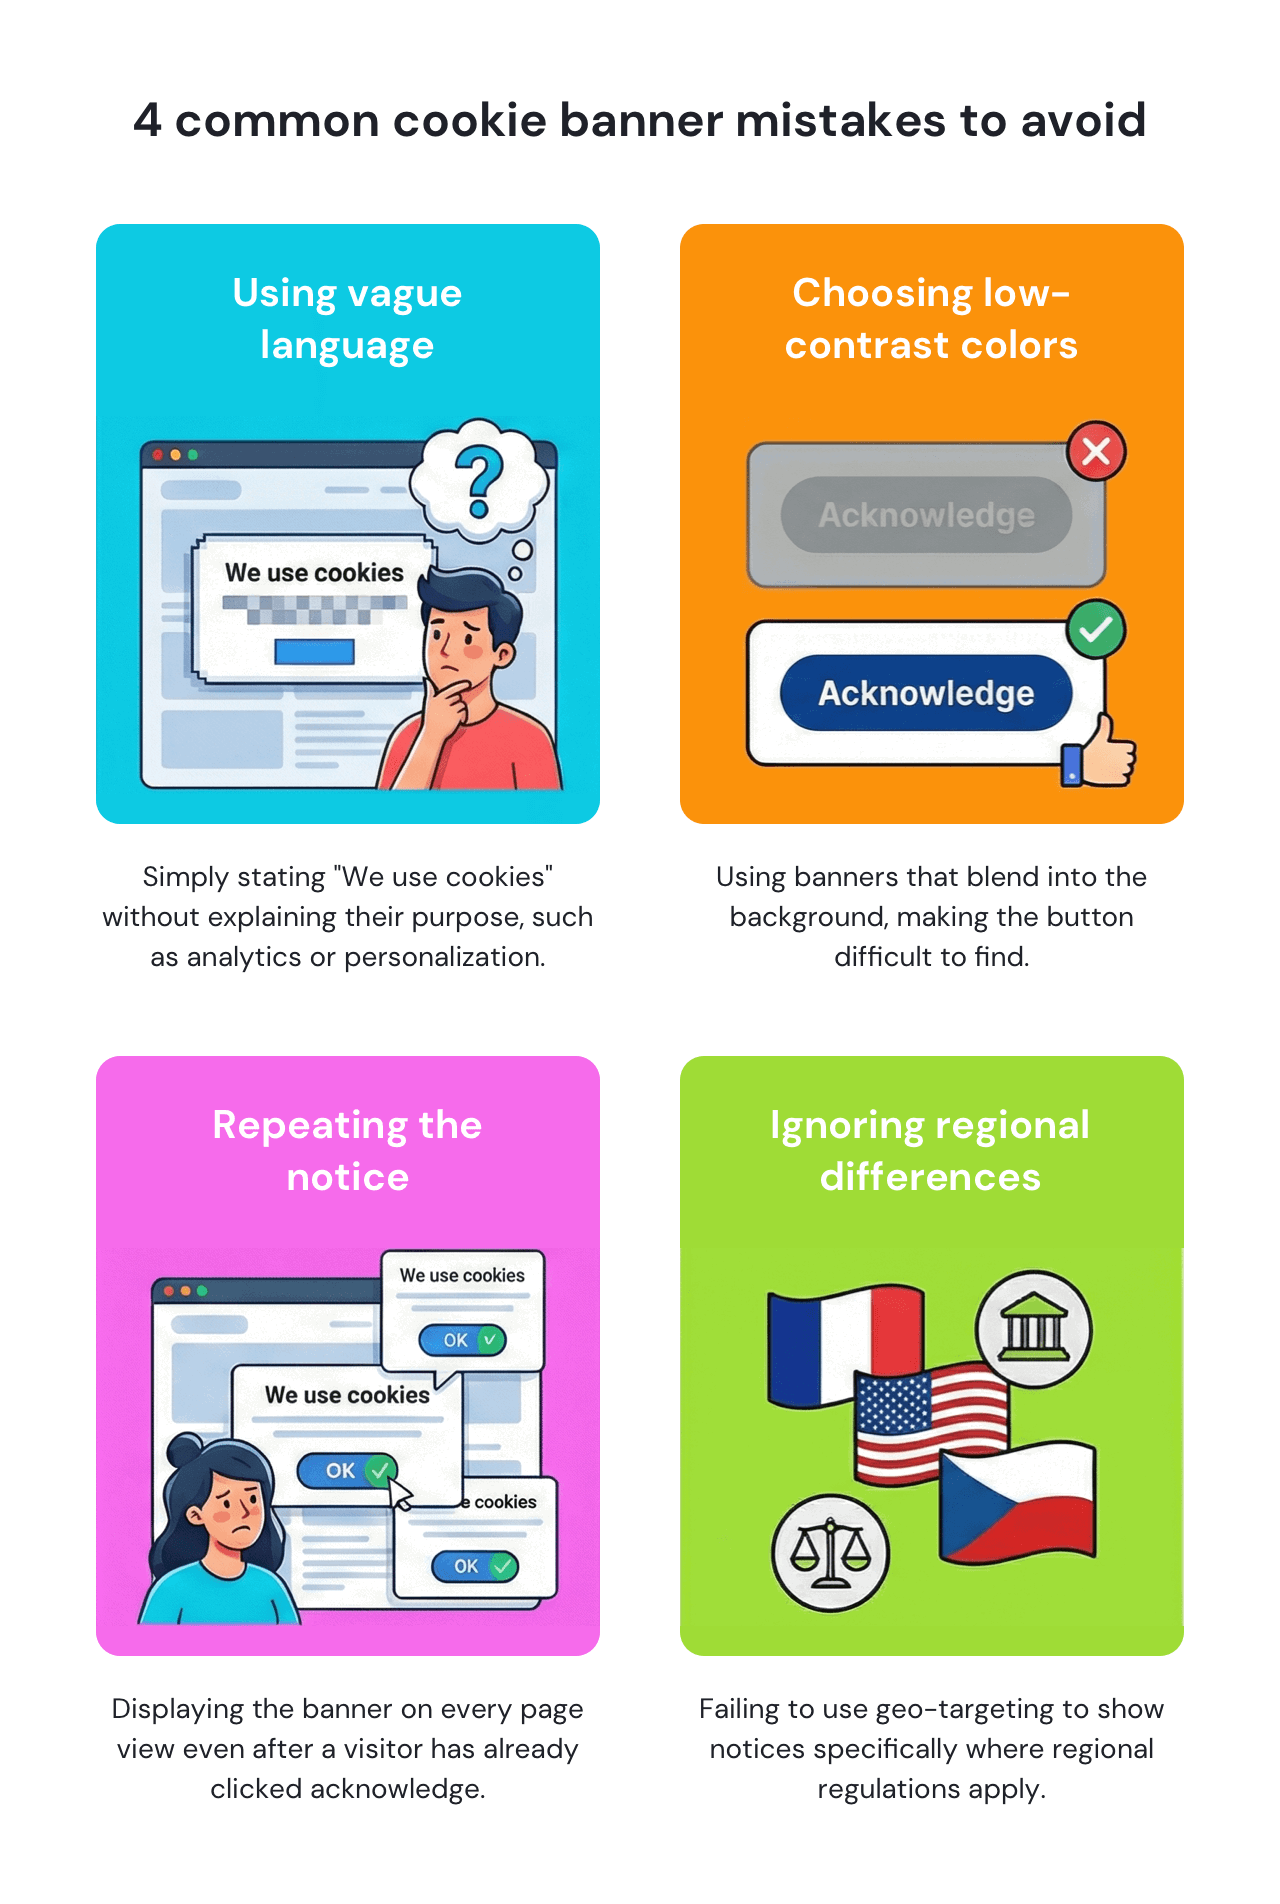
Vague language is one of the most frequent issues — a banner that only says “We use cookies” without explaining why feels incomplete. Adding one short reason, such as analytics or personalization, and linking to your policy page makes the notice clearer and more transparent.
Banners that blend too closely into the page background or use low-contrast colors often go unnoticed. The acknowledgment button in particular should be visually distinct from the surrounding text so visitors can find and click it without effort.
Displaying the cookie notice on every page view after a visitor has already acknowledged it is a configuration issue rather than a design one. Most sites set the banner to suppress permanently after the button is clicked — repeating it on subsequent visits creates unnecessary friction.
For websites with international traffic, ignoring regional differences in consent requirements is a common oversight. Display conditions can be configured to show the notice only in regions where regulations apply, rather than defaulting to a sitewide setting for all visitors.
A cookie consent message doesn’t need to be complicated. If your goal is to inform visitors about your cookie policy and collect acknowledgment, a lightweight banner or slide-in is often enough.
With Getsitecontrol, you can choose a ready-made cookie notice template, adjust the text to match your policy, change the colors to align with your website branding, set up proper audience targeting, and publish it on your website. The same builder can be used to create other website notifications, including pop-up messages and announcement bars. The entire process takes minutes and requires no technical skills. You can create an account for free to see it in action.
If you’d like to add a cookie consent message to your website without creating an account, consider Free Popup Builder by Getsitecontrol. It lets you create pop-up banners and slide-in notifications that appear on your website as soon as visitors arrive.
Choose the popup position on the screen, add your cookie notice copy, adjust the acknowledgment button, then publish it on your website using a simple code snippet. There is no need to create a new account, and it works well for simple cookie notices on blogs, small business sites, and service websites.
I really appreciate how intuitive and user-friendly Getsitecontrol is. The widgets are beautifully designed, easy to customize, and integrate seamlessly with my website. It saves me a lot of time and helps me engage with visitors in a professional and effective way.
Building materials store, owner capterraA cookie consent message is a notification that appears when you visit a website, informing you that cookies will be stored on your browser and requesting acknowledgement of the cookie policy. It typically includes a brief explanation and an “Accept” button to collect your consent.
If your website uses non-essential cookies — such as analytics, marketing, or personalization cookies — you may be required to display a cookie notice depending on your region and audience. In the European Union, explicit consent is required before placing non-essential cookies. In other regions, an informational notice with an acknowledgment button may be sufficient. Because regulations vary by jurisdiction, review the local laws that apply to your business or consult a legal professional if you’re unsure.
A cookie banner should contain a clear statement that the website uses cookies, a brief explanation of why (such as improving user experience), a link to the full Privacy Policy, and an interactive button for visitors to acknowledge the notification and provide consent.
Yes. Getsitecontrol offers pre-designed cookie notice templates that can be customized and published on your website for free. These templates cover the inform-and-acknowledge requirement — if your website requires advanced consent management features such as cookie category selection or decline options, a dedicated compliance solution may be more appropriate.
No. After selecting a template and customizing the text and colors, you publish it directly from the Getsitecontrol dashboard. For WordPress, there’s a dedicated plugin that handles the installation automatically. For Shopify, there’s a native app. For other platforms, the setup process is guided and doesn’t require technical skills.
Yes. Getsitecontrol allows you to configure display conditions based on visitor location, so the cookie banner can be shown only to visitors from specific countries or regions. This is useful for websites with global traffic that need to display a cookie notice where regulations require it. Visitors from regions where you haven’t enabled the notice will not see it.
Once a visitor clicks the acknowledgement button, the cookie notice closes and stops displaying for that visitor. The acknowledgment is stored in the visitor’s browser, so the banner does not reappear on subsequent page views. If a visitor clears their browser cookies or returns from a different device, they will be recognized as new and see the notice again.
The terms are often used interchangeably, but they refer to slightly different things. A cookie disclaimer is a statement informing visitors that your website uses cookies — it’s informational and doesn’t necessarily require any action from the visitor. A cookie consent banner goes a step further by actively collecting acknowledgment or consent via a button click. In practice, most websites combine both elements in a single notice: a brief disclaimer explaining cookie use, paired with a button that collects the visitor’s acknowledgment.
Nina De la Cruz is a content strategist at Getsitecontrol. She is passionate about helping small and medium ecommerce brands achieve sustainable growth through email marketing.
Create popups for free
Email forms, promos, coupons, surveys, bounce-stoppers.
Get started, it’s free →As a website owner, you need a simple way to publish sitewide updates — and know visitors will actually see them. Announcement bars solve this problem by staying visible at the top or bottom of the page as people browse, without interrupting the experience.
Sticky bars help visitors immediately see discount codes, sale announcements, shipping thresholds, and service updates without searching or contacting support. This format works particularly well on mobile, where screen space is limited.
If you want to grow your email list, adding an email opt-in form to your website is the first step. When timed well and tied to a clear benefit, it converts casual visitors into subscribers you can reach again.
Depending on the format, timing, and incentive, opt-in forms convert between 1% to 8% of website visitors, on average. This translates into 1 to 8 new email subscribers for every 100 people who visit your site.
A floating “Contact us” button gives website visitors a direct line to your team without forcing them to search for a contact page.
Unlike traditional forms that live on separate pages, a floating button stays visible as people browse and opens a pop-up contact form instantly upon click. This approach works well for general inquiry forms, support request forms, business inquiry forms, and beyond.
Subscribe to get updates
Get beginner-friendly tips for growing your online business.