How to add a countdown timer to your email
Getsitecontrol allows you to create emails and send them to your contacts as a part of automated workflows or broadcasts.
In this guide, you’ll learn how to add a countdown timer to your emails.
Add the countdown timer
A Countdown timer can add a sense of urgency to your offers or create hype for an event (e.g. start of a promo, launch of a new product or store, etc.).
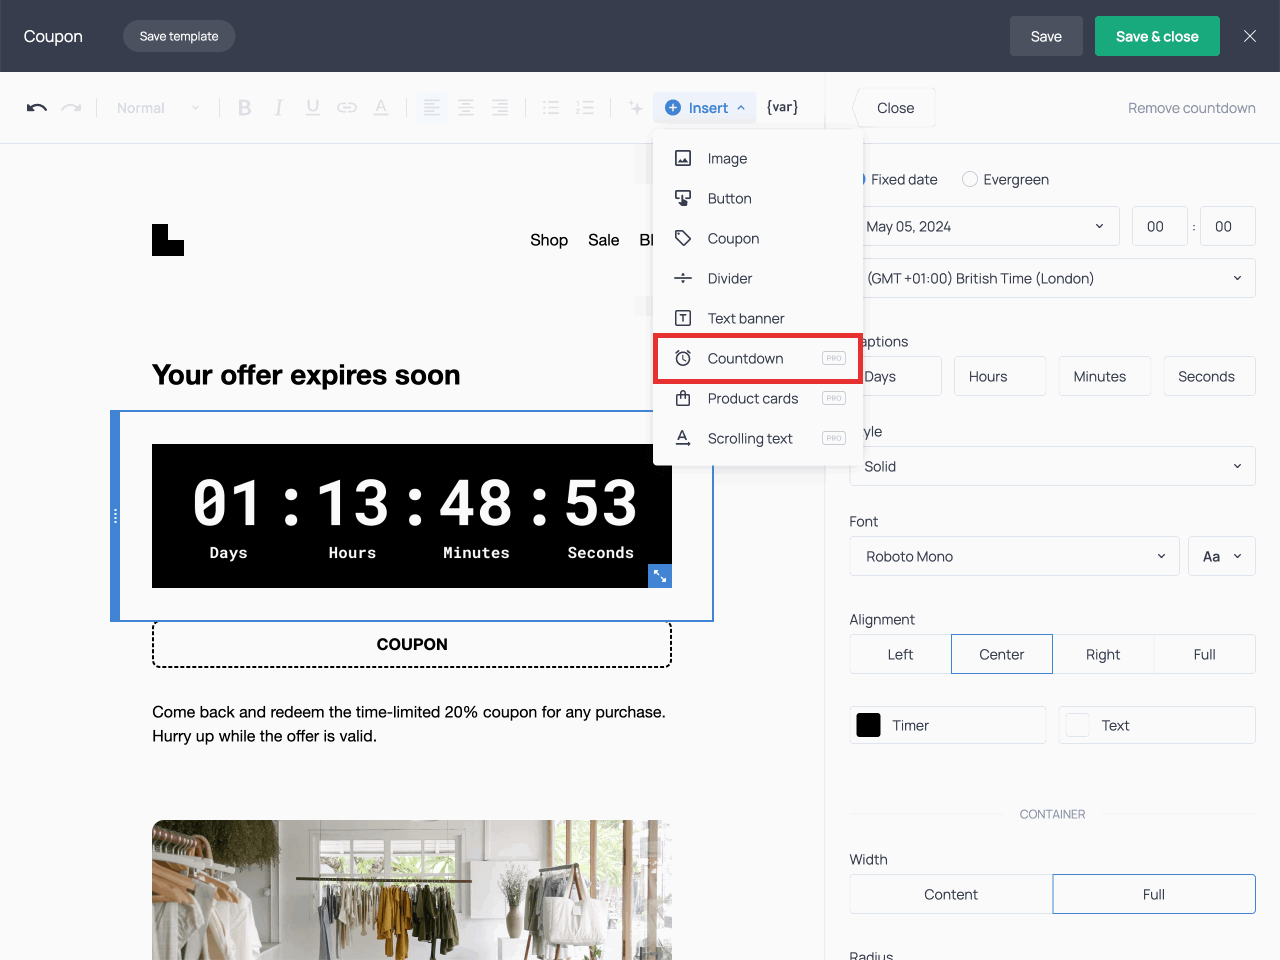
To add a timer to your email, click the +Insert button on the right side of the screen:
To change the style, countdown mode, and other details, you’ll be using the settings on the right panel.
Choose between evergreen and fixed-date
The first control lets you choose between an evergreen timer and a fixed-date timer.
The evergreen timer starts the countdown when the email lands in the recipient's inbox; it counts down the number of hours or days you’ve set up. This countdown mode is optimal if you’re sending a limited-time offer expiring within hours or days.
The fixed-date timer will display the remaining time until the date and time you choose. This mode is optimal if you want to create a sense of urgency or anticipation before a certain date.
Style the countdown timer
You can choose among 4 different styles for your countdown timer:
Using the Font menu, you can pick a different font style, including the stylized fonts for Halloween, Christmas, and Valentine’s Day.
Use the Alignment control ( 1 ) to align the countdown timer to the sides, center it, or expand it to the full width of the email. The following control ( 2 ) allows you to change the color theme:
To further customize the appearance of your countdown timer, take advantage of the container settings.
When you’re satisfied with the result, Save & close the email.
Should you need help creating or editing your emails, do not hesitate to reach out to our Tech Support team.


