How to integrate widgets with SendPulse
If you use SendPulse for email marketing and Getsitecontrol widgets to collect email addresses from your website visitors, you can easily connect the two apps to avoid having to manually export and import data. Simply choose the necessary mailing list and Getsitecontrol will add every new email subscriber to this list automatically.
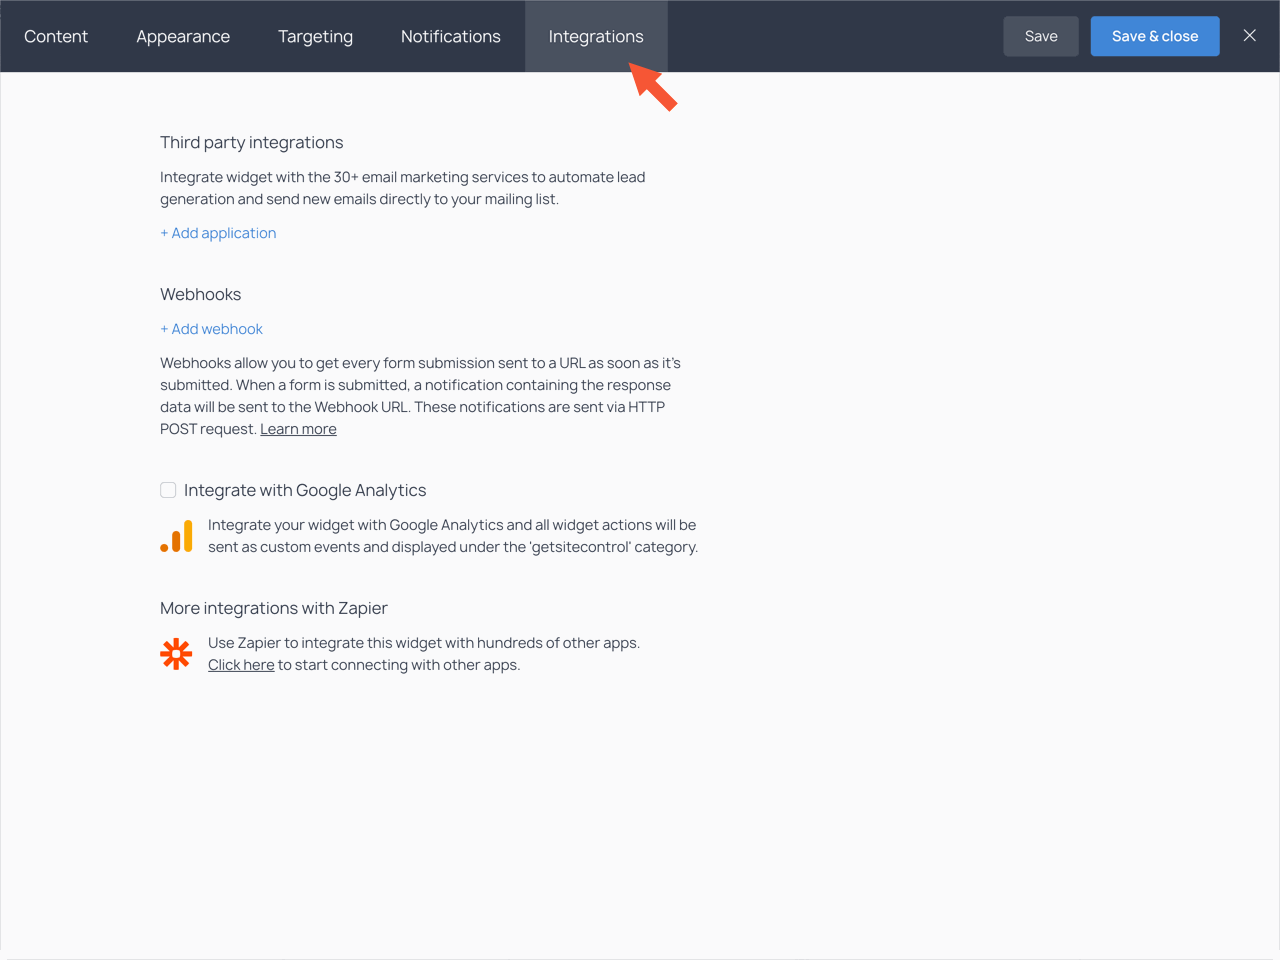
1. Find the Integrations tab
You can connect your Getsitecontrol account to SendPulse when editing your widget. Choose the Integrations tab in the top bar.
2. Connect your Getsitecontrol account to SendPulse
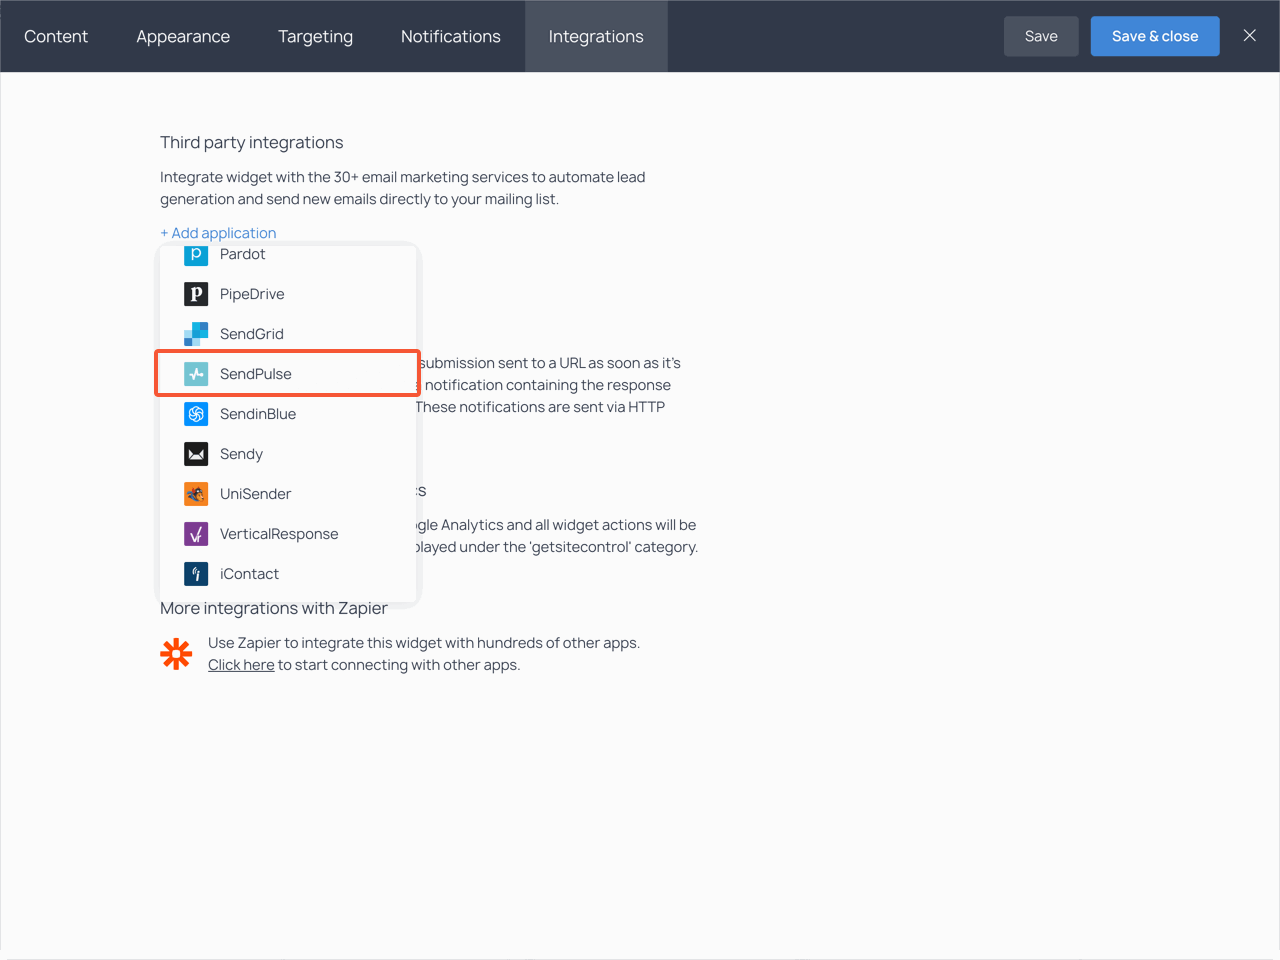
In the Third party integrations section, click the +Add application link and choose SendPulse from the drop-down list.
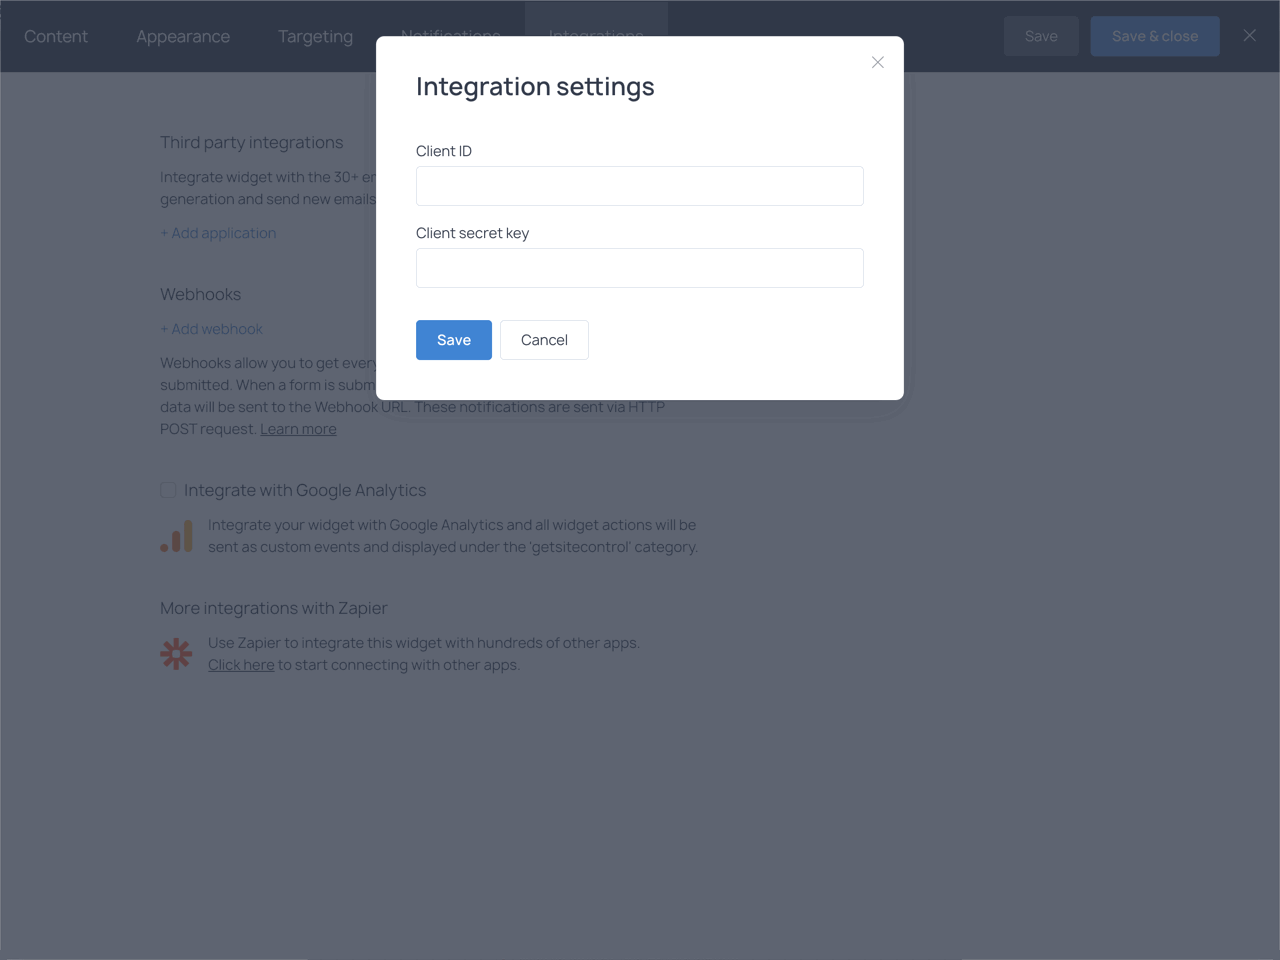
Enter your SendPulse Client ID and secret key and press Save.
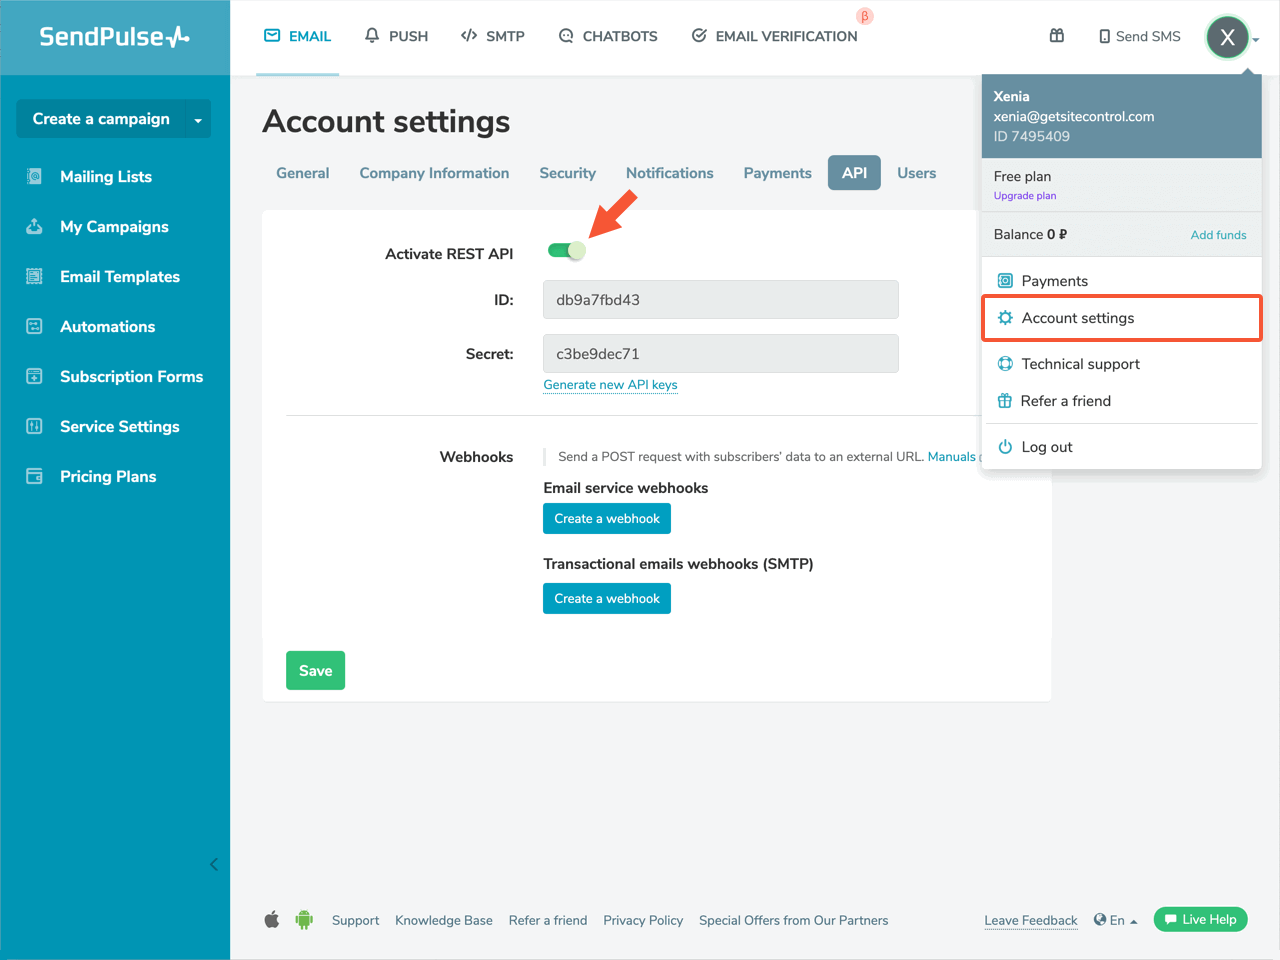
You can create the Client ID and secret key by going to Account settings in your SendPulse account. Choose API, activate REST API and click Save.
Now your accounts are connected.
3. Choose the list
You will then be offered to choose one of your SendPulse mailing lists. Choose the one you want the collected emails to be exported to.
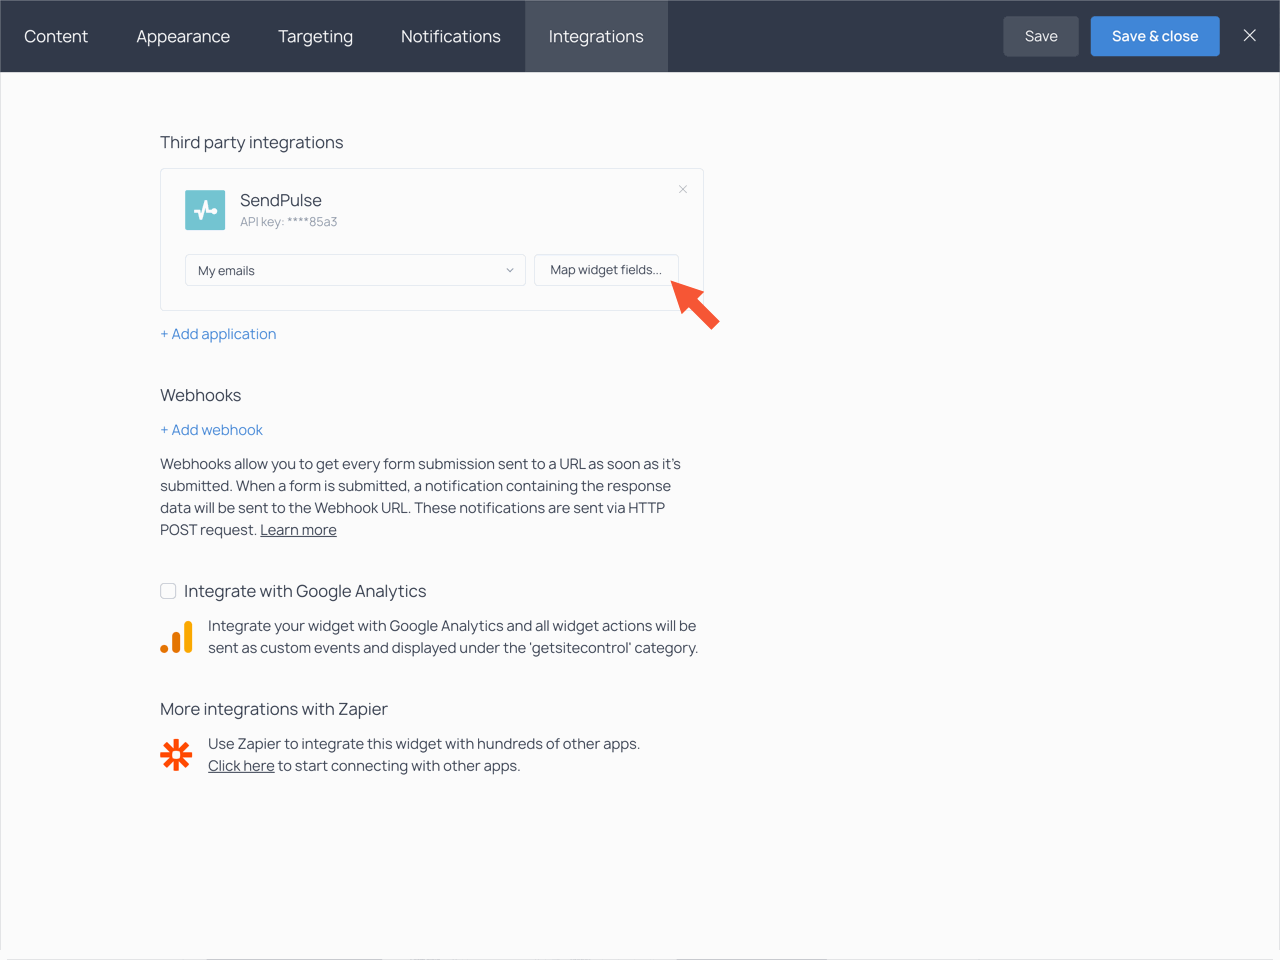
4. Map your widget fields
Make sure the fields of your widget are matched to those in the SendPulse list. Click the Map widget fields button to check that the fields are properly matched. You can read more about field mapping here.
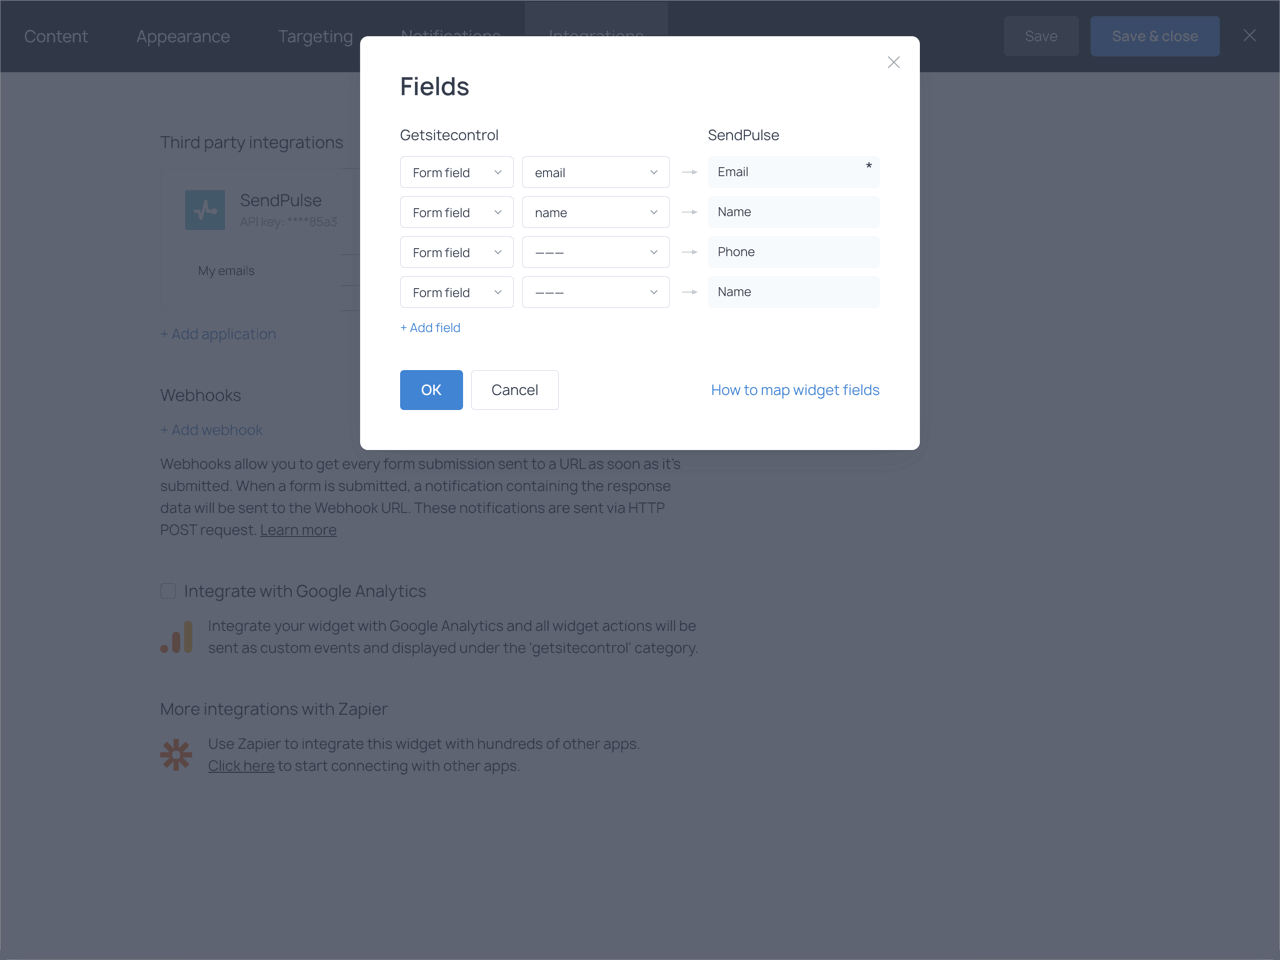
After you’ve matched the fields, click OK. That’s it. Now all new contacts will be automatically copied to the SendPulse mailing list.
You can connect your widget to more than one third-party application. Click the +Add application link to add another integration for your widget.