How to use Dynamic Text Replacement to personalize widget and email content
Dynamic Text Replacement (DTR) lets you personalize widget and email content automatically using data available for each visitor or contact. Instead of displaying the same message to everyone, you can insert variables that are replaced with specific values when the message is shown or sent. These values can come from form submissions or system-collected data such as the visitor’s location, device, product on screen, cart information, or custom API parameters.
You can use DTR to greet customers by name, reference the products they are viewing, display location-specific information, or tailor email content based on subscriber data.
In this guide, you’ll learn how to add and edit variables, explore the available variable types, and discover advanced options for using DTR in both widgets and emails.
DTR in widgets
Dynamic Text Replacement allows you to personalize the content of your widgets by inserting variables into text fields. When a widget is displayed, these variables are automatically replaced with the corresponding values, if available for the visitor.
Variables can be added to most text elements in a widget, including headings, paragraphs, notes, form field labels, placeholder text, default values, button labels, and button URLs. The following sections explain how to add and edit variables and describe the different types of data you can use for personalization.
Adding and editing variables
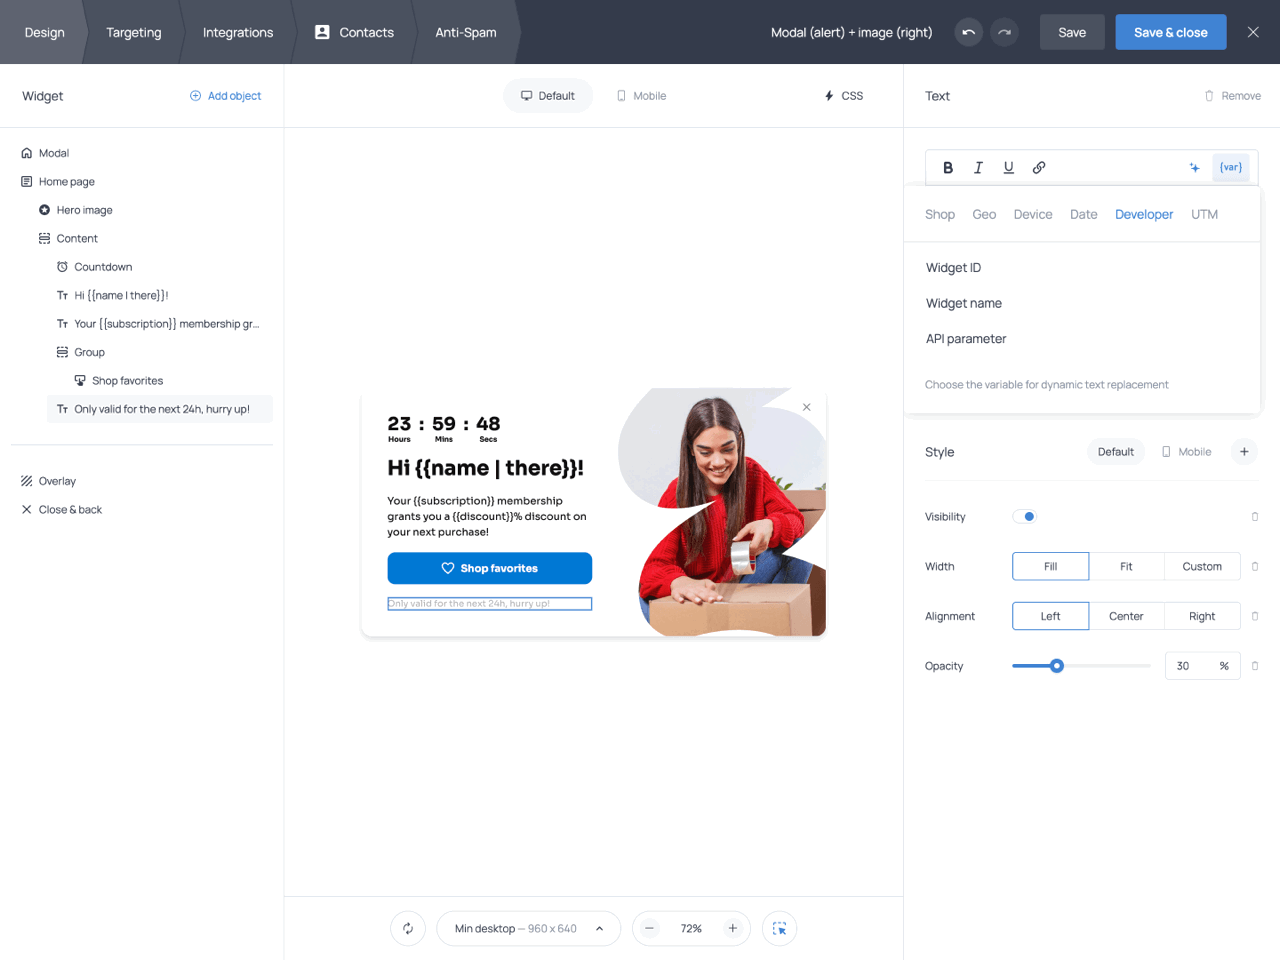
You add variables to text elements using the {var} menu next to the text field of choice. Variables can be inserted into both rich text fields and regular text fields. In rich text fields, variables appear as separate blocks within the text. Clicking a block opens the expression editor, where you can modify the variable or replace it with a more advanced expression. This makes it possible to apply calculations, conditions, and other custom logic described in the section on advanced options.
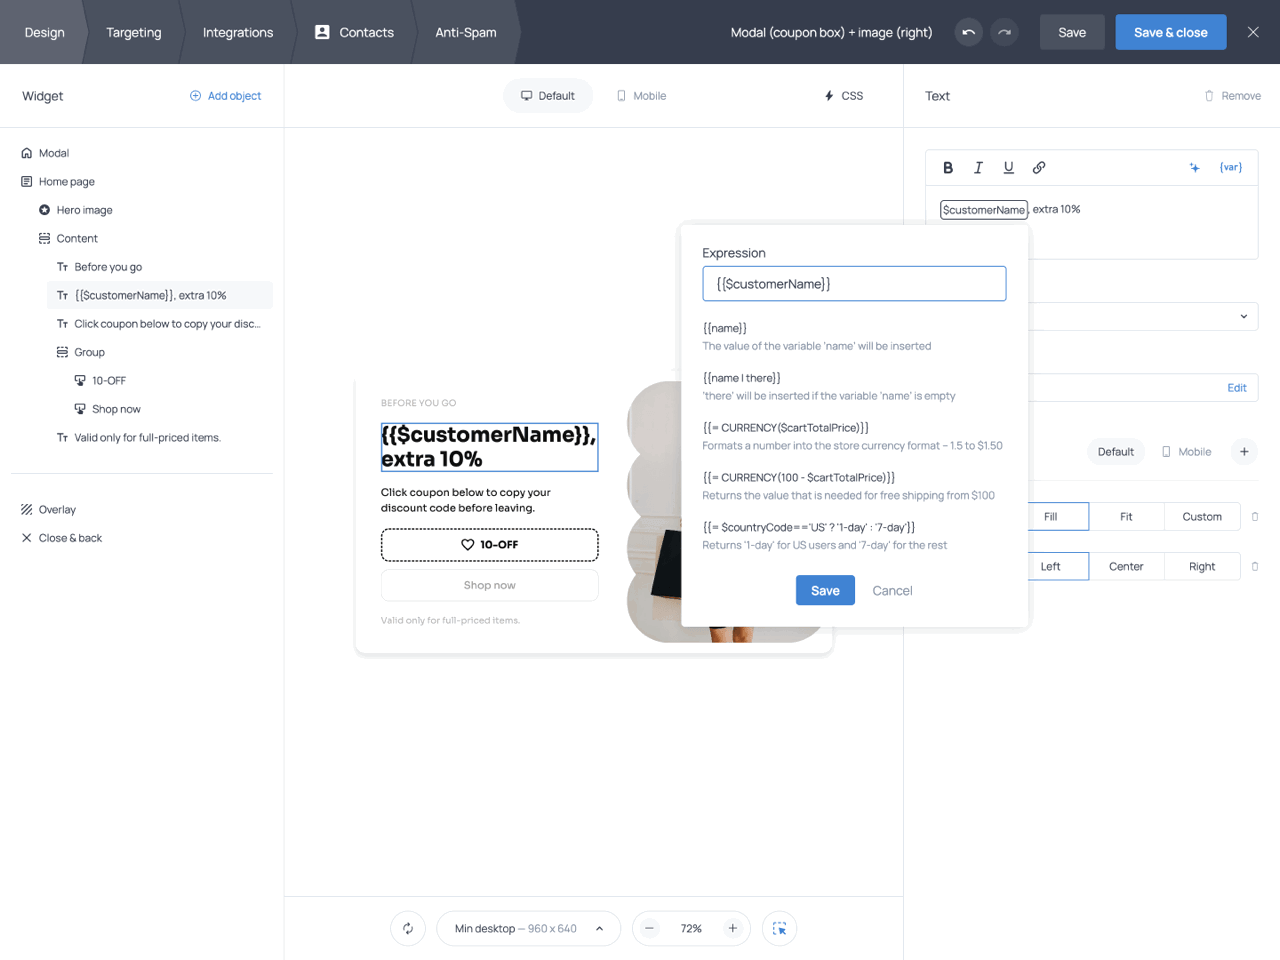
Editing a variable block in a rich text field (heading)
When you add a variable to a regular text field, such as the placeholder text field, the default value field, or the button label field, the variable will be displayed as simple text in curly brackets. Unlike variable blocks in rich text fields, these variables can be edited directly, just like any other piece of text.
Editing a variable directly in a regular text field (button label)
Using fallback values
You can specify a fallback value to display when no data is available for a variable, ensuring that the message remains meaningful. Use the following format: {{variable | fallback}}. For example: {{name | there}}. If no name is available, the greeting ‘Hi {{name | there}}!’ will appear as ‘Hi there!’
Variable categories
DTR variables are grouped into categories based on the source of the data they use. Depending on your goals, you can personalize widgets with information collected through forms, visitor attributes detected by the system, campaign parameters, Shopify store data, or custom values provided through the API.
Form
Form variables allow you to reuse information visitors have already submitted through the widget. This makes it possible to personalize subsequent pages of a form. For example, if you collect a visitor’s name on the first page, you can display it on the success page after submission.
The Form category contains the IDs of all fields available in the widget. To display the value collected by a specific field, select its ID from the Form tab in the variable menu.
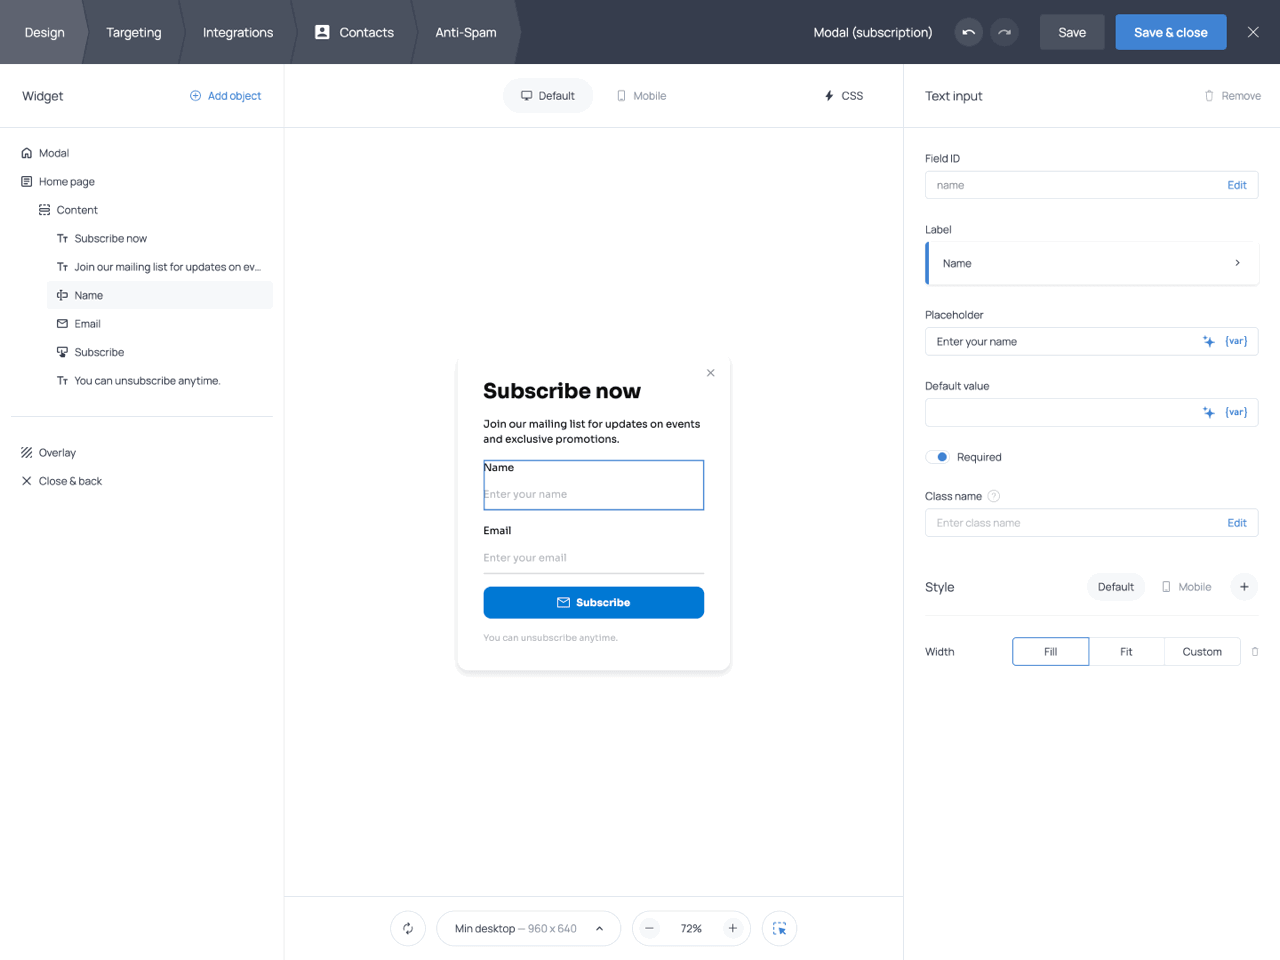
Field ID in the field settings panel (top-right)
Geo
Geo variables use the visitor’s IP address to determine their location and display location-based information. For example, you can display the visitor’s city on a free shipping bar or mention their country in a promotion. The Geo category includes the following variables.
| Variable | Description |
|---|---|
| City | Displays the visitor’s city |
| Country | Displays the visitor’s country |
| Country code | Displays the country code |
| Region | Displays the region |
| State code | Displays the state code |
| Postal code | Displays the postal code |
Location data may not always be available. Visitors can block location detection or use tools that hide their IP address. To avoid empty text, we recommend adding a fallback value, for example: {{$city | your door}}. This way, if the city cannot be determined, the widget will display a message like: ‘Free shipping to your door’ instead of showing an incomplete sentence.
Device
Device variables allow you to personalize messages based on the visitor’s browser, operating system, device type, and language settings. These variables are useful when you want to show different content or direct visitors to different pages depending on their device. The Device category includes the following variables.
| Variable | Description |
|---|---|
| OS | Displays the visitor’s operating system |
| Browser | Displays the browser name |
| Device | Displays the device name, such as iPhone |
| Device type | Displays Desktop, Mobile, or Tablet |
| Language | Displays the language configured in the visitor’s browser |
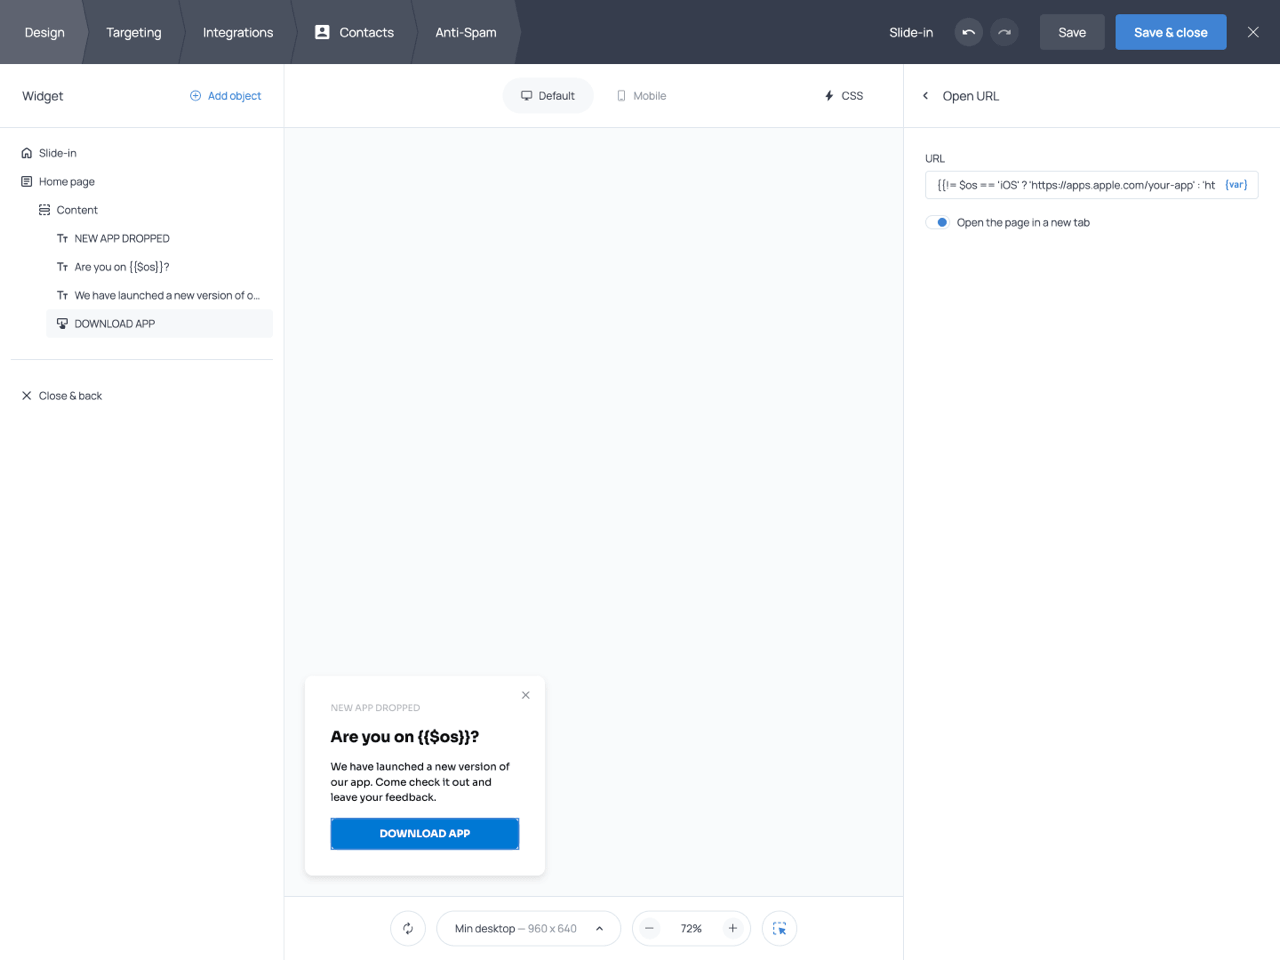
One common use case is directing visitors to different destinations depending on their operating system. For example, if you’re promoting a mobile app, you may want iOS users to be redirected to the App Store while Android users are sent to Google Play. To achieve this, add the OS variable to your widget and use the following expression in the button URL field:
{{!= $os == 'iOS' ? 'https://apps.apple.com/your-app' : 'https://play.google.com/your-app'}}When a visitor clicks the button, the widget checks the operating system detected on their device and automatically opens the corresponding app store.
Date
Date variables allow you to display information based on the visitor’s current date and time. These variables are useful for displaying time-sensitive information and creating urgency. For example, you can automatically display the current month as the end date of a promotion. The Date category includes the following variables.
| Variable | Description |
|---|---|
| Date | Displays the current date |
| Month | Displays the current month |
| Weekday | Displays the current day of the week |
| Day | Displays the day of the month |
Developer
Developer variables allow you to display information stored in your own database by passing it to Getsitecontrol through API parameters. The Developer category contains the following options.
| Variable | Description |
|---|---|
| Widget ID | Displays the widget ID |
| Widget name | Displays the widget name |
| API parameter | Displays custom values passed through the API |
For example, you might want to greet visitors by name, show their subscription status, display their membership level, or highlight a personalized discount. To do this, first send the relevant data to Getsitecontrol using the API. Then, when adding a variable to your widget, select API parameter from the Developer category and specify the parameter you want to display.
To ensure your widget displays meaningful text even when custom API parameters are empty, we recommend adding fallback values, for example, {{name | there}}. If no name is available, the greeting Hi {{name | there}}! will appear as ‘Hi there!’.
UTM
UTM variables allow you to display the source the visitor is coming from, the marketing channel, the campaign, or specific keywords. These variables are especially useful when running ads or traffic campaigns because they allow you to tailor messages to different visitor sources. The UTM category includes the following variables.
| Variable | Description |
|---|---|
| UTM Source | Displays the traffic source |
| UTM Medium | Displays the marketing channel |
| UTM Campaign | Displays the campaign name |
| UTM Content | Displays the content identifier |
| UTM Term | Displays the keyword parameter |
For example, you can use the UTM Source variable to display the source a visitor is coming from and tailor the message accordingly. If a visitor arrives through an Instagram campaign, the widget could display a message such as ‘Thanks for visiting us from Instagram! Here’s a coupon code just for you.’ In this example, Instagram is the value of the UTM Source variable, which is automatically extracted from the URL.
Shop
If you are on Shopify, you’ll have access to additional variables based on your store data. These variables allow you to personalize widgets using information about the customer, the product they are viewing, the selected variant, and the content of the shopping cart. The Shop category includes the following variables.
| Variable | Description |
|---|---|
| Customer ID | Displays the customer’s ID |
| Customer email | Displays the customer’s email address |
| Customer phone | Displays the customer’s phone number |
| Customer name | Displays the customer’s name |
| Cart item count | Displays the number of items currently in the cart |
| Cart total price | Displays the total value of the cart. |
| Cart discount | Displays the discount applied to the cart |
| Product ID | Displays the ID of the current product |
| Product type | Displays the category of the current product |
| Product vendor | Displays the product vendor or brand |
| Variant ID | Displays the ID of the selected product variant |
| Variant title | Displays the name of the selected variant |
| Variant price | Displays the price of the selected variant |
| Variant SKU | Displays the SKU of the selected variant |
| Variant barcode | Displays the barcode of the selected variant |
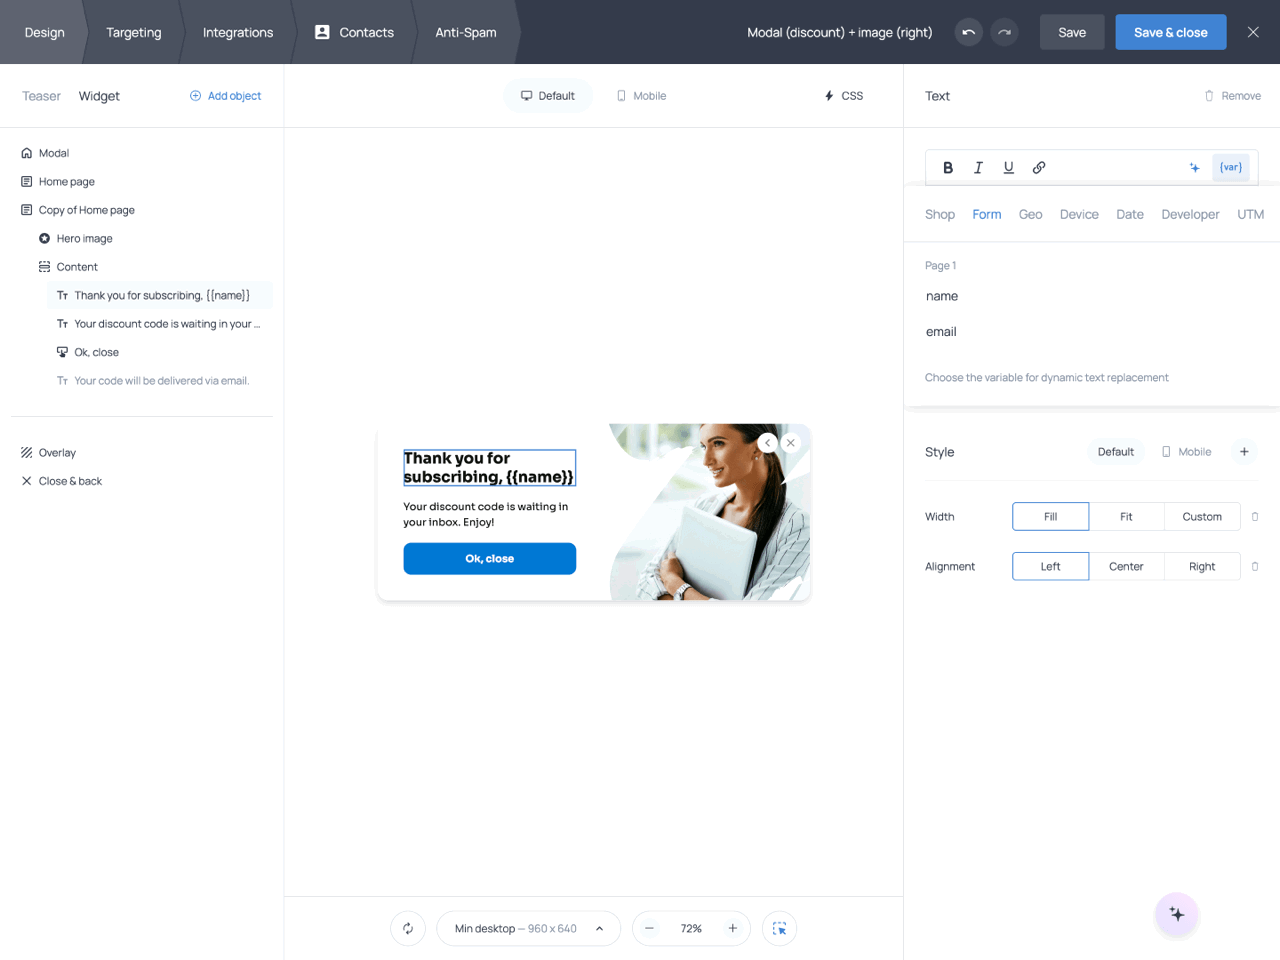
If customers are logged in to your Shopify store while browsing, you can use the Customer name variable to greet them with a personalized message. For example, instead of displaying a generic welcome message, you can address customers by name to make the experience feel more personal. If no customer account is available, consider adding a fallback value to ensure the message still reads naturally.
Shopify variables also allow you to display information about the product a customer is currently viewing. Depending on your use case, you can reference the product category, vendor, or selected variant. This can be useful for creating relevant promotions. For example, you can offer free shipping on a specific item, highlight a product collection, or create messages tailored to a particular brand. Variables such as Variant title, Product type, and Product vendor are particularly useful in these scenarios.
You can use the Cart total price variable to display how much more a customer needs to spend to unlock free shipping. To achieve this, use the Cart total price variable in the following expression:
{{= CURRENCY(100 - $cartTotalPrice)}}The amount will be automatically calculated and formatted using your store’s currency. For example, if a customer’s cart total is $75, the widget can display a message such as ‘You’re only $25 away from free shipping!’
When to use each variable category
| Variable category | Typical use cases |
|---|---|
| Form | Reusing data submitted through the widget |
| Geo | Location-based personalization |
| Device | Device-specific messages and links |
| Date | Time-sensitive promotions |
| Developer | Displaying custom data from external systems |
| UTM | Campaign-specific messaging |
| Shop | Product, cart, and customer personalization |
Advanced options
In addition to displaying variable values, DTR allows you to use variables within expressions to create more advanced personalization scenarios. The following sections cover some of the most common use cases.
Adding variables to the Open URL action
The DTR feature allows you to add variables to the button URL, and pass along data collected by the widget. For example, you can pass emails collected by a form field to the Open URL action.
To set this up, open the action button settings and add an Open URL action. Next, enter the chosen URL in the corresponding field in the following format: https://example.com?email={{email}}. Upon button click, the popup will now open the URL containing the submitted email.
It’s also possible to pass variables into an Open URL action with the help of API. Here is the method you should use:
gsc('params', {url: 'https://example.com?var=123'})After you’ve added this script to your site, add {{!url}} to the URL field in the action settings. The exclamation character at the beginning prevents URL encoding.
If necessary, you can pass along a query string containing several GET parameters. Here is the method to achieve that:
gsc('params', {query: 'price=10&quantity=2'})Make sure to add {{!query}} to the URL field in the Open URL action settings. The final URL should look like the following: https://example.com?{{!query}}
Using JavaScript expressions
You can use JavaScript expressions in the rich text editor of your widget to create personalized messages for your visitors. The following is the correct format to add JS expressions to the widget’s text: {{!= expression }}, where ‘expression’ represents any valid JavaScript expression whose result is displayed to the visitor, and the exclamation mark prevents HTML escaping (which happens by default in the widget editor).
In an expression, you can use different variables. For example, you can use the expression below to display a specific customer status depending on how much the customer has spent:
{{= totalSpent>1000 ? 'Premium' : 'Basic' }}If the customer’s total spending exceeds 1000, the widget will display Premium. Otherwise, it will display Basic.
You can also use expressions to format variable values before displaying them. For example, the following expression converts the visitor’s name to uppercase and adds a title:
{{= 'MR. ' + name.toUpperCase() }}If the visitor’s name is John, the widget will display MR. JOHN. This approach is useful when you want to apply consistent formatting to dynamic text.
Another common use case is displaying different messages based on the visitor’s location. For example, you can use the following expression to show a shorter delivery estimate for visitors in the United States and a longer one for everyone else:
{{= $countryCode == 'US' ? '1-day' : '7-day' }}If the visitor is located in the United States, the widget will display ‘1-day’. Visitors from other countries will see ‘7-day’ instead. This approach can be useful for displaying delivery times, promotions, or region-specific information.
DTR in emails
Dynamic Text Replacement can also be used to personalize email campaigns and automation emails. Instead of sending the same content to every recipient, you can insert variables that are replaced with contact data when the email is sent.
Variables can be used throughout the email, including the subject line, preview text, body, button labels, and button URLs. This makes it possible to greet subscribers by name, reference information collected through forms, and display values stored in custom contact fields.
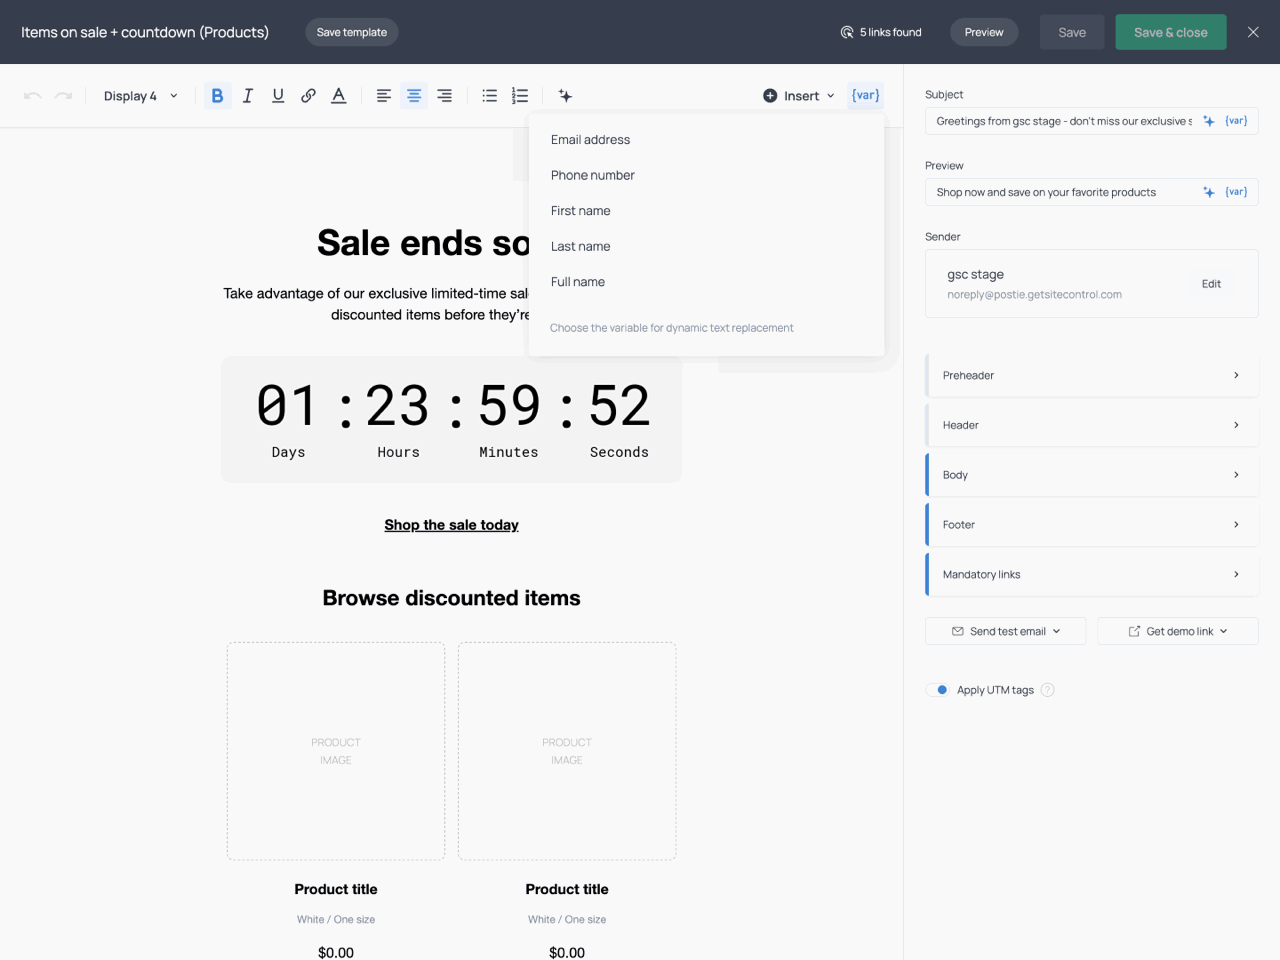
Adding and editing variables
You can add variables to email content using the {var} menus. To insert variables into the email body, use the {var} menu available in the editor toolbar. For the subject, preview, button labels and URLs, use the corresponding {var} menus displayed next to those fields.
The {var} menu in the editor toolbar and the {var} menus next to subject and preview fields
When added to the email body, variables are displayed as blocks embedded in the text. Clicking a block opens the expression editor, where you can modify or replace the variable.
In the subject and preview fields, variables are displayed as plain text enclosed in curly brackets. These variables can be edited directly, just like any other piece of text.
If you’re looking for inspiration for your email subject lines, you can use our free AI Email subject line generator. Simply describe your email or campaign, and the tool will suggest subject lines you can further personalize with variables.
Variable types
Email variables are based on contact data. By default, Getsitecontrol provides variables for the subscriber’s email address, phone number, first name, last name, and full name. In addition, any custom contact fields you create automatically become available as variables in the {var} menu.
| Variable | Description |
|---|---|
| Email address | Displays the recipient’s email address |
| Phone number | Displays the recipient’s phone number |
| First name | Displays the recipient’s first name |
| Last name | Displays the recipient’s last name |
| Full name | Displays the recipient’s full name |
| Custom contact field | Displays the value stored in a custom field |
Custom contact fields allow you to personalize emails with information beyond the default subscriber details. You might store a customer’s preferences, interests, or other information collected through your forms and relevant to your business.
For example, a pet store might collect each customer’s pet’s name through a signup form and store it in a custom field. By inserting the corresponding variable into an email, recipients can automatically see a message such as: ‘We just added some new toys we think Max might love!’ instead of a more generic message. This allows you to personalize emails for each recipient without creating separate campaigns.
Shopify variables
If you’re on Shopify, additional variables are available in certain automation types. These variables allow you to reference information related to a customer’s order or checkout session. The Shopify category includes the following variables.
| Variable | Description |
|---|---|
| Order ID | Displays the ID of the customer’s order |
| Order URL | Displays a link to the customer’s order page |
| Checkout URL | Displays a link to the customer’s saved checkout session |
The Order ID and Order URL variables are available in automations with New order and Fulfilled order triggers. They are useful in post-purchase emails, where you can reference a specific order or provide customers with a direct link to its details.
The Checkout URL variable is available in Checkout abandonment automations. It stores a link to the customer’s saved checkout session, allowing customers to resume the checkout process without starting over. For example, you can add a Complete your purchase button and use the Checkout URL variable as its destination. When recipients click the button, they are taken directly back to their checkout with their previously selected items already in place.
Using fallback values
You can specify a fallback value to display when no data is available for a variable, ensuring that the message remains meaningful. Use the following format: {{variable | fallback}}. For example: {{firstName | there}}. If the recipient’s first name is unavailable, the greeting: Hi {{firstName | there}}! will simply appear as ‘Hi there!’.
Summary
Dynamic Text Replacement allows you to tailor widget and email content to each visitor or contact. By combining variables with fallback values and expressions, you can create content that reflects customer information, location, device, campaign source, Shopify data, or custom values provided through forms and APIs.
Whether you’re greeting customers by name, displaying product information, recovering abandoned checkouts, or building more advanced conditional messages, DTR allows you to deliver more relevant experiences automatically.