How to authenticate a domain with Cloudflare
In this guide, you’ll learn how to add DNS records in Cloudflare to verify your domain in Getsitecontrol. Once verified, you’ll be able to send email campaigns and automated emails from your own domain instead of the default shared address.
Open your domain settings
For starters, log in to the Cloudflare dashboard. Open the Domain section and select Manage Domains. Find your domain and click Manage.
Add three CNAME records for DKIM setup
Find the DNS item on the left-side menu and select Records. Click the Add record button and select CNAME from the Type dropdown list. Copy the first entry under Name from the DKIM section in your Getsitecontrol DNS settings and paste it into the Name field in Cloudflare.
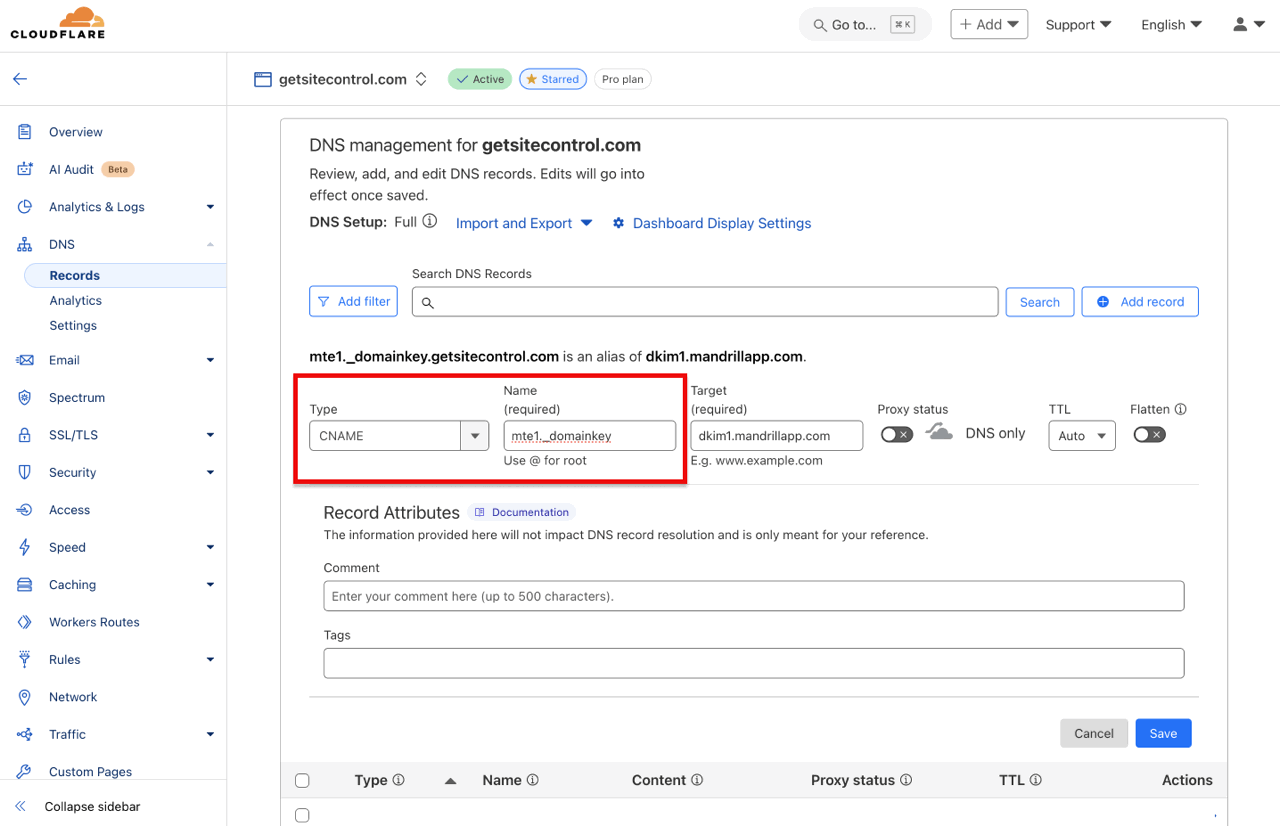
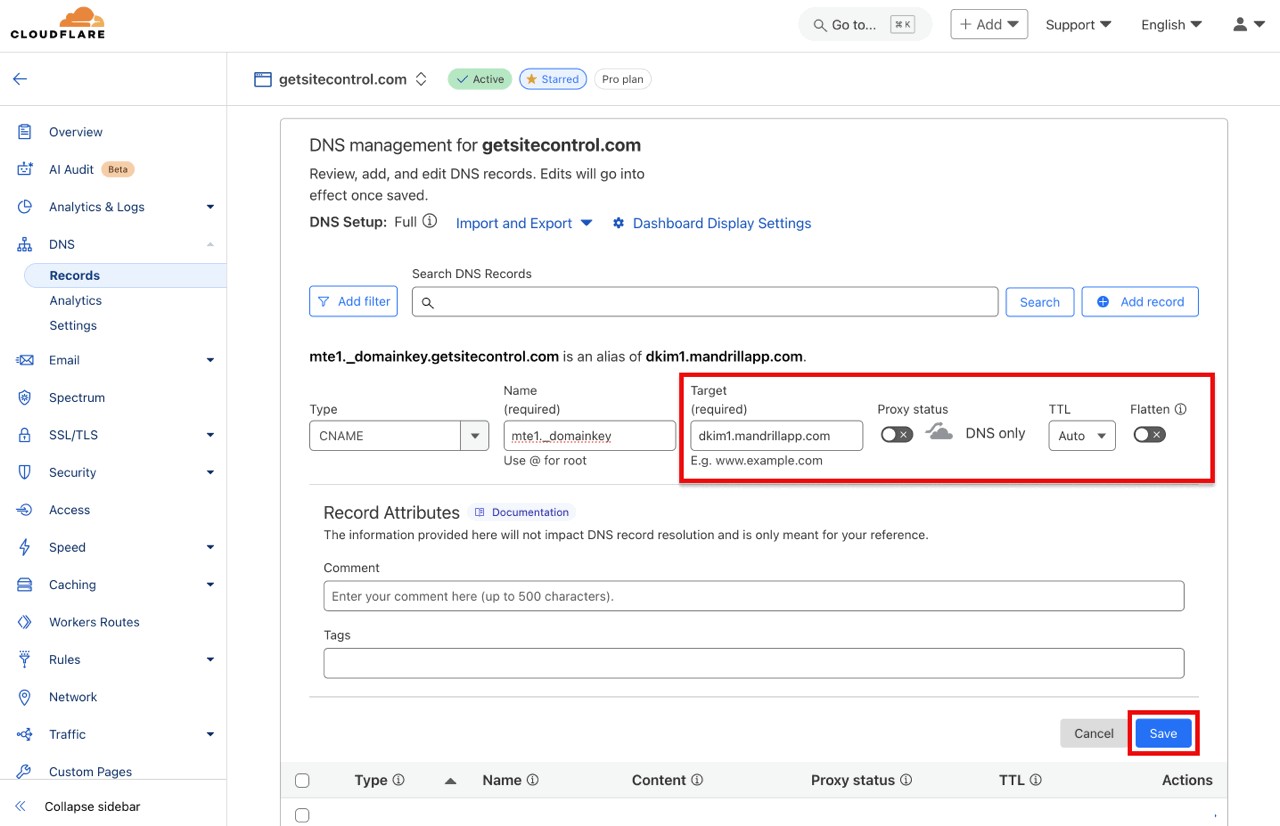
Next, copy the corresponding entry under Value from Getsitecontrol and paste it in the Target field in Cloudflare. Set the Proxy status to off, leave TTL on Auto, and disable the Flatten toggle. Repeat the process for the second and third CNAME records and save the changes.
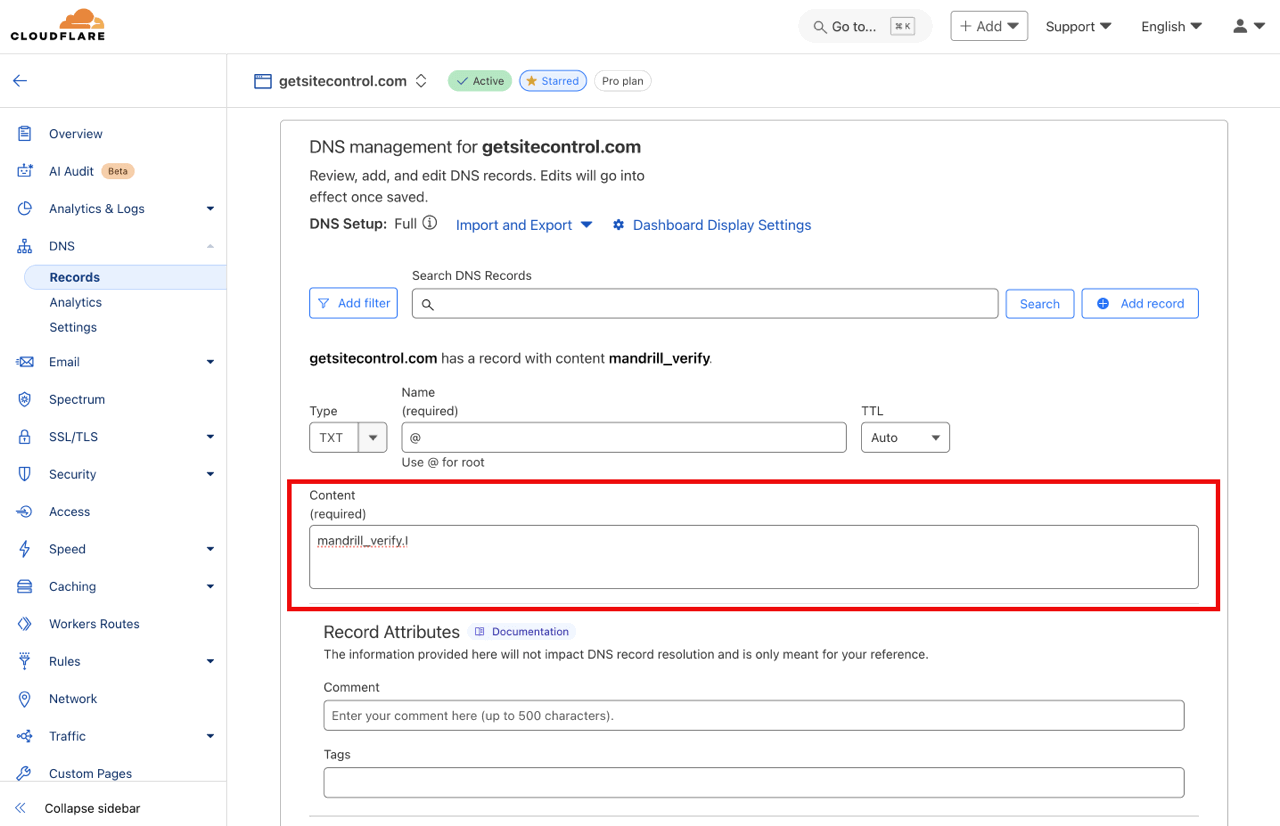
Add a TXT record for SPF setup
Click the Add record button and select TXT from the Type list. Copy the entry under Name from the SPF section in your Getsitecontrol DNS settings and paste it into the Name field in Cloudflare. Leave TTL on Auto.

Next, copy the corresponding entry under Value from Getsitecontrol and paste it into the Content field in Cloudflare. Save the changes.
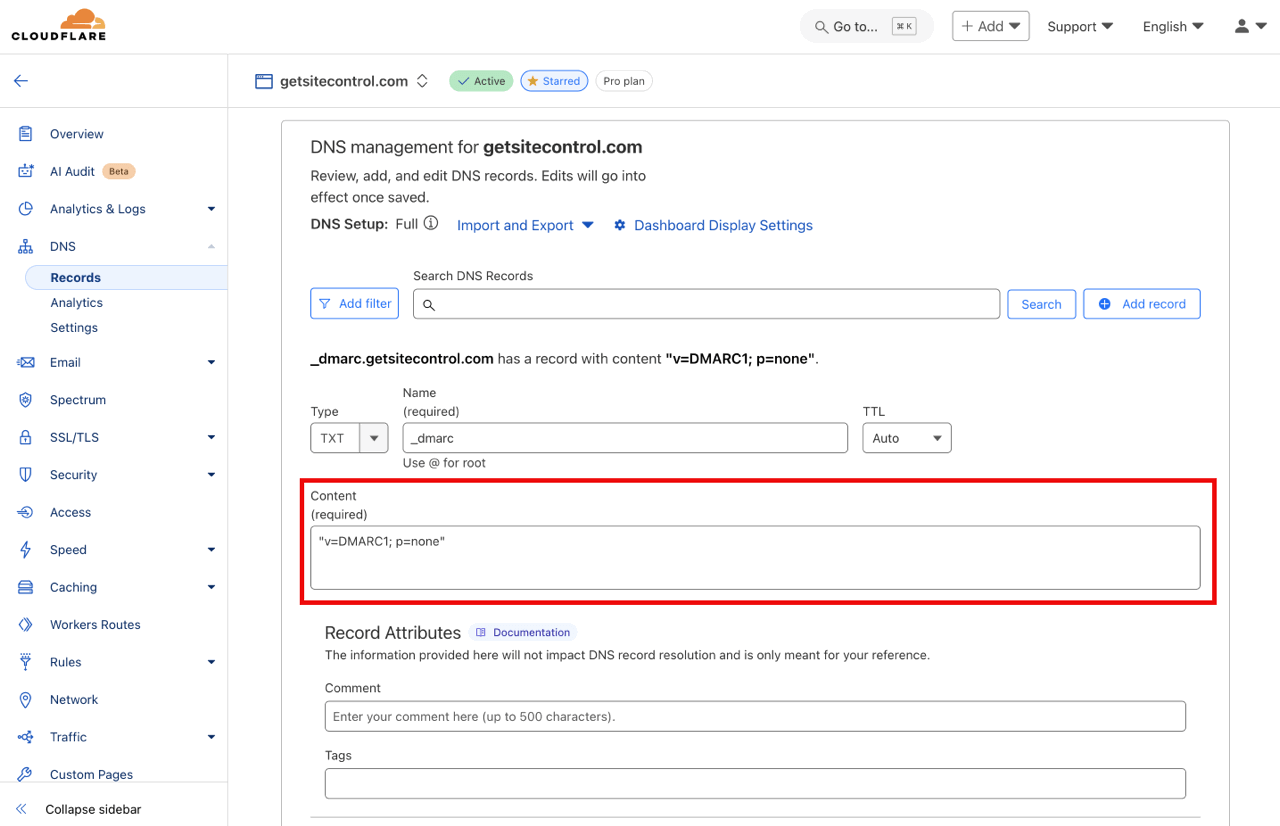
Add a TXT record for DMARC setup
Click the Add record button and select TXT from the Type list. Enter _dmarc in the Name field. Leave TTL on Auto.
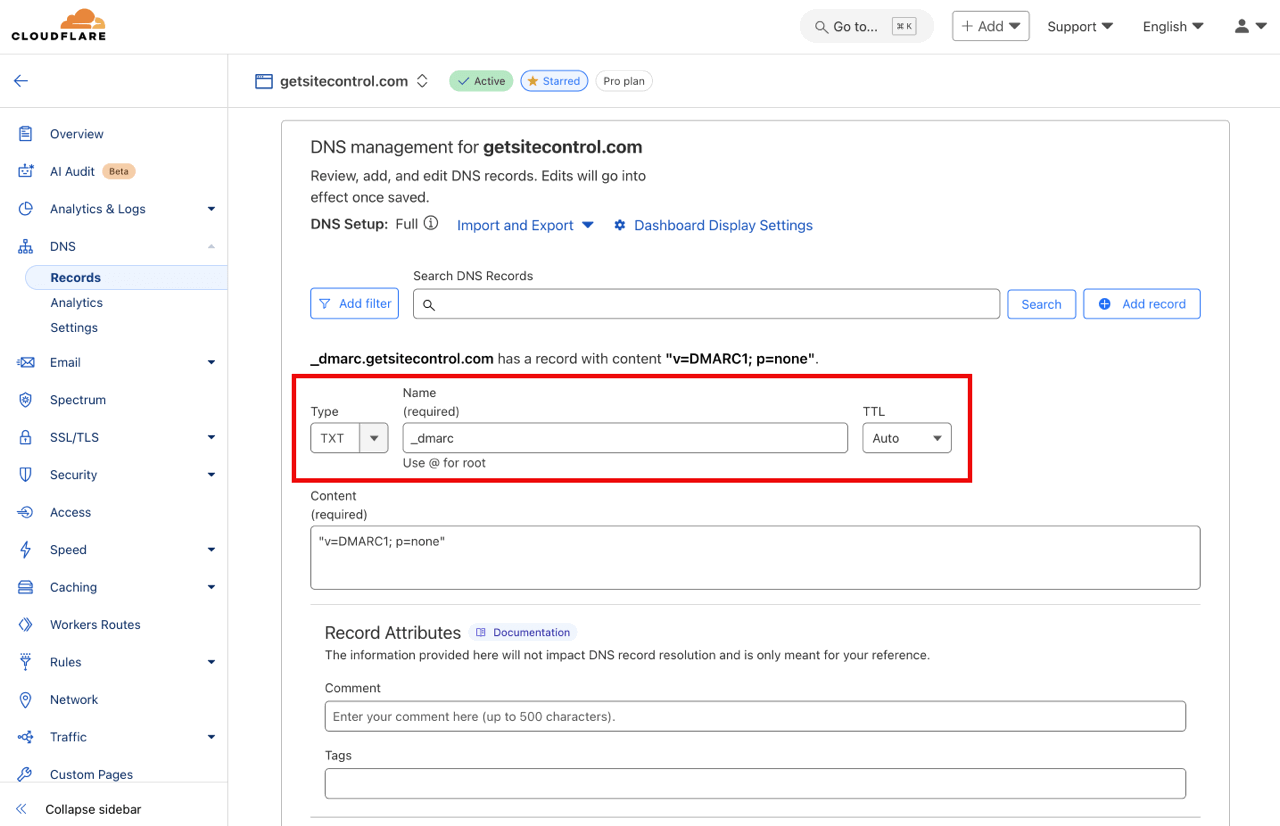
Next, copy the entry under Value from the DMARC section in your Getsitecontrol DNS settings, and paste it into the Content field in Cloudflare. Save the changes.
Verify the records
Allow a few minutes for the changes to take effect. Then, go back to the DNS records window in Getsitecontrol and click Verify records. The verification process can take up to 48 hours. Read the main guide on custom domain settings to learn how to send emails from your verified domain.