How to send emails from your domain
In this guide, you’ll learn how to connect your email domain to Getsitecontrol and send email campaigns and automated emails from your own domain instead of the default shared address.
Using a custom domain helps you build trust with subscribers, strengthen your brand identity, and improve email deliverability. When recipients see emails coming from your domain, they’re more likely to recognize your brand and engage with your messages.
Follow the steps below to learn how to add your domain, configure the required DNS records, verify them, and set your domain as the sender for your email campaigns.
Open the Email settings section
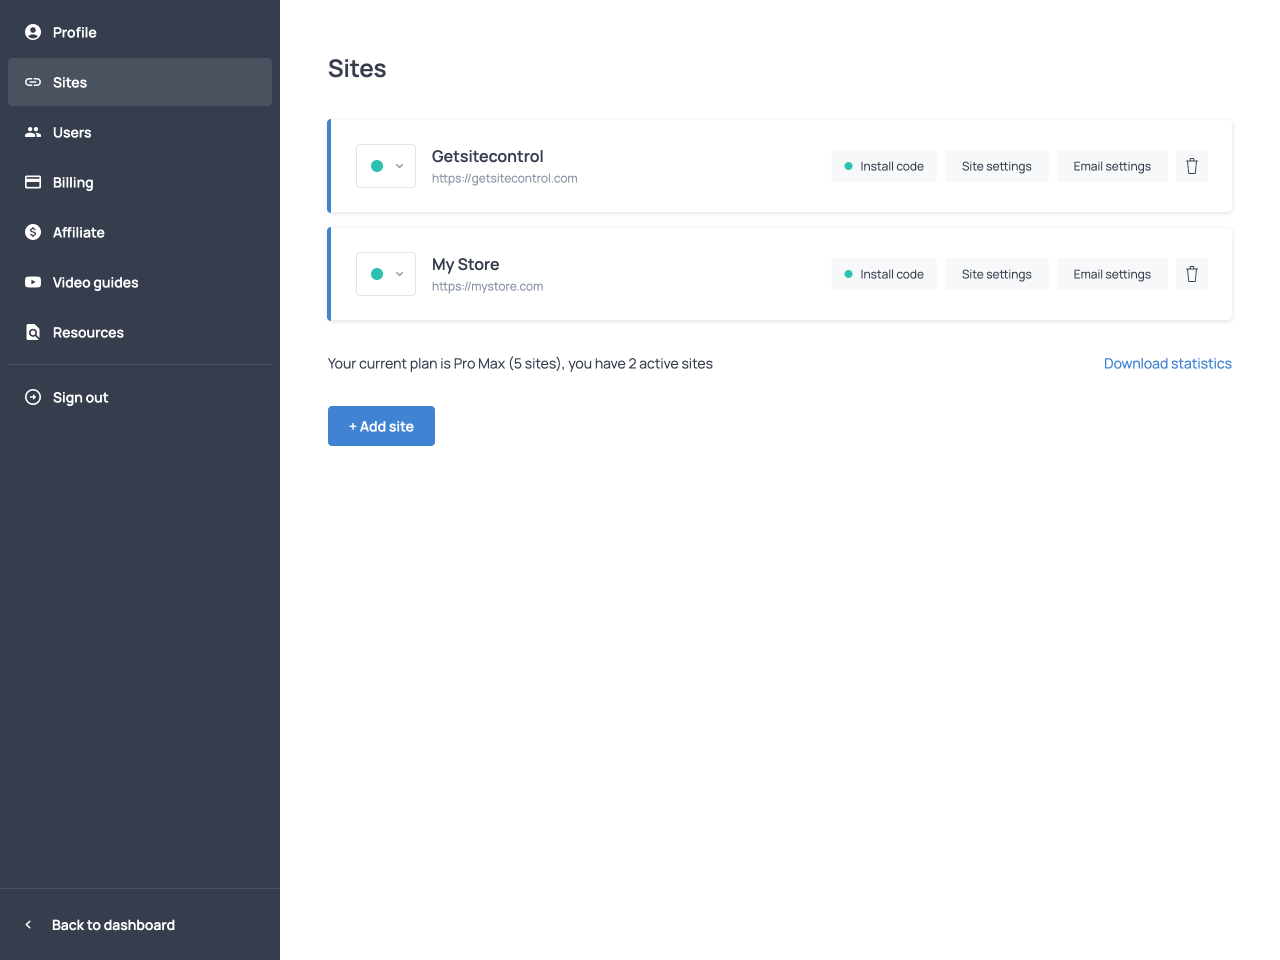
Open the Sites tab of your Getsitecontrol dashboard. If you’re using our Shopify app, open the Store tab instead. From there, click Email settings next to your website or store URL.
Add your domain
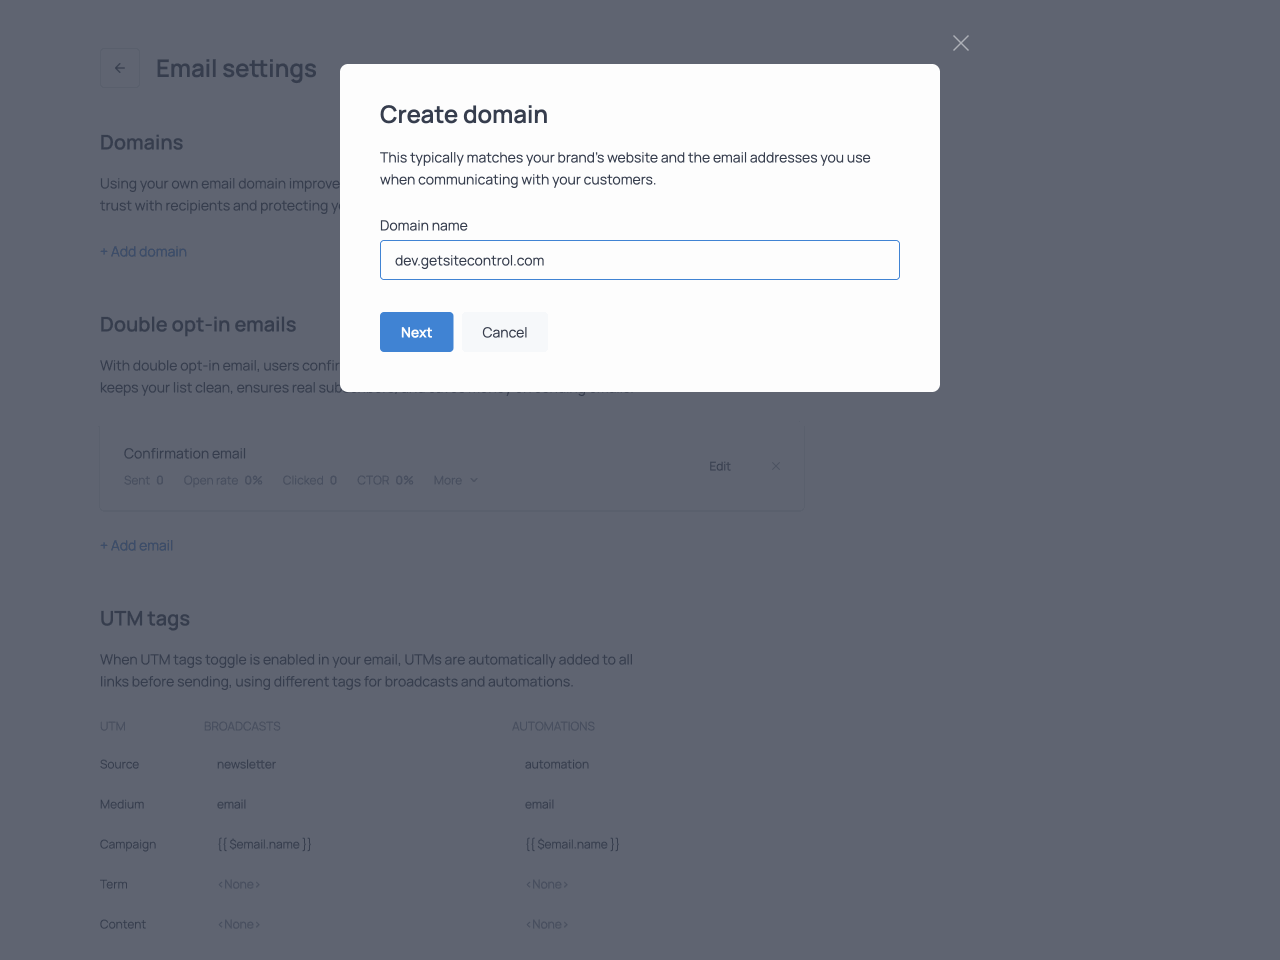
From the Email settings screen, click +Add domain. In the pop-up window, enter your root domain (e.g., mystore.com) and click Next.
Add the DNS records to your domain provider
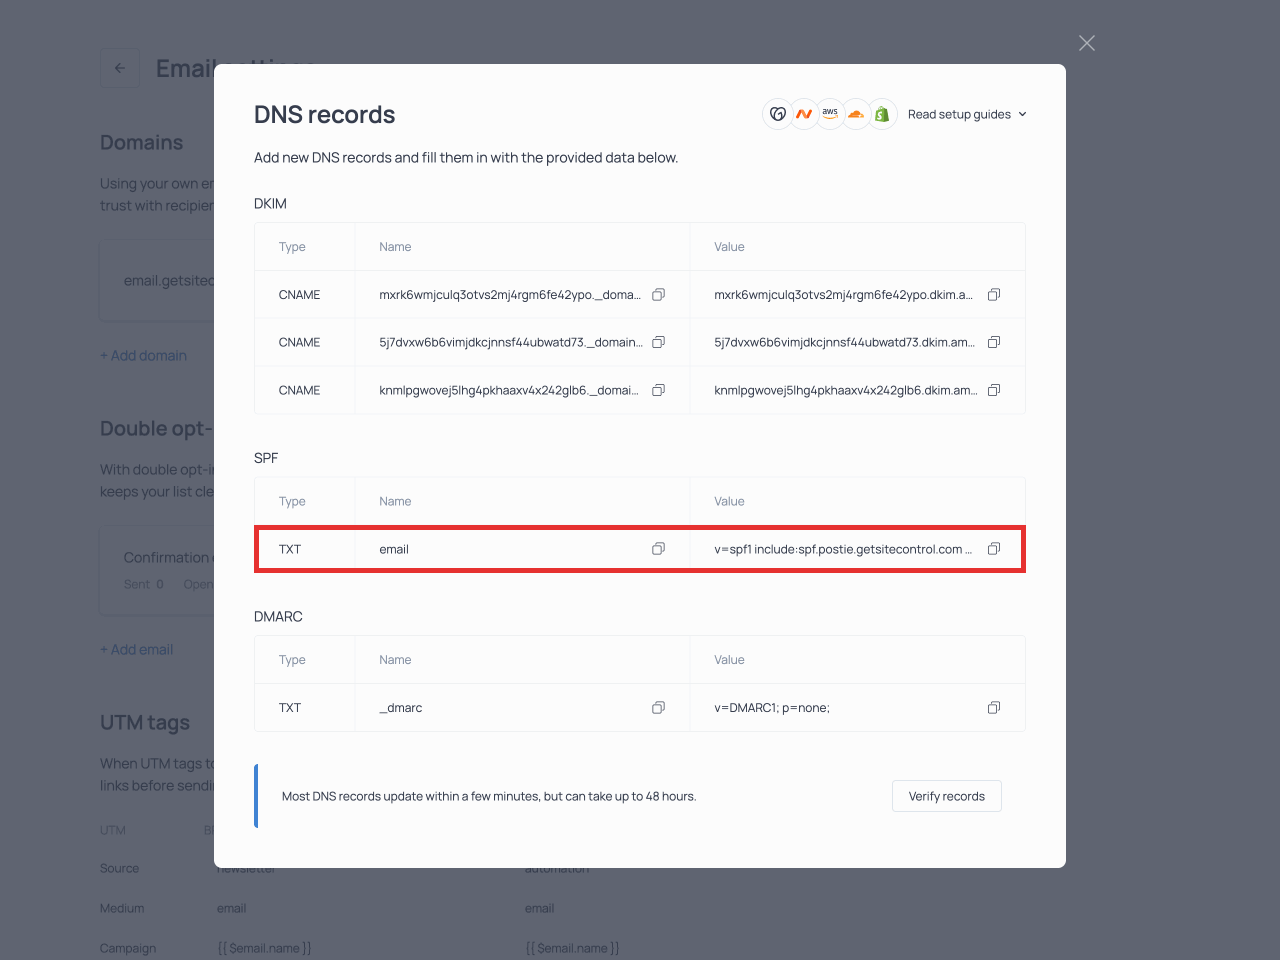
In the DNS records window, you’ll find three CNAME records (DKIM) and two TXT records (SPF and DMARC) you need to add to your domain’s DNS settings.
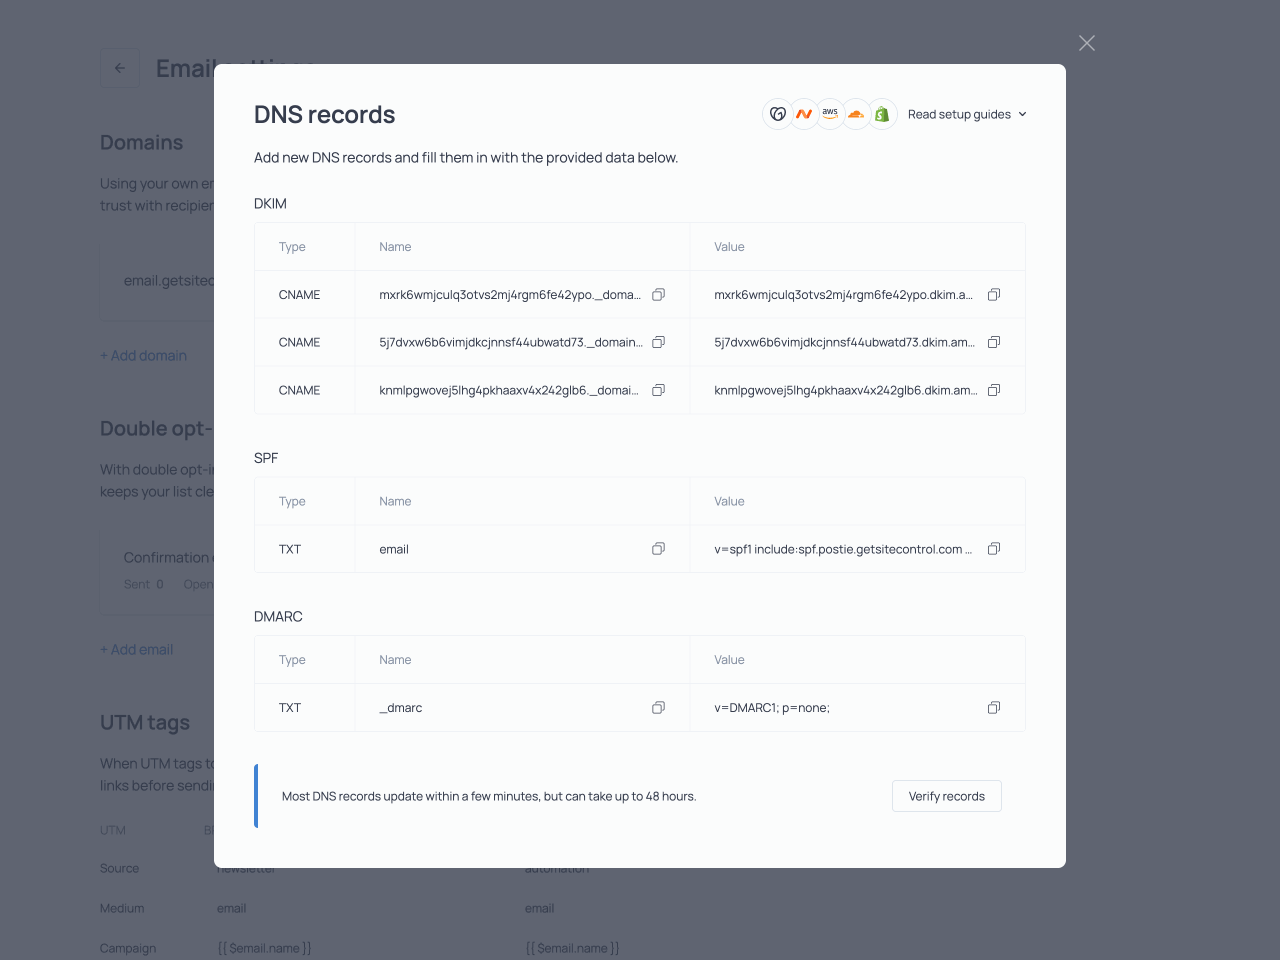
To add the DNS records to popular domain providers, open the relevant instructions. For other providers, proceed as instructed in the following paragraphs.
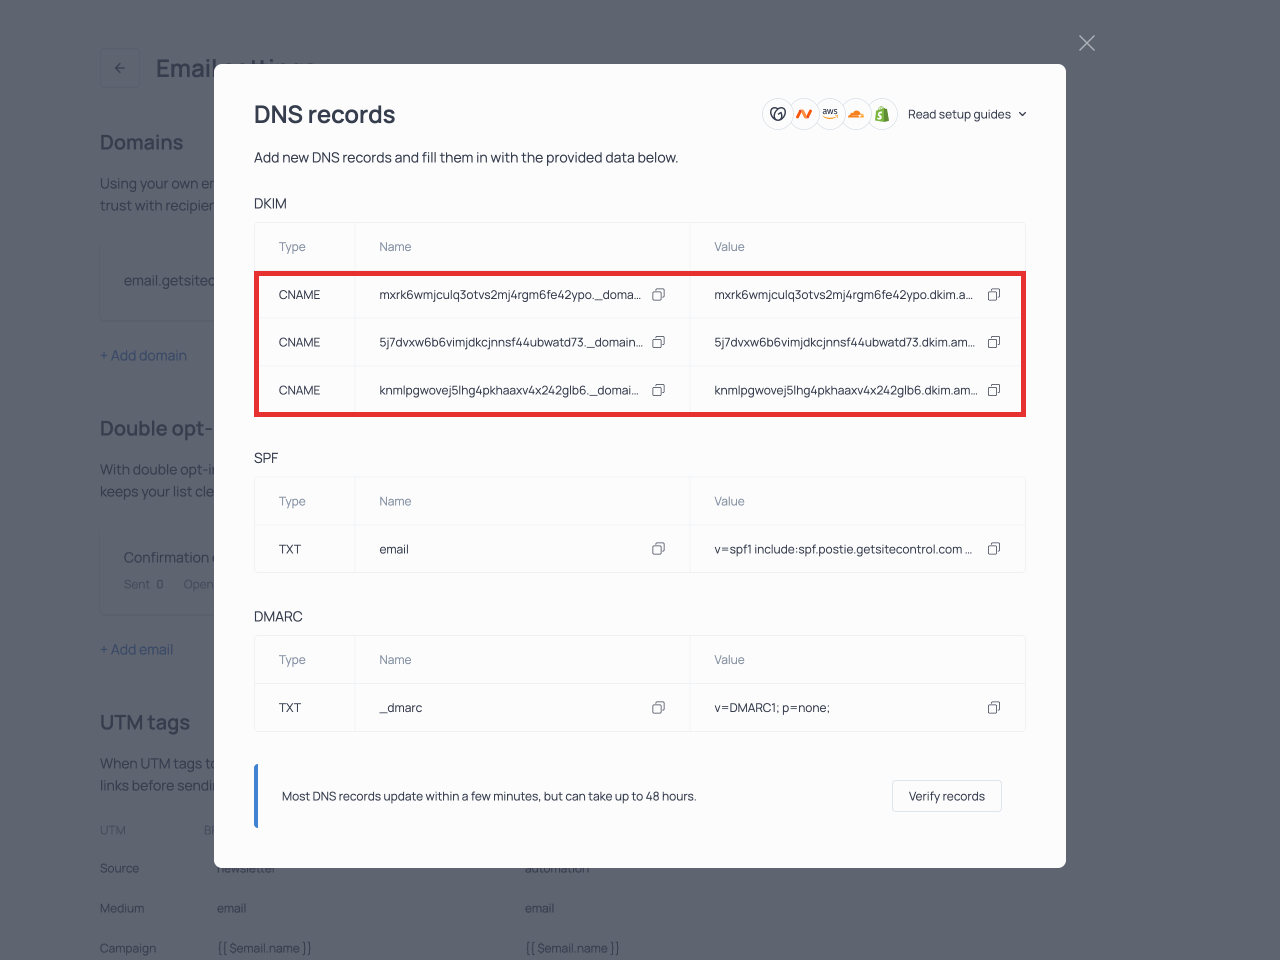
Add three CNAME records for DKIM
Open your domain’s DNS settings and create a new record. Select CNAME as the record type. From the DNS records screen in Getsitecontrol, find DKIM and copy the first entry under Name. Paste it into the record’s name field, which may be called Name or Host, depending on the provider.
Next, copy the corresponding entry under Value from the Getsitecontrol dashboard. Paste it into the record’s value field and save the record.
Create a second CNAME record: from the DKIM section, copy the second entry under Name and Value. Paste them into the corresponding fields in the record, then save. Repeat the process for a third and last CNAME record.
Add a TXT record for SPF
Create a new record and select TXT as the type. From the DNS records window in Getsitecontrol, find SPF and copy the entry under Name. Paste it into the record’s name field.
Proceed to copy the corresponding entry under Value from the Getsitecontrol dashboard and paste it into the record’s value field. Save the record.
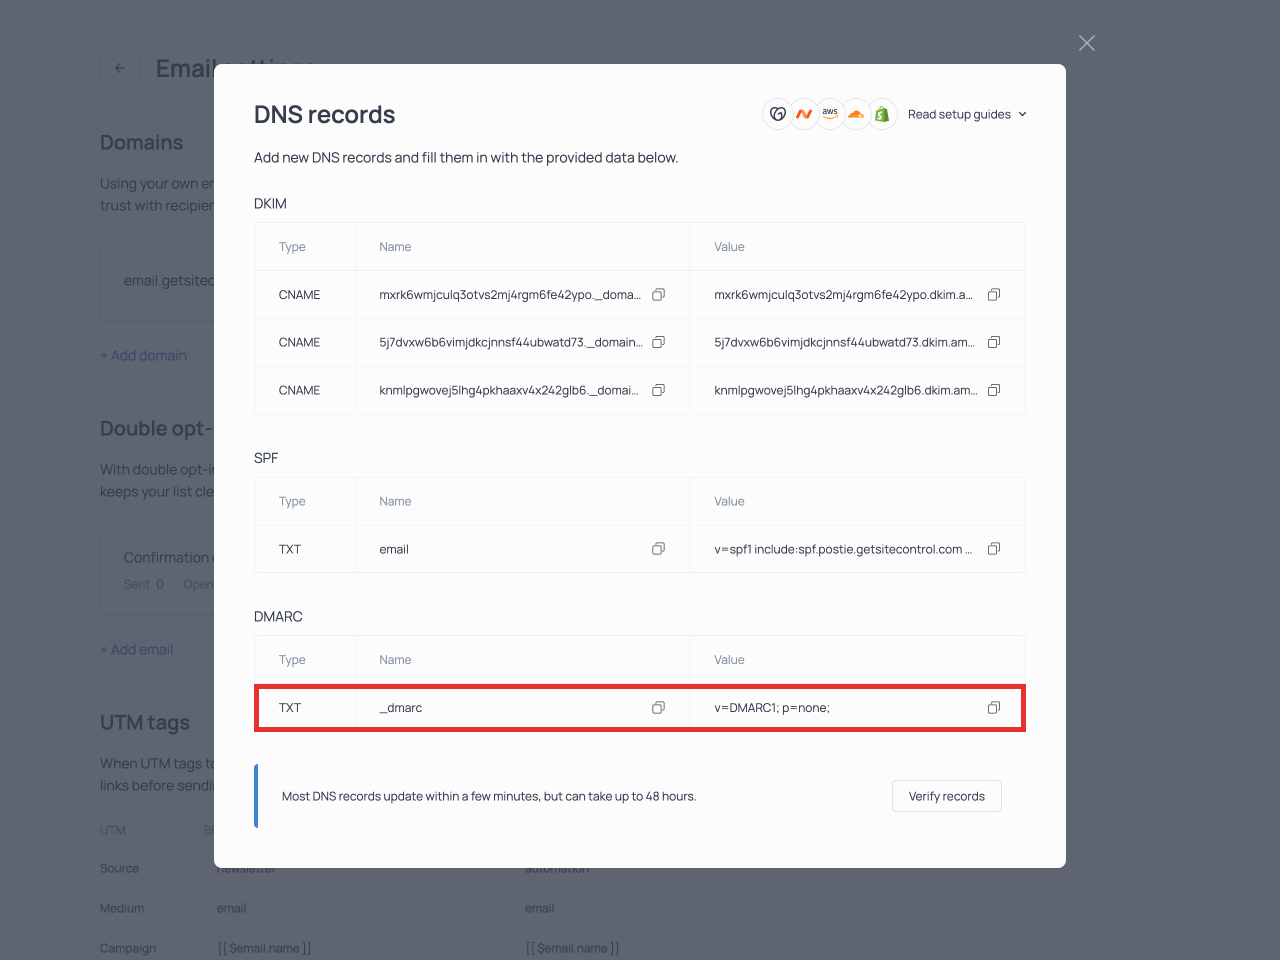
Add a TXT record for DMARC
Create another TXT record. Enter _dmarc in the record’s name field. From the DNS records window in Getsitecontrol, find DMARC and copy the entry under Value. Paste it into the record’s value field and save the record.
Verify the records
Allow a few minutes for the changes to take effect. Then, go back to the DNS records window in Getsitecontrol and click Verify records. The verification process can take up to 48 hours.
Set your domain as the sender
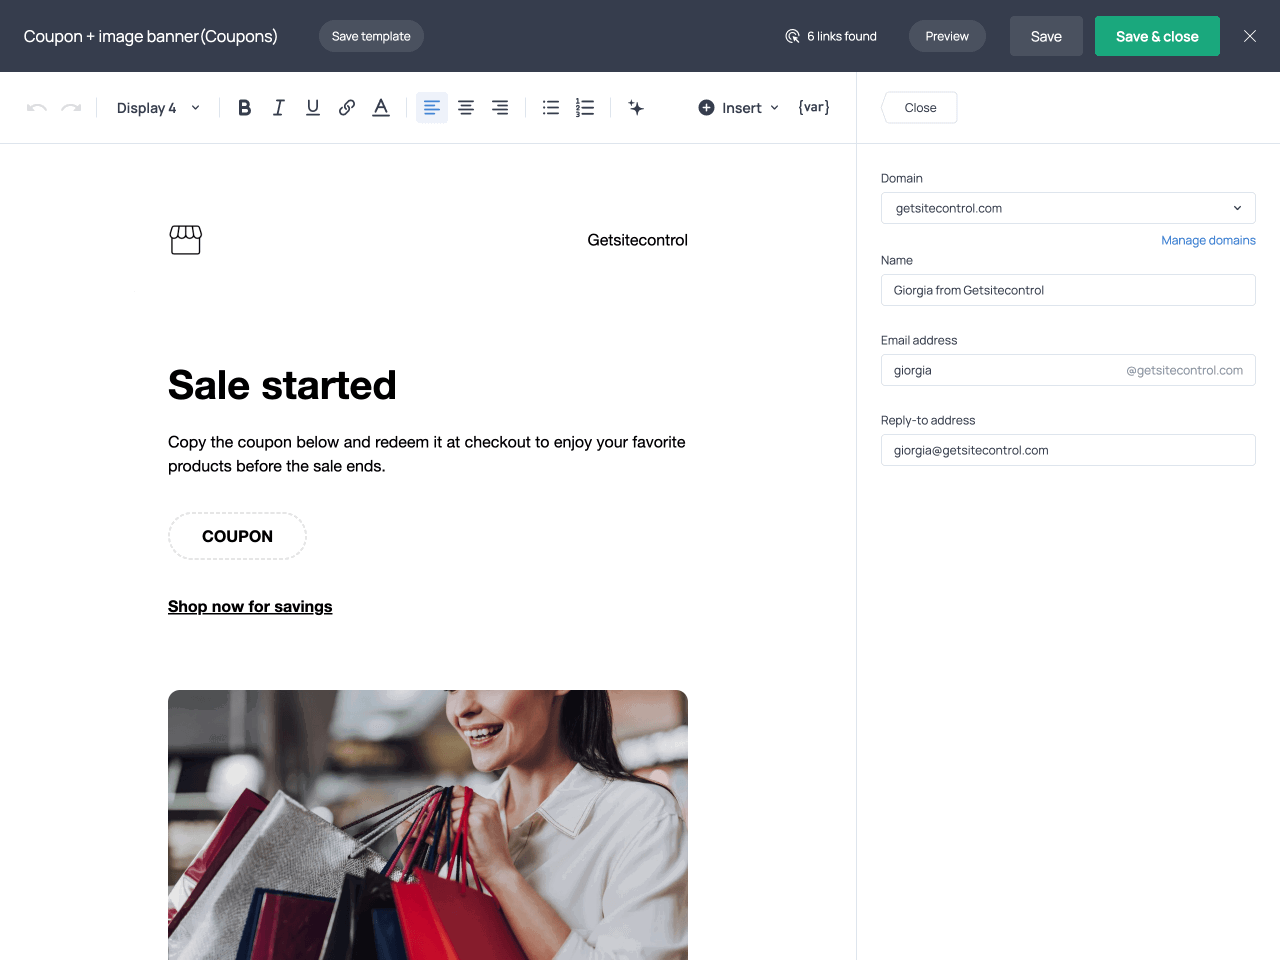
Once your domain is verified, you can set it as the sender of your emails. Open the relevant email campaign or automation, find the Sender section, and click Edit. Select your domain from the dropdown list. Next, complete the following fields.
Name
Your personal name or brand name.
Email address
The email address that appears in the From field in your recipients’ inbox.
Reply-to address
The email address where you’ll receive responses from recipients.
Troubleshooting
What to do if verification fails
- Solution 1Make sure the record type (CNAME or TXT) matches the instructions.
- Solution 2Double-check that you copied the Name and Value fields exactly as shown.
- Solution 3If you’re verifying a subdomain, make sure to add the records in the subdomain’s DNS settings, not in your main domain’s DNS settings.
- Solution 4Wait a few minutes and try verifying again. DNS changes can take time to propagate.
Recap
How to set up a custom email domain
- Step 1Open the Email settings in Getsitecontrol and add your domain.
- Step 2Use the data provided in Getsitecontrol to create three DKIM CNAME records in your domain provider’s DNS settings.
- Step 3Create a TXT record for SPF in your domain provider’s DNS settings.
- Step 4Create a TXT record for DMARC in your domain provider’s DNS settings.
- Step 5Return to Getsitecontrol, click Verify records, and wait for verification to complete. This can take up to 48 hours.
- Step 6When creating or editing an email, select your custom domain as the sender and enter your name, email address, and reply-to address.
Your setup is complete. You can now send broadcasts and automated emails from your own domain, helping you maintain consistent branding and improve recipient trust.
If you want to add and verify another domain, you can do so from the Email settings in your dashboard. However, you won’t be able to verify the same email domain in different Getsitecontrol accounts.