
Try Getsitecontrol for free
Easily create website overlays and generate more conversions.
When you’re starting to grow your website or email list, you want to collect data as fast as possible. For that purpose, it’s hard to find something more efficient than a fullscreen website overlay.
Above is a fullscreen email opt-in form – the most common example of a website overlay. However, you can also use overlays to conduct surveys, promote sales, prevent shopping cart abandonment, request age verification, and more.
In this tutorial, we’ll show you how to create custom overlays in Getsitecontrol – a no-code popup builder that works on any website platform. We’ll also feature overlay templates you can customize and use on your website.
With Getsitecontrol, you don’t need to create anything from scratch. There are dozens of pre-designed templates to help you focus on the content instead of the technical side of the process.
For this tutorial, we’ll be using the email capturing overlay featured at the beginning of the article. However, in the gallery, you’ll also find fullscreen surveys, sales promos, and other overlay examples designed for different goals. So, go ahead and visit the gallery first.
To see templates in action, simply click on them. Once you find a website overlay you like, use the prompts on the right-hand side to add it to the Getsitecontrol dashboard.
On the first screen, you can work with the content and design of the overlay. To get started, click on the text you’d like to change and type your copy instead.

For example, if you’re working on a welcome offer overlay, indicate it in the title by typing “Welcome offer” or “20% off your first purchase” 👇

In the same manner, you can change the description, field names, and the call to action on the button.
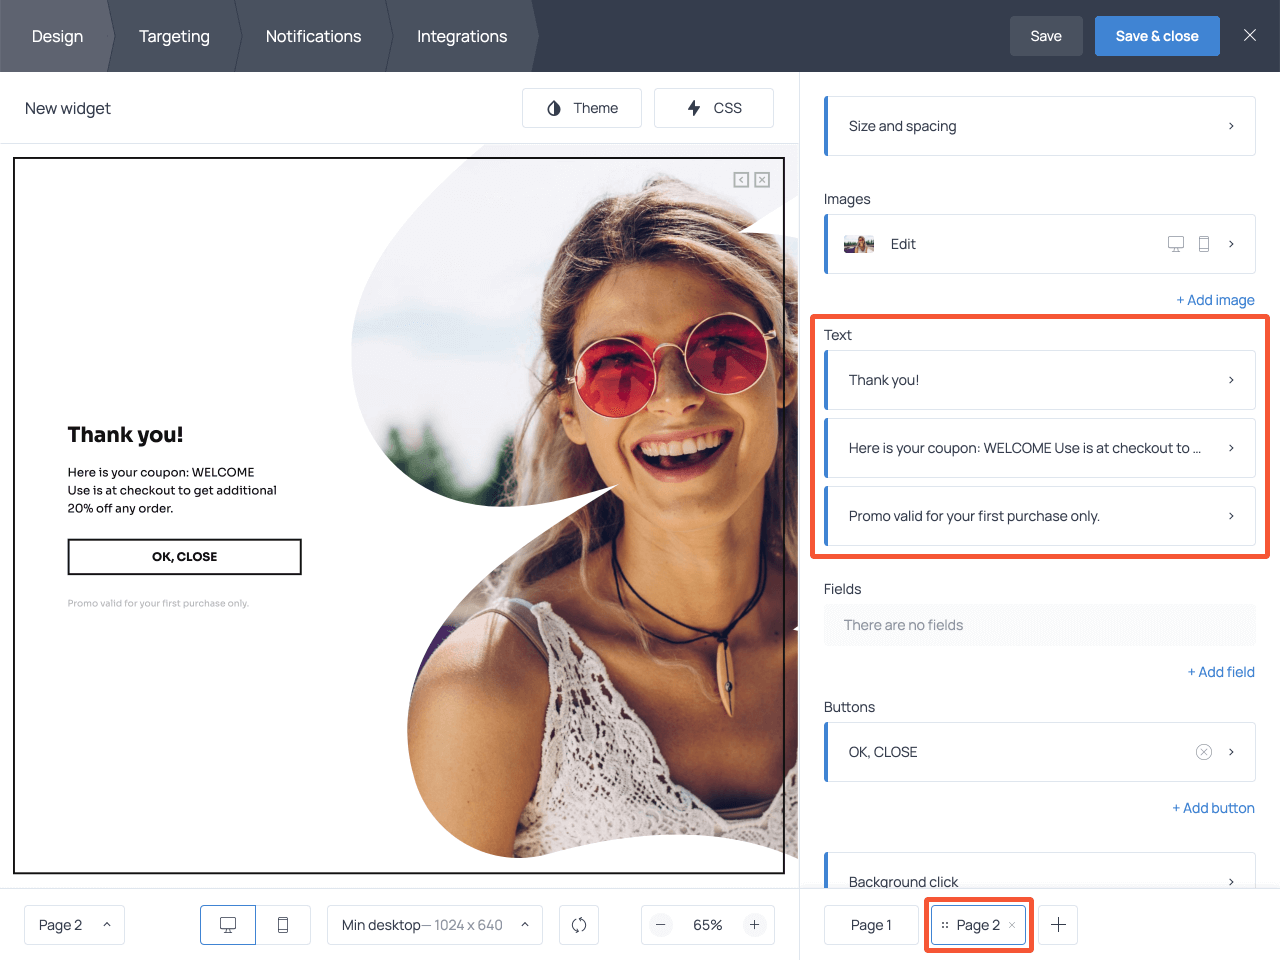
Once a visitor fills out the form, you can display the discount coupon code right on the overlay using a submission success message.
If you display the discount code right after submission, it may encourage visitors to continue shopping and apply the promo.
To create a custom submission success message, open Page 2 in your dashboard and type the coupon code along with the terms and conditions.
💡 Want to add a little nudge? Make your offer time-limited and encourage customers to use the coupon within a week or less.
Along with the copy, you can change the color theme, image, font, and field style. For example, if you want to use another creative, click on it and proceed to ‘Change image’. You’ll be able to select a new image from the built-in gallery or upload your own visual.

It's also a good practice to use the same font you’re using on your website. To change the font, open the Theme menu and make a selection from the dropdown menu.

On the same screen, you can change the colors of the background, text, and button or just try other pre-designed themes.
By default, the overlay you’ve created will appear on every page of your website as soon as a visitor arrives. If you want to change that, use the Targeting tab.

To specify the pages where you want to display your offer, use the first field, named Include. Alternatively, you can do the opposite and exclude some of the pages from the promo.
If you want to change the timing, find the field named Start displaying the widget, remove the default ‘at once’ condition and select another one. For instance, you can display a website overlay when a visitor is heading to the exit or stays inactive for a certain period.
It’s also a good idea to make sure you stop displaying the overlay to those who have already filled out the form.
At this point, the website overlay is ready. Save your changes and activate the overlay in your website using the app prompts. If you want, you can also connect it to your email marketing software using the Integrations tab.
Remember to connect Getsitecontrol to your website as well. The installation is an intuitive and straightforward process, especially if you’re on WordPress or Shopify. If you’re using any other website platform, just follow the step-by-step instructions, and you too will figure it out in no time.
If you want your website overlay to bring real results, make sure it’s always:
These three rules will help you increase conversions while maintaining great user experience on your website. Below, we’ll elaborate on these ideas and provide examples.
Let’s face it: if you’re displaying a fullscreen popup, especially if you’re displaying it upon landing, it will interrupt your visitor’s experience on the website. Most visitors dislike being interrupted. That’s why you want to make sure the interruption is paired with value, such as a discount, free shipping offer, an eBook, or at least a big promo announcement.
Using website overlays to conduct a survey? You will get more submissions if you offer a discount in exchange for participation and display the coupon code on the submission success page.
The fact that you can display a website overlay at any moment doesn’t mean you should. As a rule of thumb, it’s best to display overlays either right upon landing or right before the exit. Anything in between might be perceived as too much of a distraction for a visitor.
One of the worst practices is hiding the Close button on a popup. At Getsitecontrol, we disapprove of this tactic so much, we made it impossible to implement. If you want to go the extra mile with the transparency, you can add a second button that will also allow visitors to close the overlay. It’s often called an opt-out button, and it usually says something like “No, thanks” or “Maybe next time”. Here is one example 👇
Marketers often use a bit of humor when writing the opt-out button copy, and you can do it, too. For instance, instead of “No, thanks”, you can type “No, I hate discounts” or “I’ll pay the full price.”
Whether you’re collecting emails, survey submissions, or leads, website overlays can help you get more traction, faster. And as long as you follow the best practices by putting your visitors first, you’ll be able to create a win-win situation without annoying potential customers.
Ready to try website overlays? Then create a Getsitecontrol account and head straight to the template gallery. Within less than an hour, you’ll be able to launch your first overlay and start tracking results.
Nina De la Cruz is a content strategist at Getsitecontrol. She is passionate about helping small and medium ecommerce brands achieve sustainable growth through email marketing.
You’re reading Getsitecontrol usecase collection where we talk about the best practices for using website popups. This usecase is a part of null section.
Create popups for free
Email forms, promos, coupons, surveys, bounce-stoppers.
Get started, it’s free →Thinking of adding text marketing to your growth strategy? Good call!
Compared to emails, text messages have higher open rates and better convey a sense of urgency. For instance, if you want to make sure all subscribers know about the flash sale in your ecommerce store, you can’t beat the efficiency of text marketing.
But how do you start collecting phone numbers?
That’s actually an easy part. The best tool for collecting phone numbers on a website is an eye-catching popup. Pair it with an irresistible offer, and you’ll get something like this 👇
As a website owner, you need a simple way to publish sitewide updates — and know visitors will actually see them. Announcement bars solve this problem by staying visible at the top or bottom of the page as people browse, without interrupting the experience.
Sticky bars help visitors immediately see discount codes, sale announcements, shipping thresholds, and service updates without searching or contacting support. This format works particularly well on mobile, where screen space is limited.
Most visitors – especially new visitors – will leave your website without converting. That’s the reality.
Sometimes, it’s because your content doesn’t meet their expectations. Other times, it’s just how people surf the Internet.
Either way, having people leave in large numbers is pretty annoying, especially when you spend ad money to drive them to your website in the first place.
One tool you can try to reduce those numbers is website exit popups 👇
Subscribe to get updates
Get beginner-friendly tips for growing your online business.


