How to set up actions for widgets
Actions determine what happens when a visitor interacts with a Getsitecontrol widget on your website.
You can assign actions to a button click or a background click — a click on any part of the widget — depending on your needs.
In this article, we’ll cover all the available actions and provide instructions on how to set them up. Feel free to skip to the section you need using the shortcut menu on the right.
1. Where to add an action
You can attribute actions to a widget button or to a widget background. In the latter case, the action will happen when a visitor clicks anywhere on the widget, except for the button.
Add an action to a button
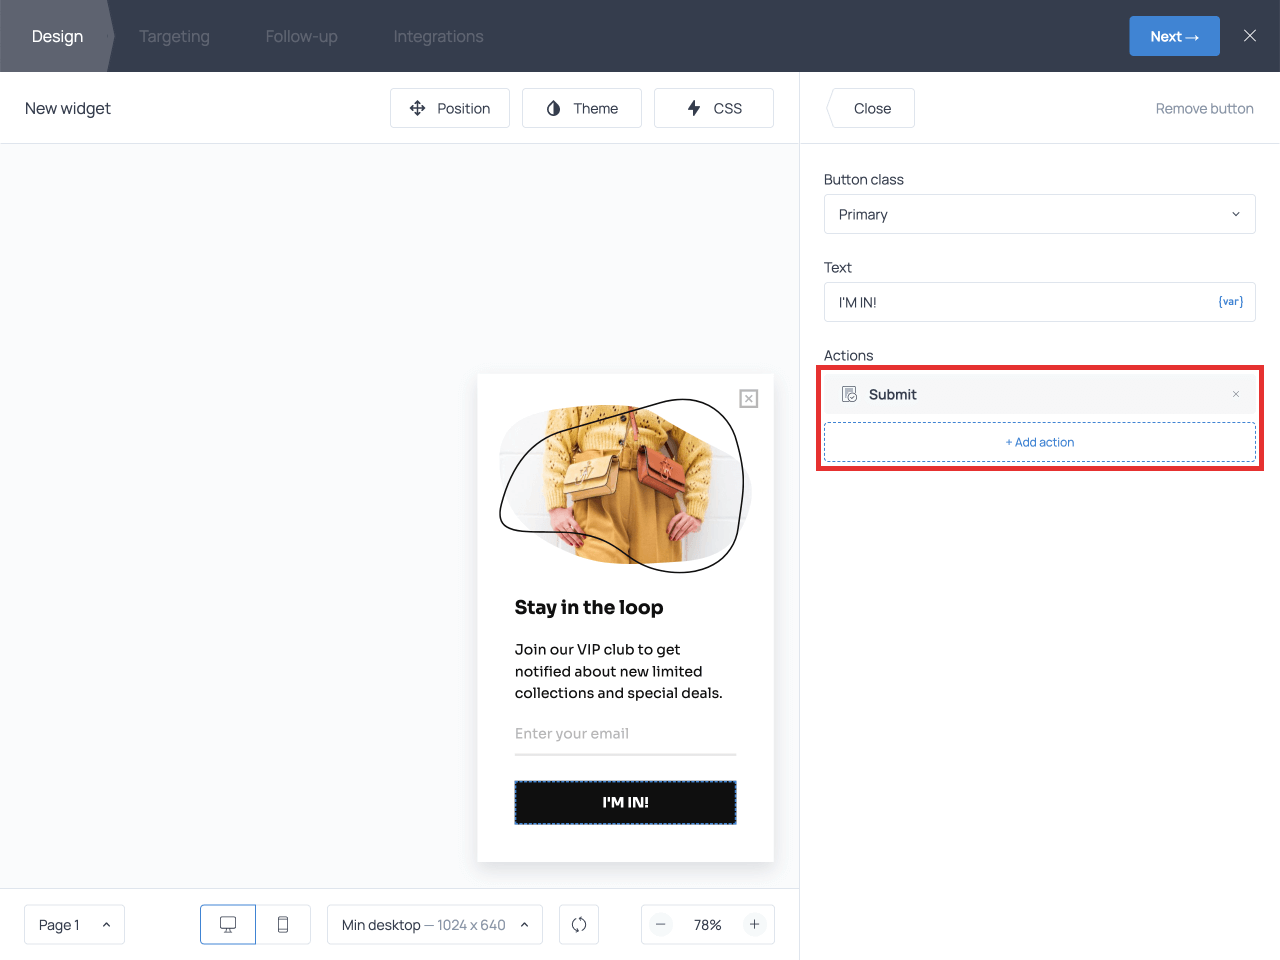
Click on the button in the widget preview to open its settings. Then, click the +Add action link and choose the necessary action type.
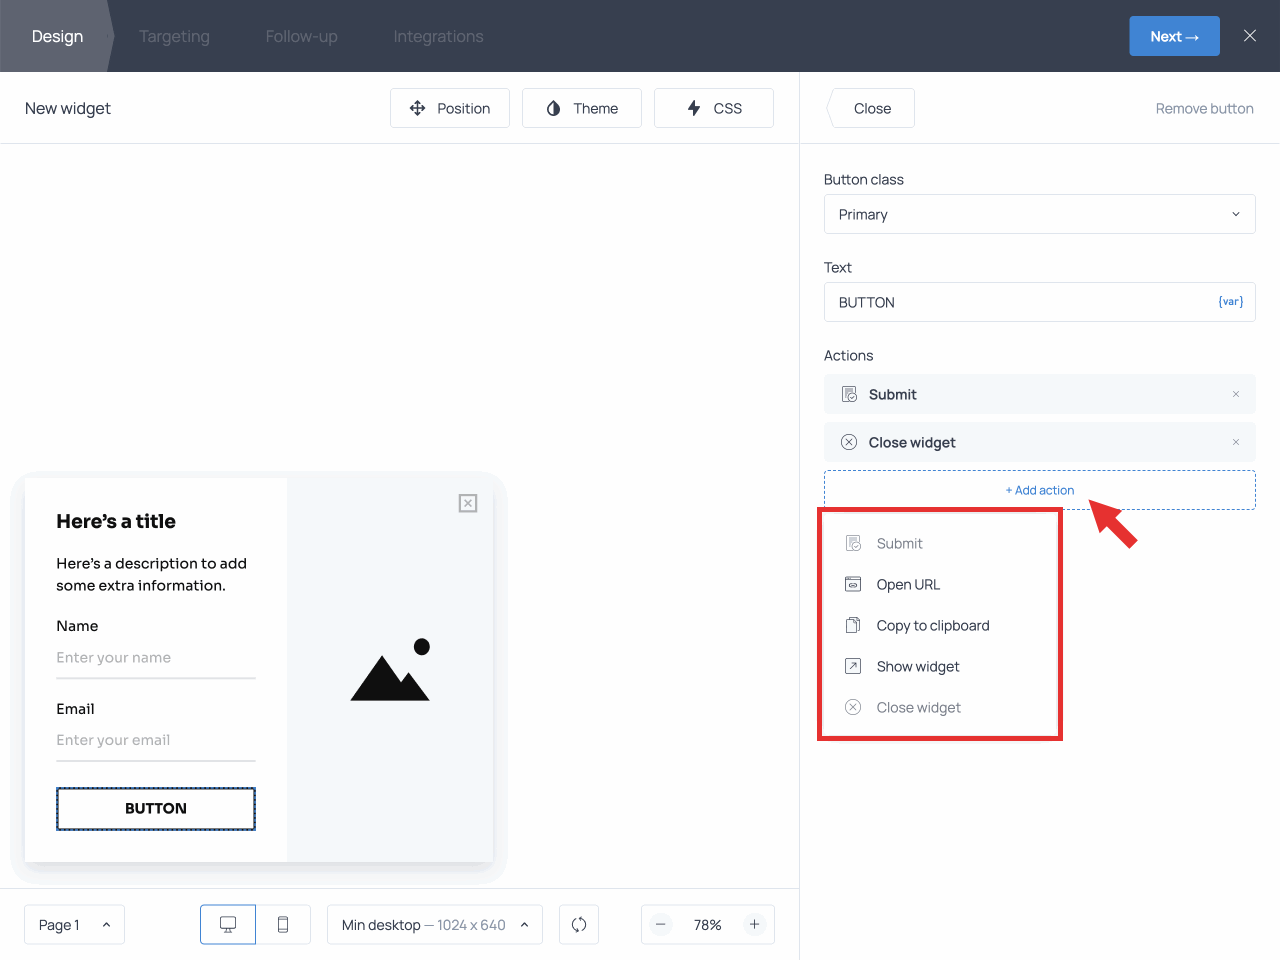
You can read more about each action type in this section.
If you’re working on a premade template that already features a button, you might see some actions already assigned by default in the ‘Actions’ section:
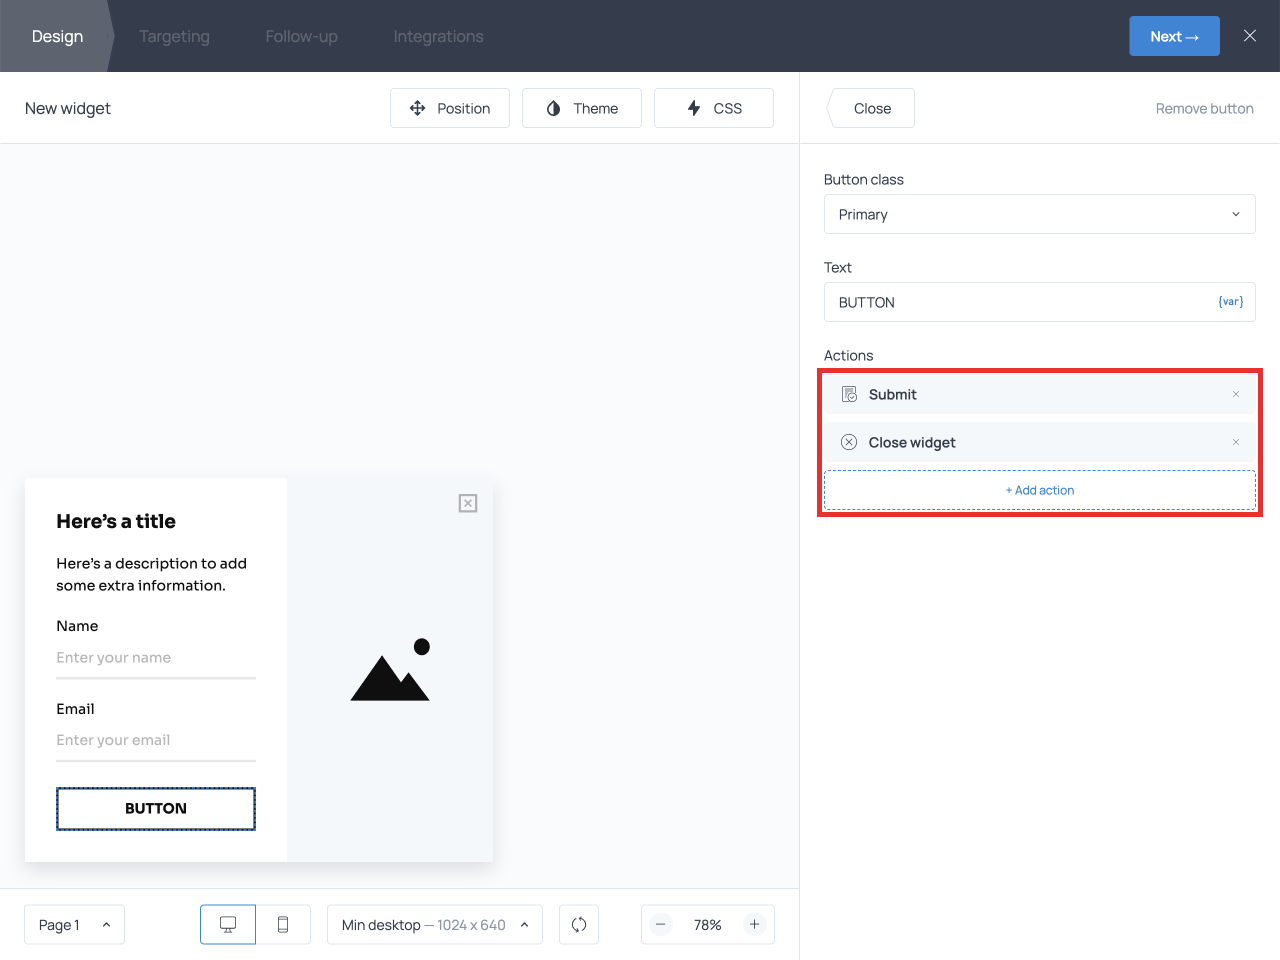
Feel free to remove the default actions and swap them for different ones if necessary. To remove an action, click the X on its right side.
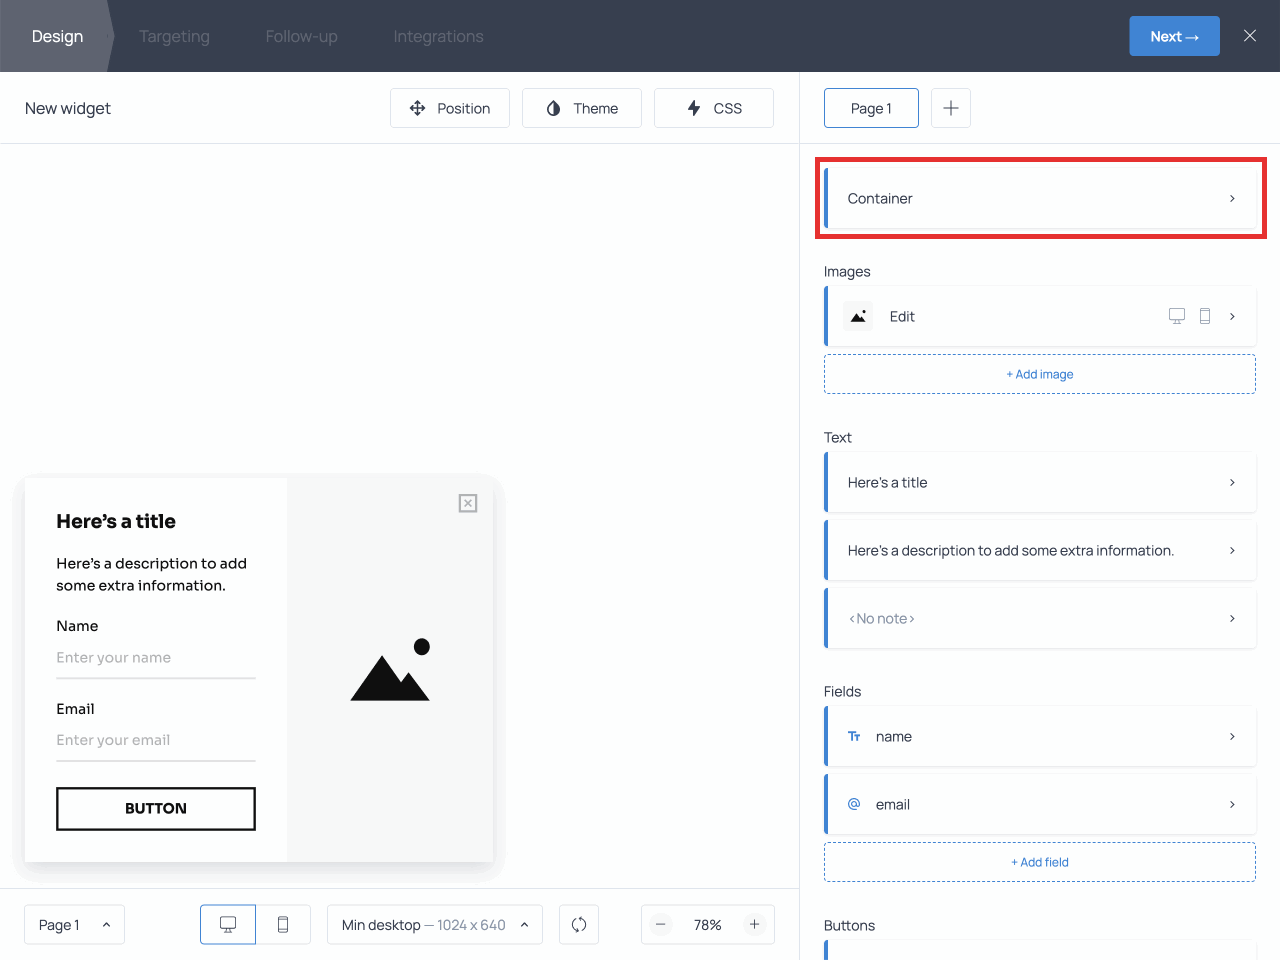
Add an action to the background
To add an action to the widget’s background, open the Container section in the Design tab:
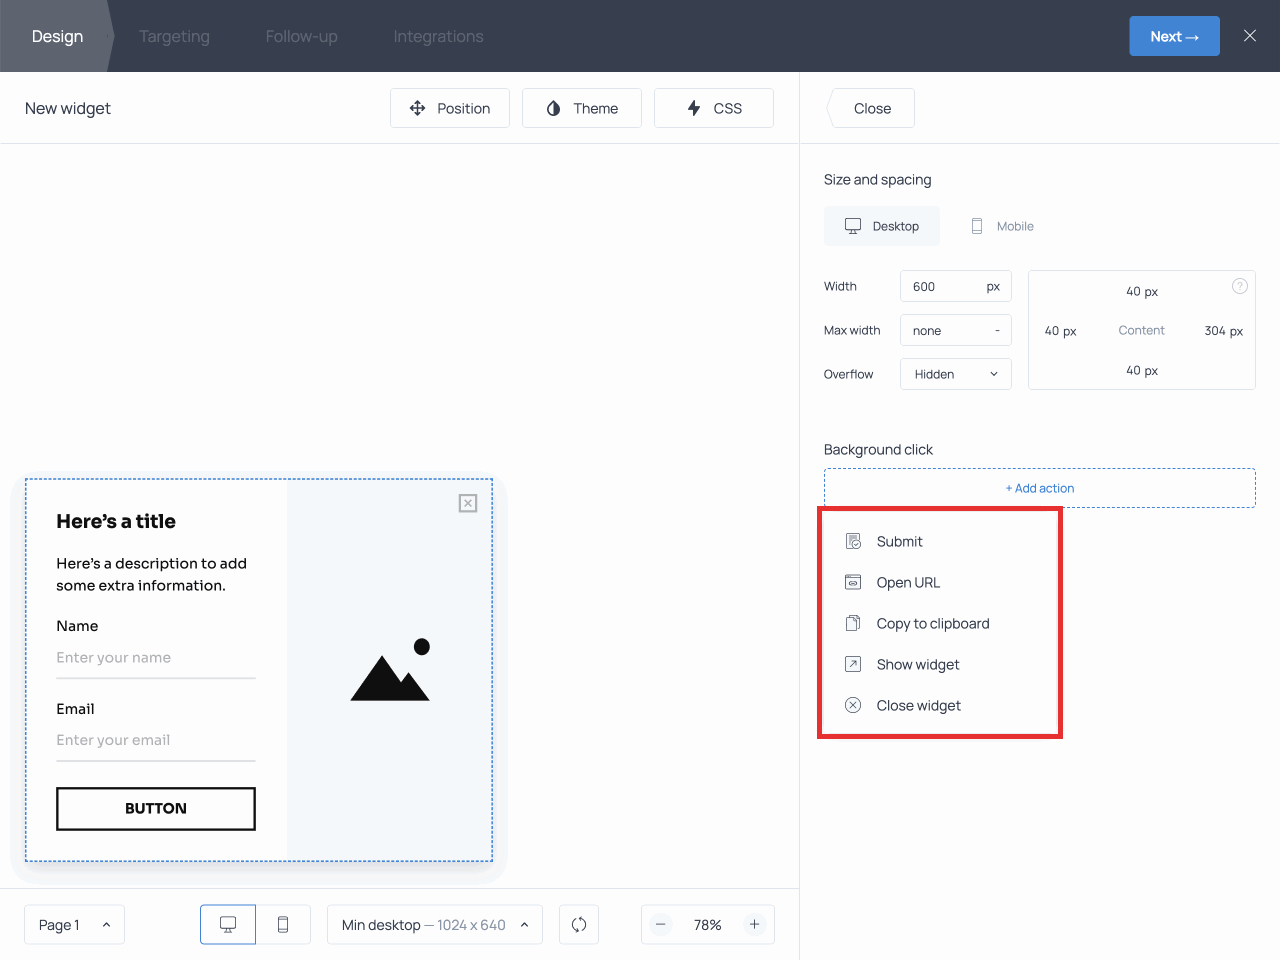
Next, find the ‘Background click’ subsection. By default, there are no actions assigned to the background click. To add a new one, click +Add action and choose an option from the dropdown list.
In the following section, you’ll find a detailed description of each action.
2. Action types
There are five types of actions available for all Getsitecontrol accounts:
And there are two additional actions specific to the Getsitecontrol Shopify app:
Let’s take a closer look at each one of them.
Submit
The Submit action saves the data entered by the visitor and allows them to move on to the next page (if there is one).
Therefore, there has to be a button with a Submit action on the widget page when:
- there is a field (of any type) on the widget page and/or
- there is a next page after the current one.
In other words, you need a Submit action for forms of any kind.
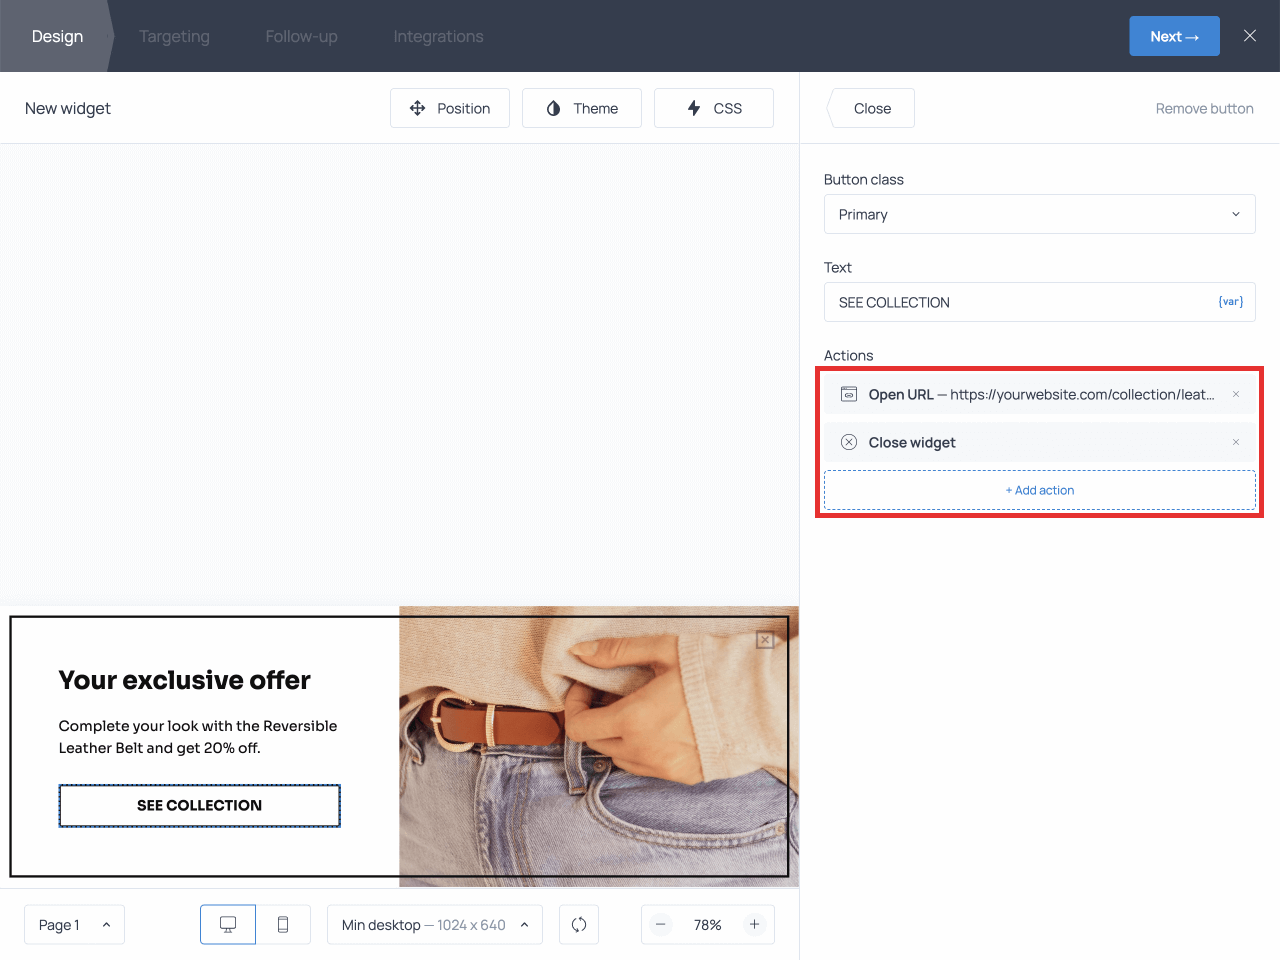
Open URL
The Open URL action opens a page of your choice.
You can use it to redirect visitors to a page you’d like them to check out on your website, for example, a contact page or a sales page.
When setting it up, add the URL of the target page to the corresponding section. Flag the box to have the page open in a new tab, or unflag it to open the page in the current tab.
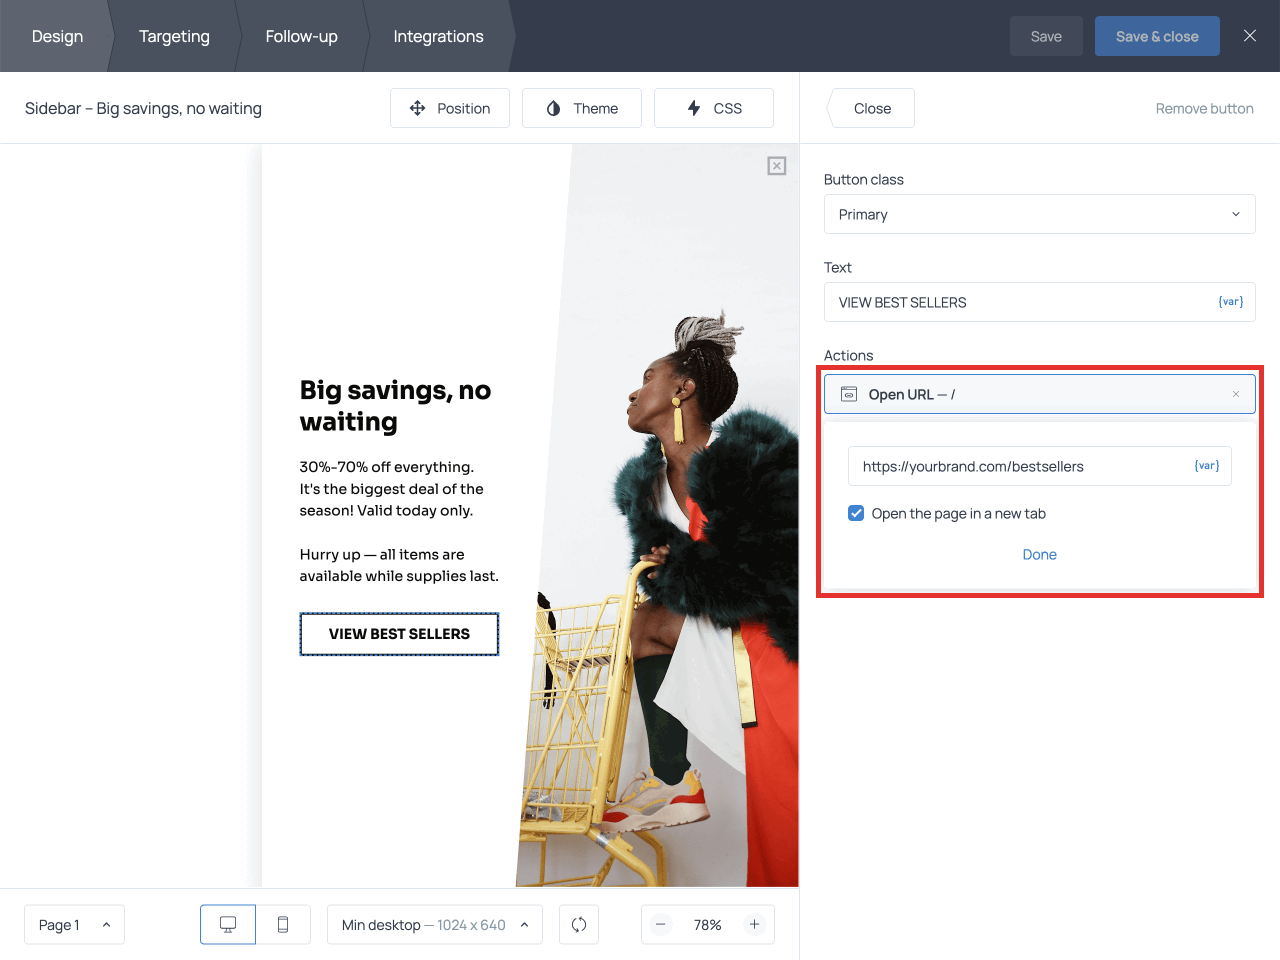
Click Done to save the changes.
❗Make sure to add the entire URL of the page, including https://
If you want to redirect visitors to a section of a page, it will be enough to add it to the Open URL settings in this form: #contact-us
If the section is on the current page, there is no need to enter the whole URL:
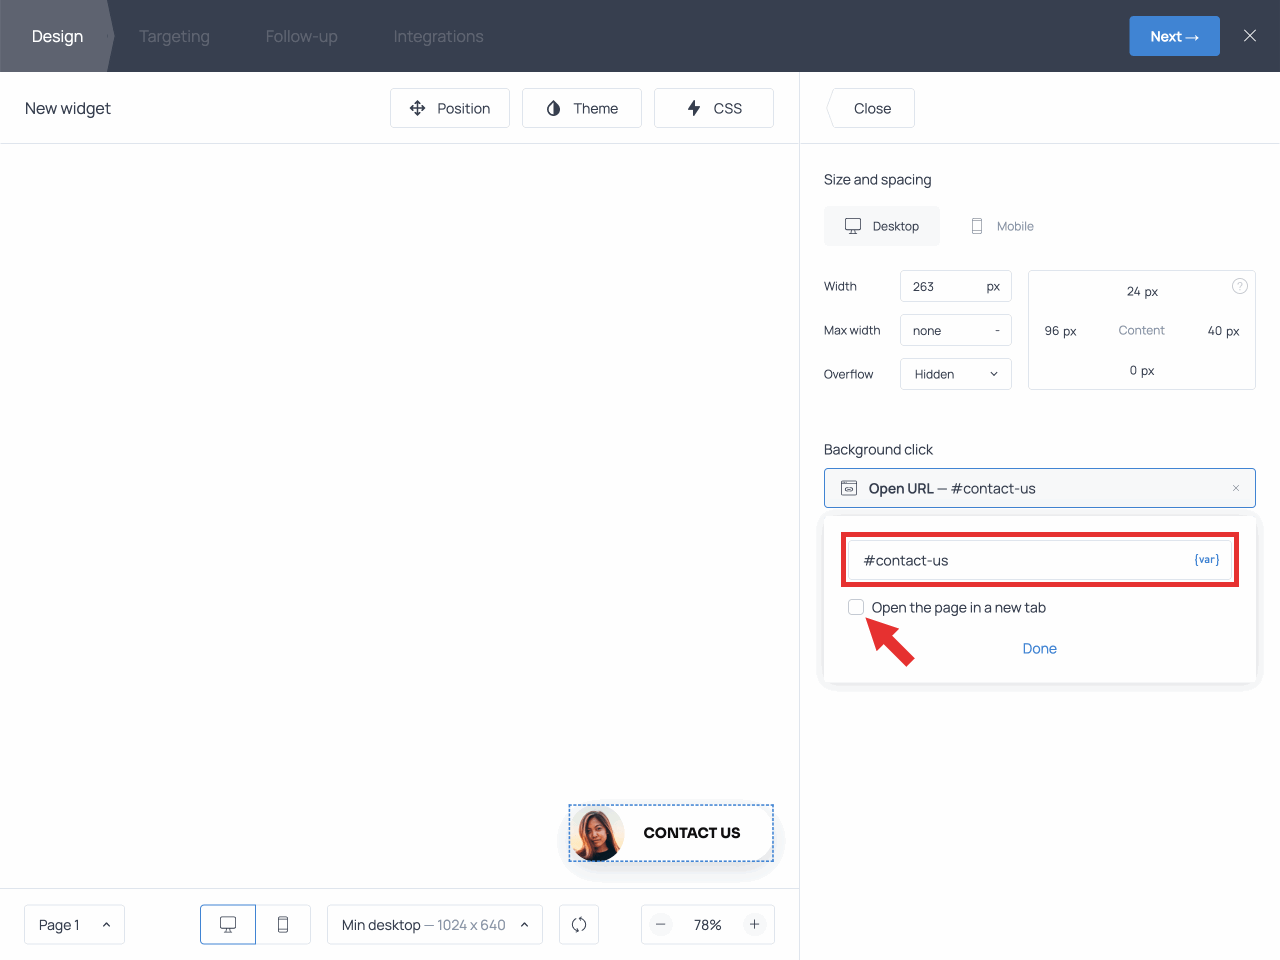
Otherwise, you’ll need to add the full URL to the Open URL settings, e.g.
https://getsitecontrol.com#contact-us
❗The ‘Open the page in a new tab’ checkbox needs to be unchecked for this method to work.
Copy to clipboard
The Copy to clipboard action copies a piece of text of your choosing (typically a coupon code) to the visitor’s clipboard.
A button with a Copy to clipboard action makes it easy for your customers to use coupons in your store because they don’t need to manually copy the code — all they need to do is click the button.
To set it up, enter the discount code in the first field and a confirmation message in the second one, like in the example below:
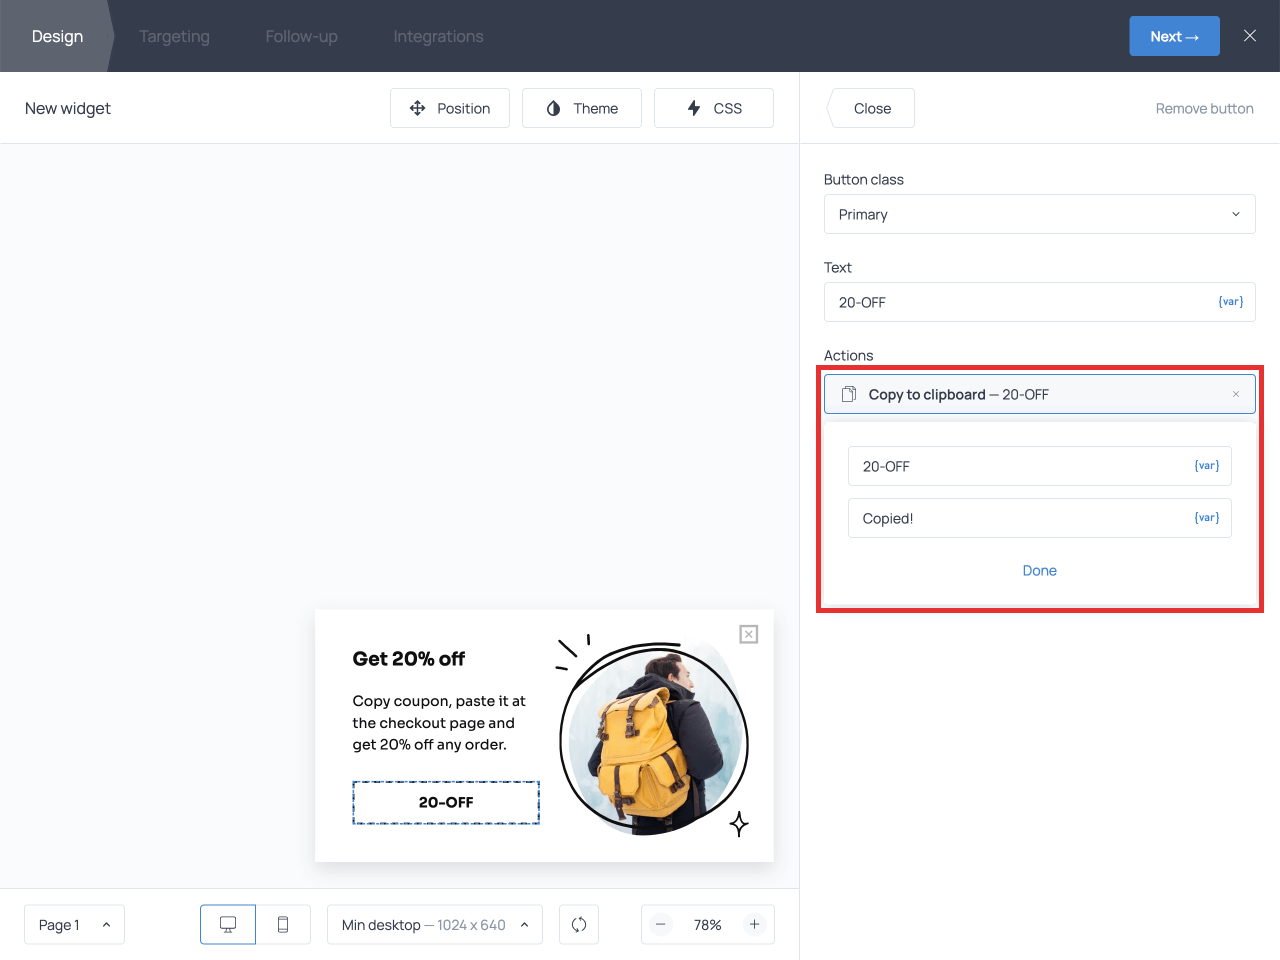
❗Please note that you’ll need to create and activate the discount code on your ecommerce website before sharing it with customers.
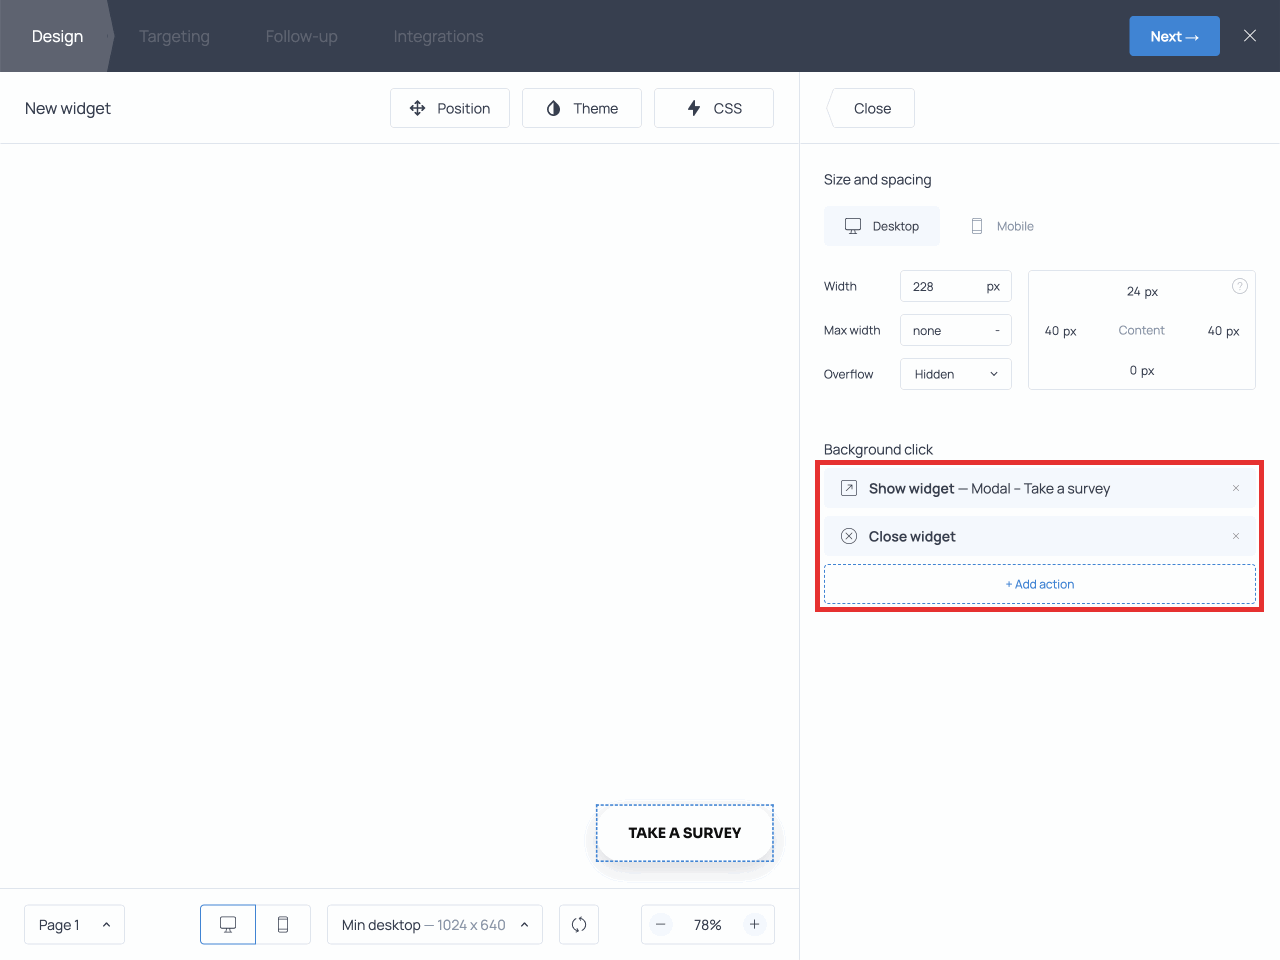
Show widget
The Show widget action comes in handy when you want to show a widget upon a click on another one.
For example, you may want to place a floating ‘contact us’ button on your website that will open a pop-up contact form. This way, the ‘contact us’ button will always be in sight, but it won’t interrupt user experience on your website.
When setting up this action, choose the widget that will appear upon click and hit Done to save the changes.
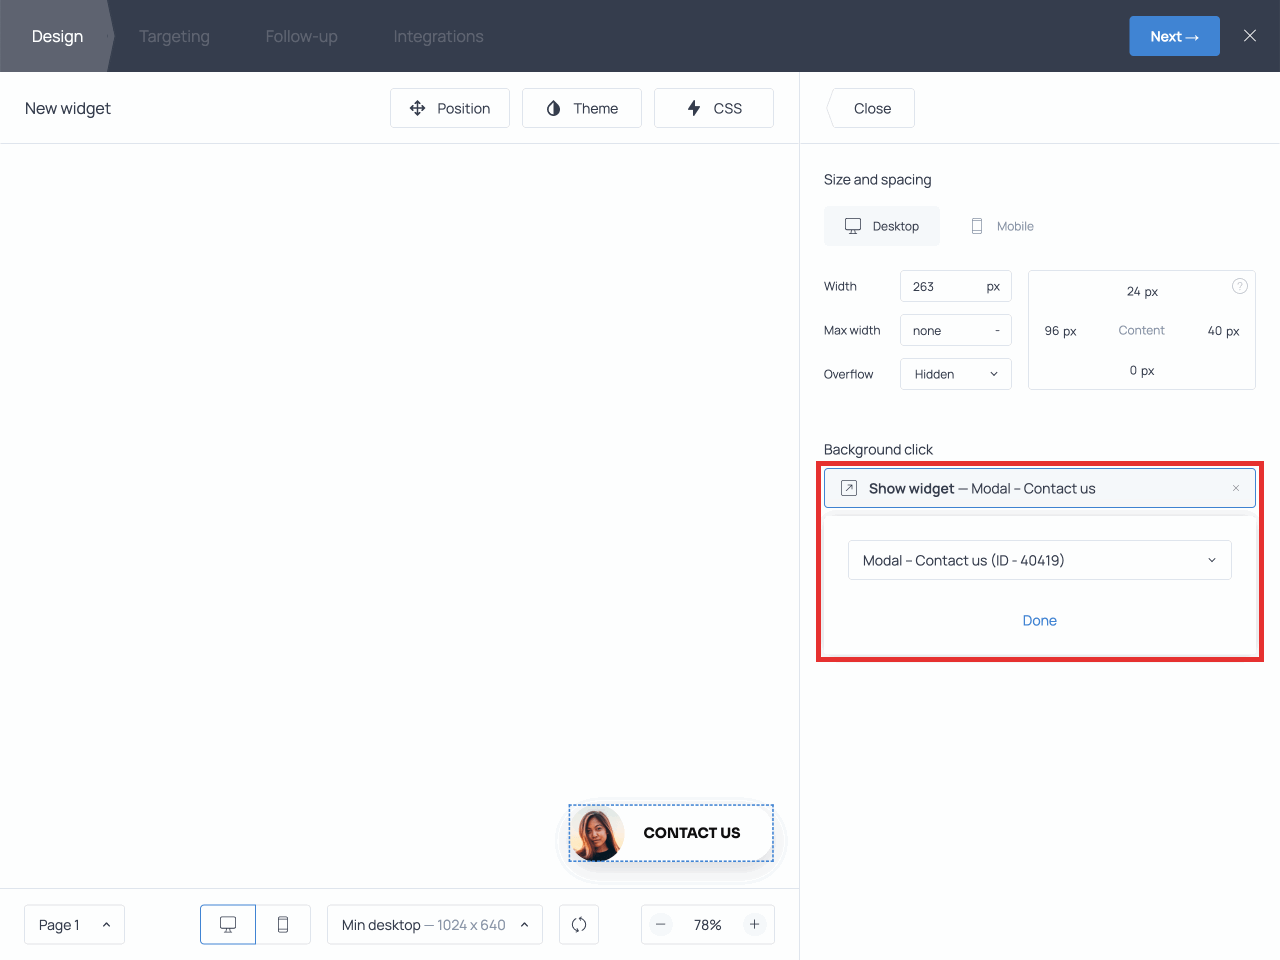
❗When selecting targeting triggers for the widget that is meant to appear upon click, make sure to remove all ‘Start displaying widget’ triggers from the settings. Otherwise, it’ll show up automatically, too.
For more detailed instructions on how to set this up, check out our guide on launchers.
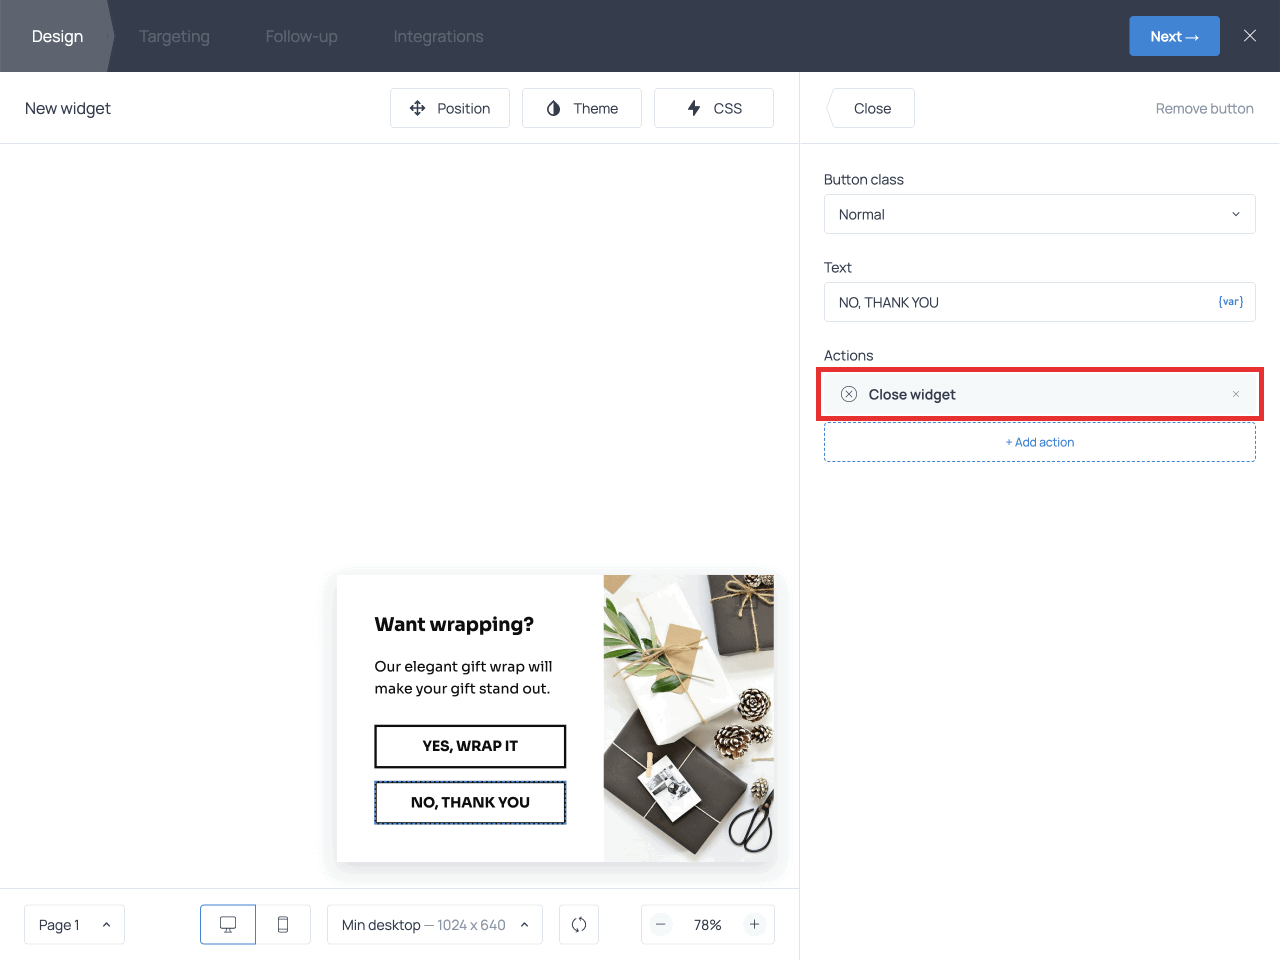
Close widget
The Close widget action simply closes the widget with a click, thus allowing your visitors to easily dismiss it.
You can place it on notification messages or on the widget’s ‘Thank you’ page, for example.
That concludes the list of actions available to all Getsitecontrol accounts. Let’s move on to the Shopify-specific actions.
Add to cart (Shopify)
The Add to cart action is available to Getsitecontrol’s Shopify app users only.
This action allows your customers to add a suggested product to the shopping cart in one click. It’s a great tool for upselling and cross-selling campaigns. Here’s how to set one up.
After selecting Add to cart from the Actions menu, you’ll see two options: Add product variant from current page and Add custom product variants.
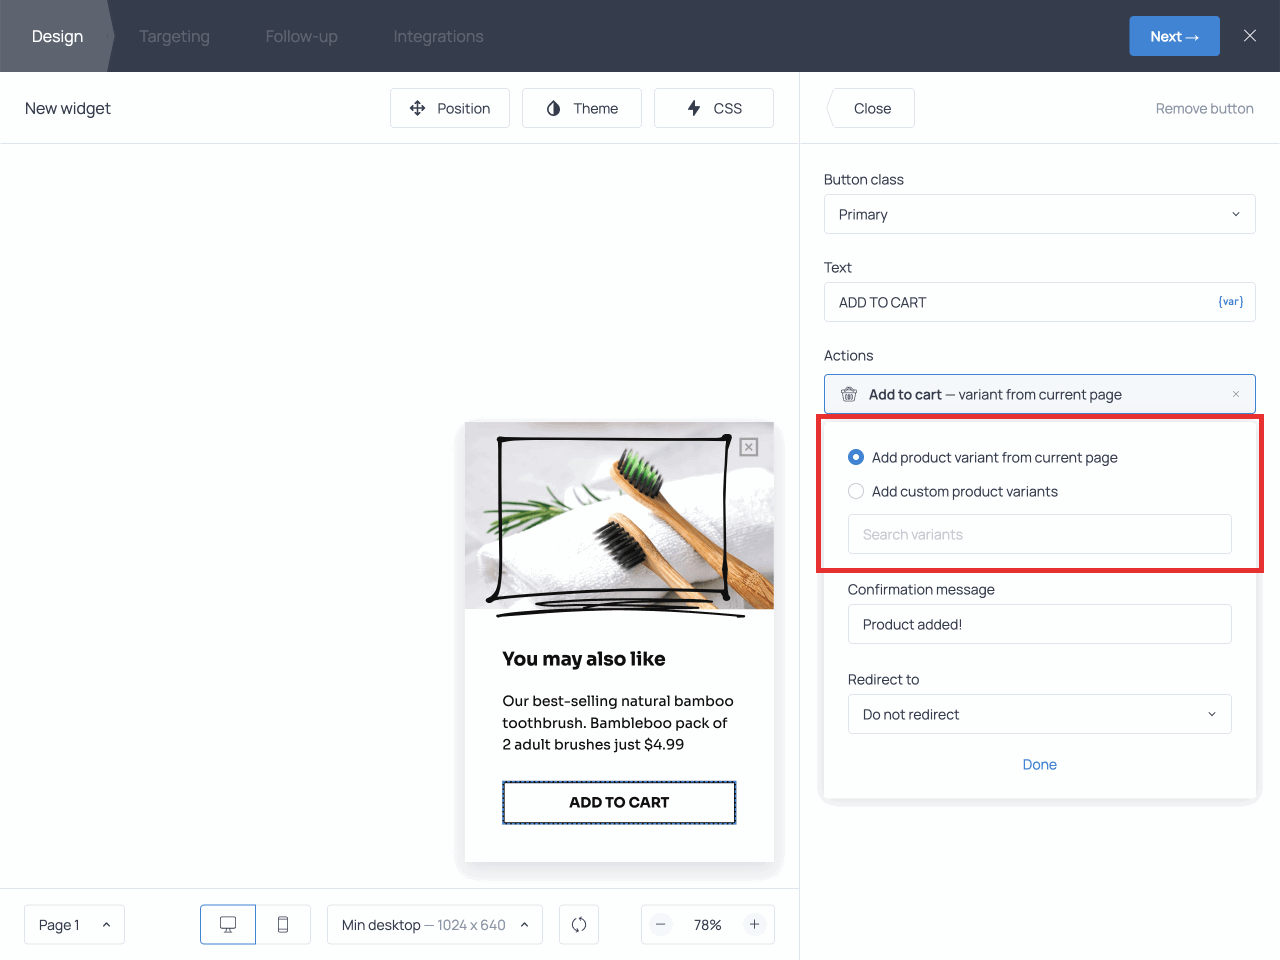
The Add product variant from current page option will add the product displayed on the page the customer is viewing at the moment.
The Add custom product variant option allows you to choose any product(s) in your store.
After selecting the product type from the dropdown list, choose whether you want to redirect your customer to the cart or checkout.
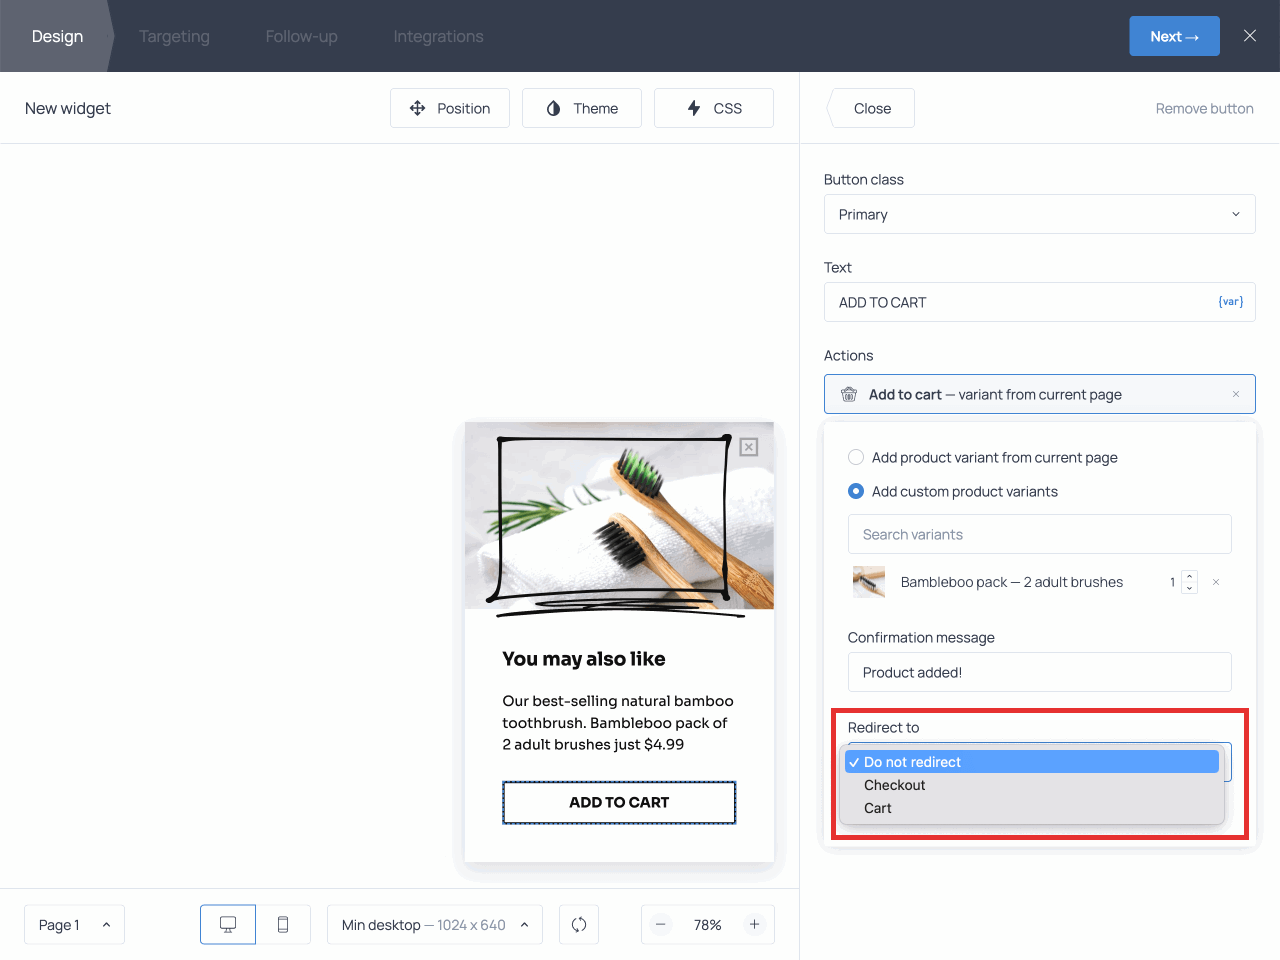
If you want them to stay on the current page, select Do not redirect.
Apply discount (Shopify)
The Apply discount action applies a discount code of your choice to your customer’s cart with a button click.
❗Please note that before you can apply the discount via a Getsitecontrol popup, you need to create the discount in your Shopify account. Then, you can add it to the corresponding field in the Apply discount settings.
You can either paste the code from the ‘Discounts’ section of your Shopify dashboard or search for it right from the Getsitecontrol Actions panel.
Finally, you’ll decide where you want to redirect your customers: to the cart, to the checkout pages, or not to redirect at all.
3. Combining actions
You can add more than one action to the same button or to the widget background. Below are some examples of combinations for you to check out.
Save the data from the form and close it
If you want to close the form right after your site visitor fills it out, use the following combination of actions: Submit + Close widget.
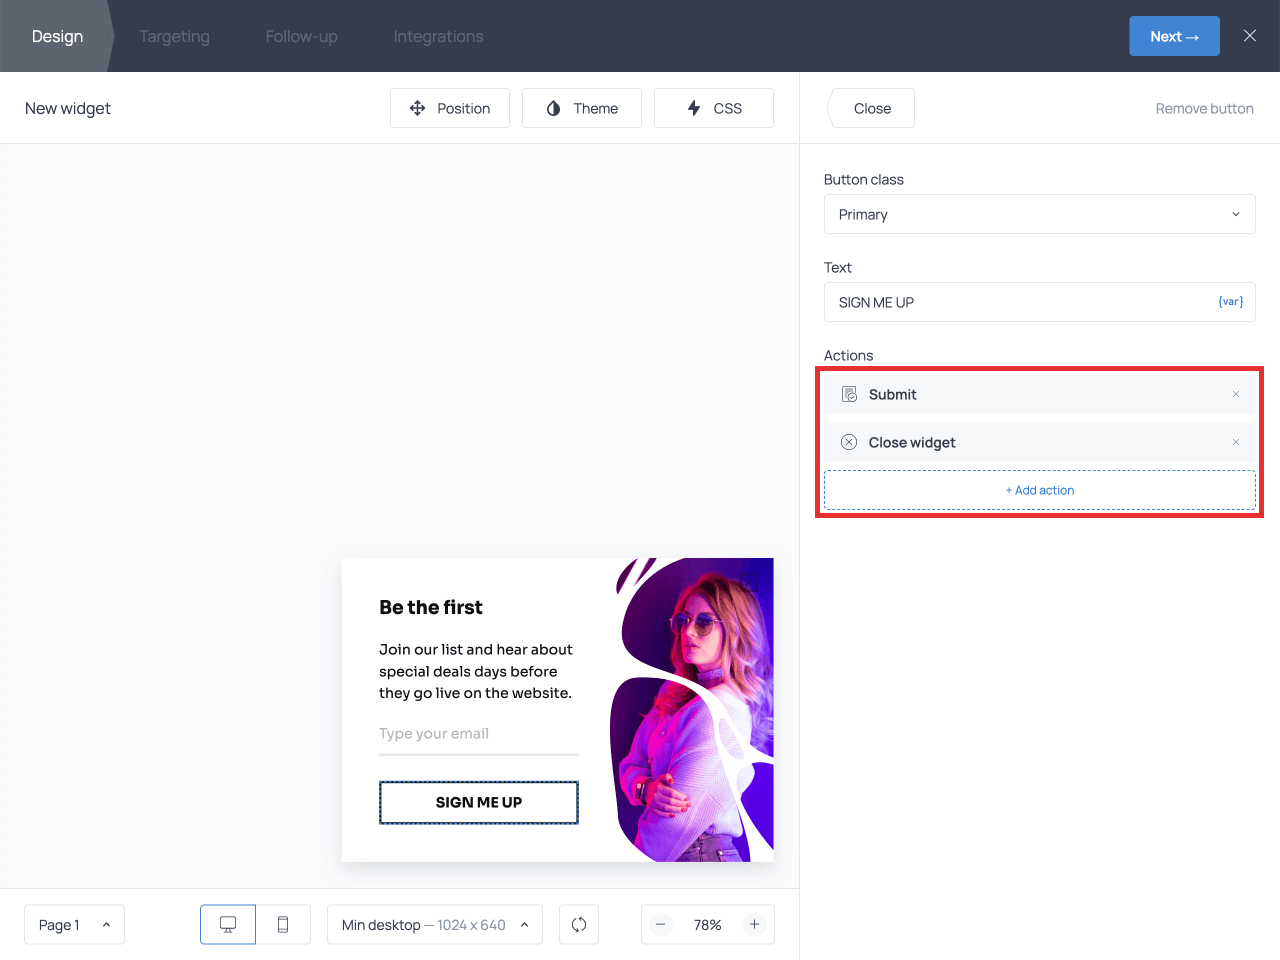
It’s perfect for forms of any kind: opt-in, feedback, survey, etc.
Open a link and close the widget
If you want to take your visitors to another webpage with a button click and close the widget simultaneously, combine an Open URL action and a Close widget action.
This combination is suitable for popups featuring promos or new-ins, when you want your audience to check out a particular page on your website.
Save the data, close the form, and open a link
If you want to combine the two scenarios described above — save the data from the form, close the widget, and redirect the visitor to another webpage — add the following three actions to your button: Submit + Open URL + Close widget.

Show another widget and close the first one
If you want to trigger widget B with a button click on widget A, you’ll need to add two actions to the button on A: Show widget + Close widget. This will simultaneously open B and close A.
Some use case examples for this setup are:
- To trigger a contact form with a click on a ‘Contact us’ button
- To open a survey form with a button click on another widget
- To open any pop-up form via a floating button.
Add product to cart, apply discount, and close widget
If you’re a Shopify user, you can combine the platform-specific actions as well.
Let’s say you want to add a specific product to the customer’s cart and apply a discount for them at the same time. You’ll need to combine Add to cart + Apply discount + Close widget.
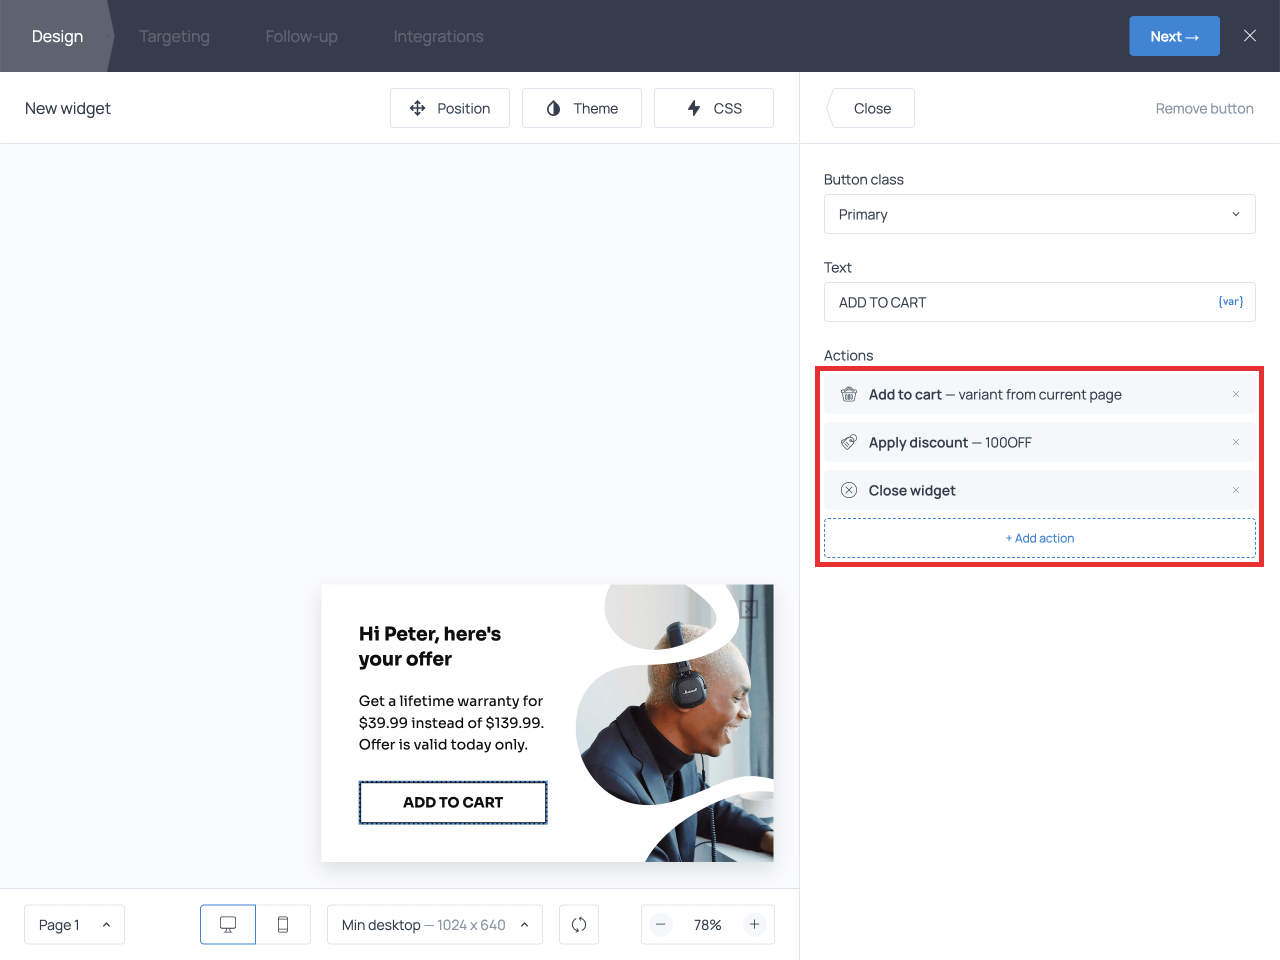
Make sure to specify the necessary product in the Add to cart action settings and to add the discount code to the Apply discount settings.
Lastly, choose if you want to redirect your customers to cart/checkout pages or not. If you do want to redirect them, choosing this option for one of the actions will be enough.
Once you finish setting up actions, don’t forget to save the changes using the Save & close button.
That’s it! Now you know how to effectively use actions to create a better experience for your site visitors.